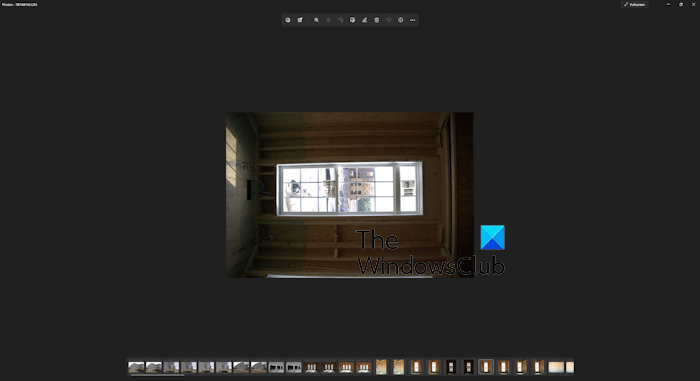
Are your photos displayed in landscape mode automatically on Windows 11/10? Some users have complained that all images on their computers are opened in landscape mode in Microsoft Photos. This issue is mostly reported with RAW camera images. If the same is happening to you, this post will interest you. Here, we will show you how to stop portrait images from being shown in landscape mode on your PC.

Portrait photos displayed in Landscape on Windows 11
If your photos are automatically rotated and displayed in landscape mode on your PC, here are the fixes to resolve the error:
- Update your graphics driver
- Download the required codec.
- Disable AutoRotation in Registry.
- Repair or reset Microsoft Photos.
- Use an alternative image viewer.
1] Update your graphics driver

Make sure that your graphics drivers are up-to-date. It could be a faulty or outdated graphics driver triggering the problem. So, you can update your graphics driver to its latest version and check if the issue is fixed.
Read: How to check the installed codecs?
2] Download the required codec
If you are trying to view RAW images in Microsoft Photos and the app is automatically rotating your images, download the necessary RAW image codec and install it on your system to display images correctly. For example, if you are trying to view ARW images, download the Sony RAW Codec from a trusted online source and then install it. See if this works for you.
Read: Popular free Media Codec Packs for Windows 11
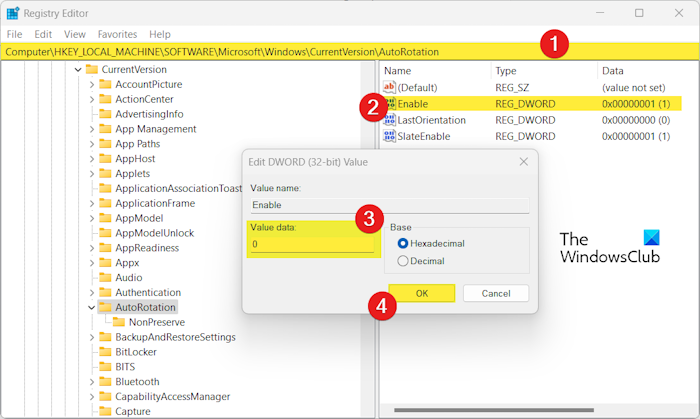
3] Disable AutoRotation in Registry

You can try disabling the AutoRotation feature on your PC using Registry Editor. This will stop the Photos app from automatically rotating images and showing pictures in landscape mode.
But, before doing that, make sure to back up your registry to be on the safer side.
Now, here are the steps to disable AutoRotation via Registry Editor:
First, evoke the Run command box using Win+R and enter regedit in the Open box to launch the Registry Editor app.
Now, navigate to the following address:
HKEY_LOCAL_MACHINE\SOFTWARE\Microsoft\Windows\CurrentVersion\AutoRotation
After that, in the right-side pane, double-click on the Enable DWORD.
Next, in the Value data field, enter 0 and then press the OK button to save changes.
Once done, exit the Registry Editor app and reboot your computer to let the change take effect.
Open the Photos app and check if the issue is resolved now.
Read: Photos App Slideshow option missing in Windows.
4] Repair or reset Microsoft Photos

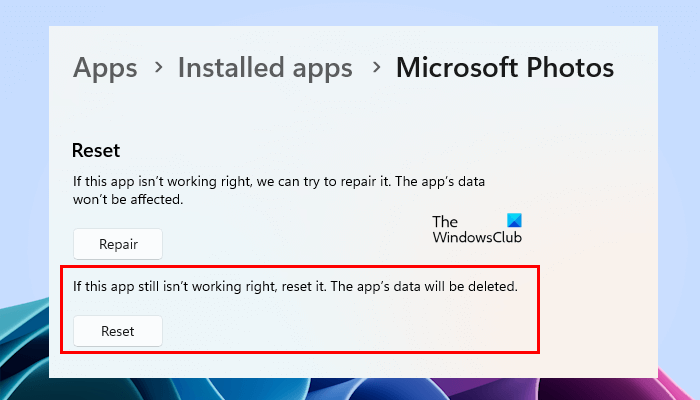
The next thing you can do is repair the Microsoft Photos app to fix any corruption associated with the app. In case that doesn’t work, you can reset Photos to its original default and see if it helps. Here’s how to do that:
- First, open the Settings app using Win+I.
- Now, go to the Apps > Installed apps section.
- Next, locate the Microsoft Photos app and click on the three-dot menu button.
- After that, select Advanced options and scroll down to the Reset section.
- Then, click on the Repair button and follow the instructions to complete the process.
- If repairing doesn’t work, click on the Reset button to reset Photos and see if the issue is fixed.
See: Printer keeps printing Landscape instead of Portrait.
5] Use an alternative image viewer
If the above solutions don’t help, you can use an alternative to Microsoft Photos. There are a lot of great free photo viewer apps and software that allow you to view your images correctly. There are good image viewers like One Photo Viewer, XnView, FastStone Image Viewer, etc.
How do I rotate a picture in Windows 11?
To rotate a picture on Windows 11, you can open it in the Photos app. After that, click on the Rotate option from the top toolbar or press the CTRL+R hotkey to rotate the picture clockwise. You can also rotate an image in File Explorer. Press Win+E to open the File Explorer and navigate to the pictures folder. Next, select the picture and then click on the Rotate left or Rotate right option to rotate the picture.
How do I change Windows from portrait to landscape?
You can change your display from portrait to landscape using Windows Settings. For that, launch the Settings app using Win+I and go to the System > Display section. Now, click on the drop-down menu button next to the Display orientation option and set it to Landscape.
Leave a Reply