One of the issues that many Windows users are reporting is that their PC’s power plan keeps changing automatically, especially after a reboot. This is a common issue experienced by many and especially reported by users who recently upgraded their motherboard, or CPU or updated their Windows 11/10 Operating System.
Windows 11/10 Power Plan keeps changing
Because of this issue, Windows 11/10 cannot save the power plan resulting in unusual sleep mode, brightness issues, etc. In most cases, it is changed to high performance. As a regular Windows 10 PC user, this issue can be annoying, especially if you prefer particular power settings.
So, if you are also facing this issue, please go through the below fixes and I am sure one of them will work for you.
- Log in with your administrator account
- Reset your Power plan
- Check preinstalled Power manager software
- Update your Graphics driver
- Run the power troubleshooter and reboot
- Clean boot your computer
- Scan your system for viruses
- Disable BrightnessReset
- Turn off Game mode
- Use PowerCFG tool for troubleshooting Power plans.
Let us look at these fixes in detail.
1] Log in with your Administrator account
Maybe you are making changes without Administrator privileges and failing every time. Before you deep dive into the below fixes try to log in with the administrator account and set up the power plan settings. Then, log in with the normal Windows username and see if the issue persists.
2] Reset your Power plan
To reset your Power plan, follow the below steps,
Open Control Panel > All Control Panel Items > Power Options > Edit Plan Settings and restore the default power plan settings by clicking on the Restore plan defaults button for this plan. Do this for all your Power Plans.
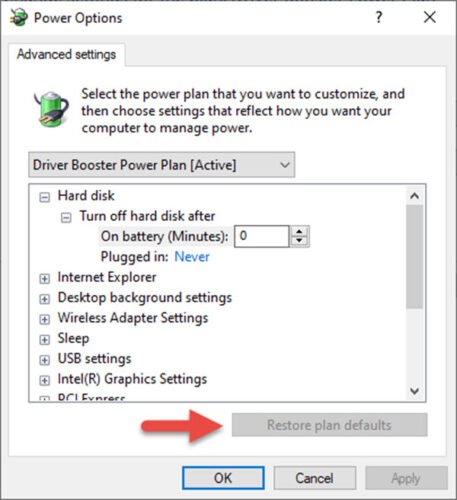
Alternatively, you can also restore the default plan settings to default by using Command prompt using below,
Open Command Prompt as Admin and execute the following command:
powercfg –restoredefaultschemes
Exit command prompt.
Now create a new power plan.
Creating a new plan is easy.
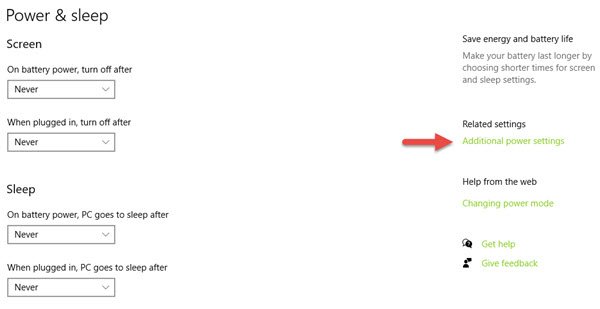
Open Settings and navigate to System > Power & Sleep > select Additional power settings.
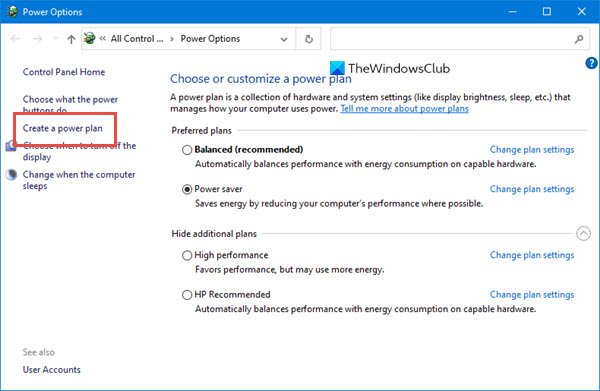
Click on Create Power Plan option at upper left.
Now follow the procedure to create a new power plan.
3] Check preinstalled Power manager software
Check if your OEM has installed a Power manager software, Dell, HP, etc, often do that. That could be causing this to happen.
4] Update your device driver
Update your Graphics Drivers and see.
5] Run the Power troubleshooter and reboot
Run the Power Troubleshooter. You may access it via the Windows Troubleshooters Settings Page.
6] Clean Boot your computer
If the issue is still not fixed then perform a clean boot of your PC. Here is how you can clean boot. At times conflicting apps and system files may also be the issue behind Power Plan change, so clean boot helps you analyze and uninstall the conflicting apps. Here is how you can do a clean boot of your PC.
- Enter msconfig in the search bar and press Enter. Open “System Configuration”
- Click on the Services tab, and check the “Hide all” Microsoft services check box and click Disable all
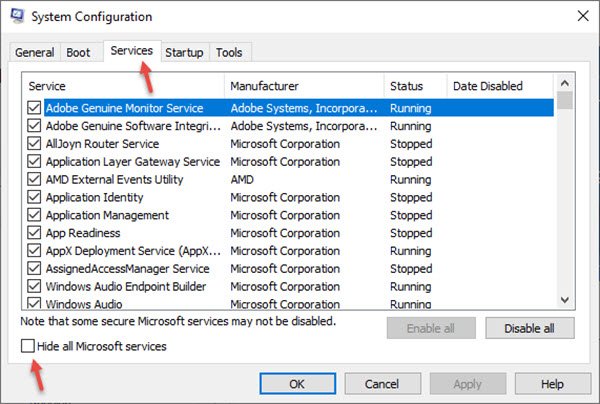
- Now open Task Manager, and click on “Start up”
- Select each Start up app and click “Disable”
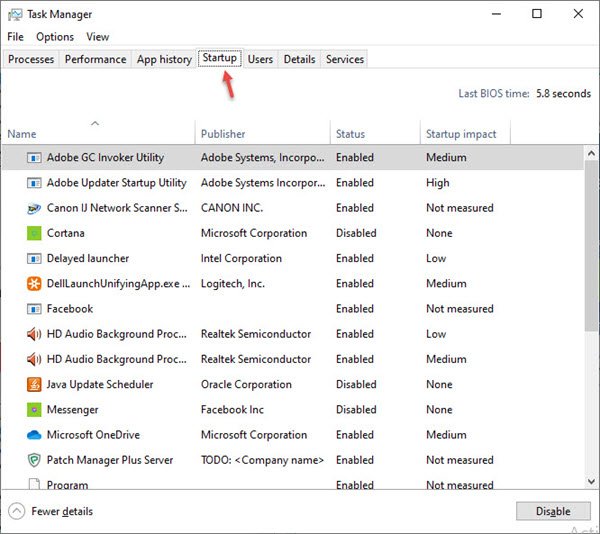
- Close the Task Manager and restart your PC.
Once in Clean Boot State, you will have to manually troubleshoot to identify the offender.
7] Scan your system for viruses
Many times it is the viruses and malware programs that are behind this issue and the power plan keeps changing to balanced. Hence, if your issue is still resolved, then scan your complete system for malware.
You can also use Windows 10 inbuilt Windows Defender or a third-party antivirus of your choice.
Read: How to troubleshoot Power Plans.
8] Disable BrightnessReset
Open Task Scheduler using Start Search. In the left pane, you will see Task Scheduler Library. If you can see the Display option through the below steps then perform BrightnessReset.
Navigate to Microsoft > Windows > Display > Brightness.
In the right pane, if you see a scheduled task called BrightnessReset, double-click on it > Properties > Triggers tab > Edit.
Now disable it and see if it works for you. If it does not help, you may re-enable it.
9] Turn off Game mode
This fix is only for Avast antivirus users.
If you are using Avast antivirus, then you need to disable game mode. To do this:-
Open Avast > Click on Performance > Select Game Mode >Toggle off Game Mode to disable it.
10] Use PowerCFG tool to Troubleshoot Power plans
If you need to troubleshoot Power Plans further, use the built-in PowerCFG command-line tool.
Let us know which method worked for you or if you have any other fixes for this issue.
Leave a Reply