In the past, we have shared many articles based on context menu tweaks. Today, in this article, we will share with you yet another tweak for the Desktop context menu. Earlier, you might have tried different ways to add new options to the Desktop context menu – by editing the Registry or using some freeware like Right-Click Extender, Context Menu Editor or Ultimate Windows Customizer. Today, we will give you a way to add new entries using the native Windows PowerShell.

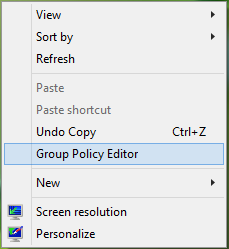
For example, if you need to access Local Group Policy Editor frequently; you can it to the Desktop context menu. The benefit of doing so is that you don’t need to run gpedit.msc command. In the same way, you can add any program to the context menu under the hood of the Desktop context menu, instead of pinning it to Start Screen or Taskbar. Now here is the how-to part:
Use PowerShell to add item to Desktop Context Menu
1. First of all download the Add item to context script from the Technet Gallery. It will download the script in form of a compressed ZIP archive – so unzip it. After unzipping, you’ll get the file named AddItemToContext.psm1 which you have to place at Desktop for convenient access; however, you can place it anywhere – but remember its location.
2. Open an administrative Windows PowerShell window and execute the following command by substituting the location of AddItemToContext.psm1 :
Import-Module filepath\AddItemToContext.psm1

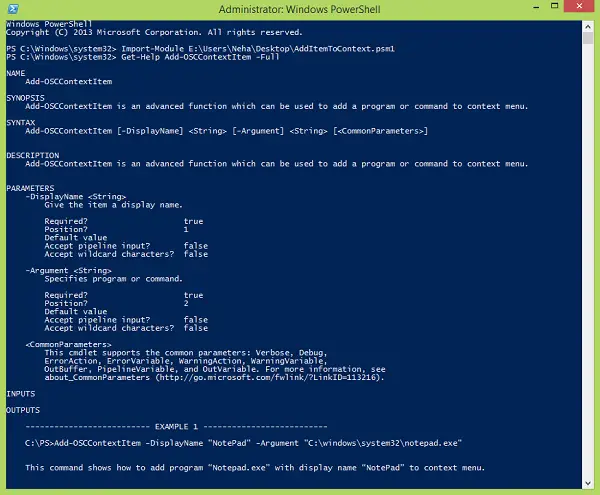
3. Now run the following command to get the help about adding new things to Desktop context menu which is specified by Add-OSCContextItem operator for this script:
Get-Help Add-OSCContextItem -Full
4. Now in order to add a new item to the Desktop context menu, for instance, say, Local Group Policy Editor, you can use the following command:
Add-OSCContextItem -DisplayName "Group Policy Editor" -Argument "C:\Windows\system32\gpedit.msc"
You can substitute the location of any program you like to add to the context menu in place of the argument in the inverted commas, in the above command. When PowerShell has done with adding a new option, it will notify you.

5. Lastly, if you want to remove the added entry from the Desktop context menu, you need to use Remove-OSCContextItem operator of the script. So run this command:
Remove-OSCContextItem -DisplayName "Group Policy Editor"
Again replace the part in the inverted commas for the entry you would like to remove; which you’ve added in step 4. PowerShell would ask you to remove the child items of entry it created, thus type Y and hit Enter. When the entry is removed, you’ll be notified.
Hence, in this way you can add new things to the Desktop context menu using Windows PowerShell.
Leave a Reply