If you want to delete or create a scheduled task on Windows 11/10 using Windows PowerShell, this tutorial will help you do that. You do not have to open Task Scheduler to create the scheduled task. However, you have to execute some commands to get the job done.
Task Scheduler is one of the best utilities of Windows 11/10, allows you to create tasks and perform them at a scheduled time. From opening an app like Notepad to executing PowerShell scripts, you can do everything with Task Scheduler’s help.
Create a scheduled task with PowerShell
To use PowerShell to create a scheduled task on Windows 10, follow these steps-
- Search for powershell in the Taskbar search box.
- Click on Run as administrator.
- Click the Yes button.
- Enter the $action variable to store the action.
- Enter the $trigger variable to store the timings of the scheduled task.
- Enter this command to create the scheduled task.
Let’s check out the detailed version of these steps.
At first, you have to open Windows PowerShell with administrator privileges. For that, search for “powershell” in the Taskbar search box, and click on the respective Run as administrator button. If the UAC prompt appears, click the Yes button. Once the PowerShell screen is visible, enter the following command-
$action = New-ScheduledTaskAction -Execute 'app-path'
Do not forget to replace the app-path with the original path of the app you want to run.
For example, if you want to open Notepad, enter notepad.exe. If you want to open Google Chrome on a 64-bit Windows 10 computer, enter the following path-
C:\Program Files (x86)\Google\Chrome\Application\chrome.exe
The entire command will look like this-
$action = New-ScheduledTaskAction -Execute ' C:\Program Files (x86)\Google\Chrome\Application\chrome.exe'
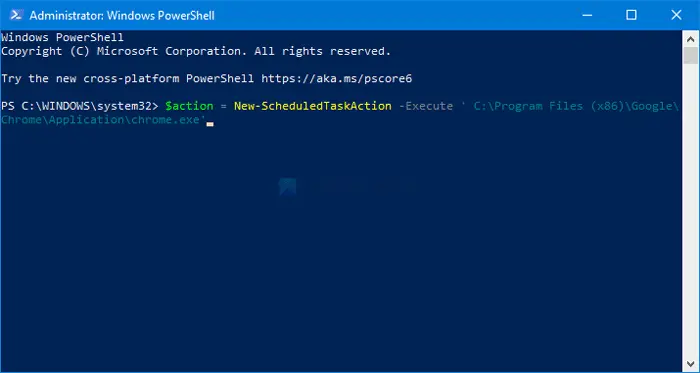
In case you want to execute a PowerShell script, you have to use -argument and specify the script. In that case, the command will look like this-
New-ScheduledTaskAction -Execute 'powershell.exe' -argument script-path
Next, you have to set the time when you want to execute the task. Like Task Scheduler, you can choose any time according to your requirements. The basic command looks like this-
$trigger = New-ScheduledTaskTrigger -Once -At 06:30PM
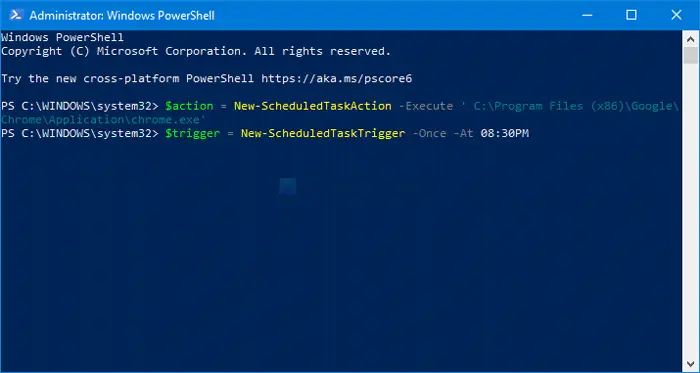
As per this command, the task will run once at 06:30 PM or 18:30 on the same day. It is possible to use various settings like -Daily, -Weekly, -Monthly, etc. On the other hand, you can choose the time in 12 or 24-hour format. If you choose a 12-hour format, you must define the AM/PM.
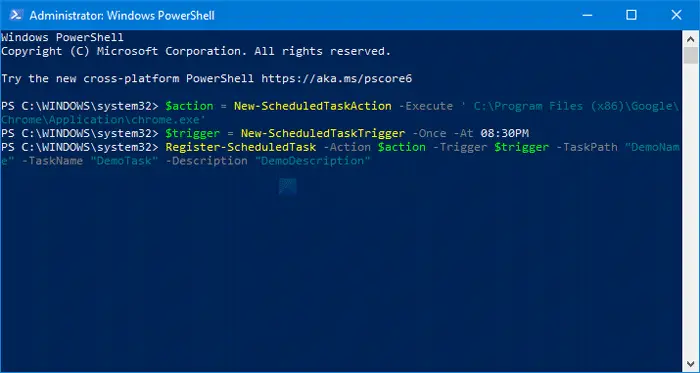
After that, you have to register for the task. For that, enter the following command-
Register-ScheduledTask -Action $action -Trigger $trigger -TaskPath "DemoName" -TaskName "DemoTask" -Description "DemoDescription"
Do not forget to change the DemoName, DemoTask, and DemoDescription according to your preference.
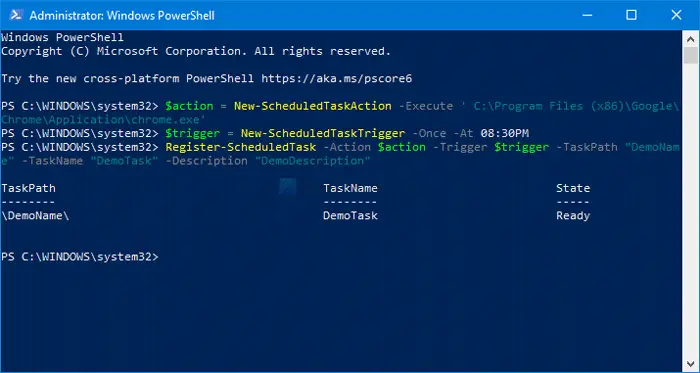
Once done, you will be greeted with the following screen-
Delete a scheduled task with PowerShell
To use PowerShell to delete scheduled tasks, follow these steps-
- Search for powershell in the Taskbar search box.
- Click on Run as administrator.
- Click the Yes button.
- Enter the following command to select the task.
- Enter the Unregister command to delete the task.
To learn more about these steps, keep reading.
At first, open an elevated Windows PowerShell window and enter the following command-
Get-ScheduledTask -TaskName "DemoTask"
Don’t forget to replace the DemoTask with the original task name. after that, enter this command to delete the task-
Unregister-ScheduledTask -TaskName "DemoTask" -Confirm:$false
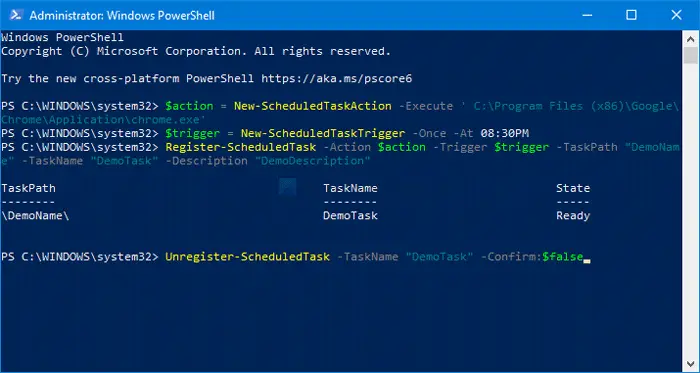
To confirm the removal, you can enter the first command. If it shows an error message, the task is removed.
This post offers more ways to delete a Scheduled Task.
That’s all! I hope it helps.
Leave a Reply