When it comes to an encrypted connection over the internet, VPNs provide excellent services to users. Both paid and free VPN services are available to secure your internet connection. VPN has different protocols. PPTP and L2TP are among the most commonly used VPN protocols. Some users experienced issues while connecting to the PPTP or L2TP VPN protocol. This article lists some solutions that will help you if PPTP/L2TP VPN is not connecting in your Windows 11 computer.

PPTP/L2TP VPN is not connecting in Windows 11
If PPTP/L2TP VPN is not connecting in Windows 11, use the solutions provided below. Before you proceed, install the latest Windows Update. This simple fix resolved the problem of some users.
- Connect your system via an ethernet cable
- Uninstall the Windows Update
- Stop the Dell Optimizer service (if applicable)
- Modify Windows Registry
Below, we have explained all these fixes in detail.
1] Connect your system via an ethernet cable
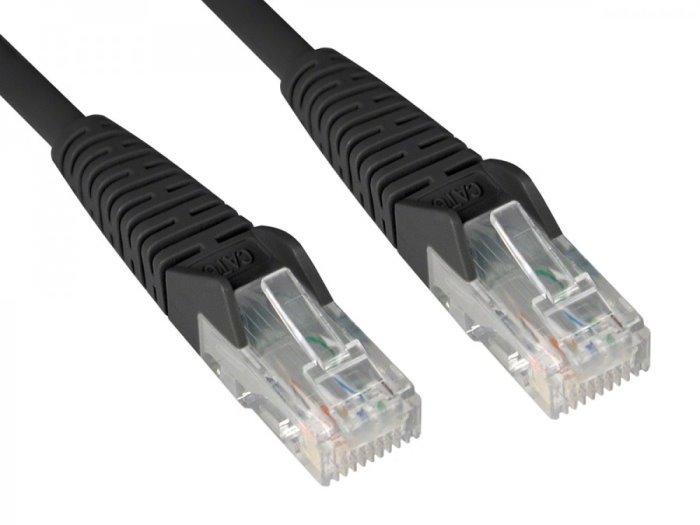
This is the easiest fix. If you use your computer near your router and are connected wirelessly, we suggest you connect your computer to the router via an ethernet cable. Some users were able to fix the issue with this simple fix. If this trick does not help, use the other solutions provided below.
2] Uninstall Windows Update
This solution is especially for insiders. However, users with a stable build of Windows OS can also try this. According to the reports, the Windows Update with the KB5009566 number was causing the problem. After uninstalling that update, the issue was fixed. If you have recently installed a Windows Update with this KB number, uninstall it.
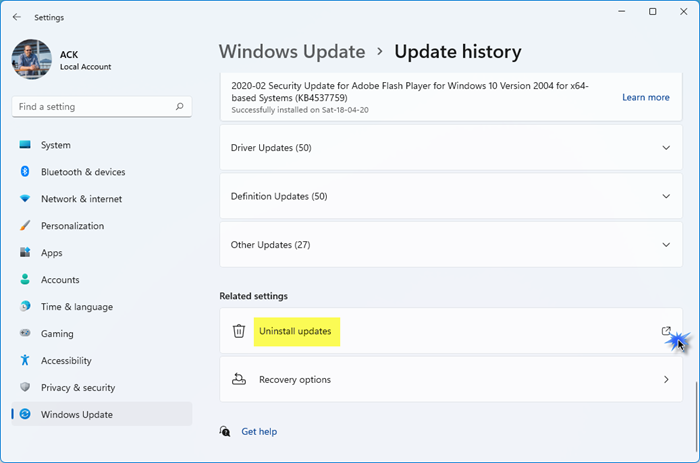
Another Windows Update with the KB number KB5009543 was found problematic when it comes to connecting to VPN connections. Microsoft has also mentioned this on its official website. Under the known issues section, it is clearly mentioned that the VPN connections with the L2TP protocol may be affected. This issue has been resolved in the update with KB number KB5010793.
3] Stop the Dell Optimizer service (if applicable)
Some affected users reported that the Dell Optimizer Service was preventing Windows from connecting to PPTP or L2TP VPN protocol. If you are a Dell user and Dell Optimizer is installed on your system, you will see the Dell Optimizer service running in the background. The Dell Optimizer application may or may not come pre-installed on Dell systems.
Follow the steps written below:
- Open Windows Services Manager.
- Scroll down the list of services and locate the Dell Optimizer service.
- Once you find it, right-click on it and select Stop.
- After stopping the service, double-click on it to open its properties.
- Under the General tab, select Manual in the Startup type drop-down.
- Click Apply and then click OK.
- Restart your computer.
This should fix the problem.
If you are not a Dell user, another third-party startup application or service can be responsible for the problem. We suggest you start your system in a Clean Boot state to find the cause of the problem. When you disable all the third-party Services and startup apps and then restart your computer, you will enter a Clean Boot state.
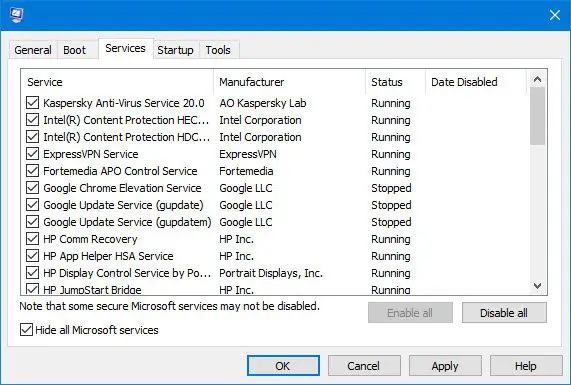
After entering the Clean Boot state, check if you can connect to the PPTP/L2TP VPN protocol or not. If the problem is fixed in the Clean Boot state, a third-party service or startup app is responsible for this problem. To identify it, follow the steps written below:
- Enable half of the third-party services and restart your computer.
- Check if the problem persists. If not, enable the second batch of the services and restart your computer.
- If the problem occurs, disable one of the third-party services from the list of services you have just enabled and restart your computer.
- See if the problem persists or not. If yes, repeat the steps again.
When the problem disappears, the service you just disabled is the culprit. Keep that service disabled. Then, follow the same steps to identify the problematic third-party startup app.
4] Modify Windows Registry
If the L2TP server is behind the NAT or NAT-T device, you may experience connection problems. This issue can be resolved by creating a key in Windows Registry. We will show you how to do that. The following steps will show you how to modify Windows Registry to fix this problem. Hence, make sure that you follow these steps carefully. Incorrect modifications in the Windows Registry can cause serious errors in your system.
Before you begin, we recommend you create a System Restore Point and backup Registry. This is for safety purposes. If any problem occurs, you can restore your system to the previous working state by using the system restore point.

Open the Registry Editor. Navigate to the following path.
HKEY_LOCAL_MACHINE\SYSTEM\CurrentControlSet\Services\PolicyAgent
The easiest way to go to the above-mentioned path is to copy and paste it into the address bar of the Registry Editor. Hit Enter after that.
Make sure that the PolicyAgent key is selected on the left side. Now, right-click in the empty space on the right side and go to “New > DWORD (32-bit) Value.” Give the name AssumeUDPEncapsulationContextOnSendRule to the newly created value.
The newly created value has the following three states:
- 0. It is the default value. When you leave it at 0, Windows cannot establish security associations with servers located behind NAT devices.
- 1. Setting this value to 1 allows Windows to establish security associations with servers that are located behind NAT devices.
- 2. If you set this value to 2, Windows can establish security associations when both the server and VPN client computer are behind NAT devices.
Double-click on the AssumeUDPEncapsulationContextOnSendRule value and enter 1 or 2 in its Value data. Click OK to save the changes. Restart your computer. See which of these two values (1 or 2) works for you.
Why is Windows 11 not allowing VPN connections?
Windows 11 may block VPN connections due to firewall or security software settings. Ensure your firewall or antivirus isn’t blocking the VPN. Temporarily disable these programs to check if they resolve the issue. Keeping your system updated can also help.
Does Windows 11 support PPTP VPN?
Windows 11 has the option to connect to a PPTP VPN protocol. You can select PPTP in the VPN type drop-down while adding a VPN connection in Windows 11. You may experience connecting issues while configuring the L2TP behind a NAT or Nat-T device. In this case, you can fix the issue by modifying the Windows Registry.
Why is my Windows 11 not connecting to VPN?
One of the most common causes of VPN not being connected to Windows 11 is a firewall. Sometimes, the firewall blocks the requests sent by VPN software. In other cases, the issue is associated with a particular VPN protocol. You can fix this issue by using some fixes, like reinstalling VPN software, changing the VPN protocol, etc.
Read next: VPN not hiding or changing location.