Adobe Premiere Pro is a known name in the editing community and has been the right choice for millions of editors. However, when editing a video, Premiere Pro says Media Pending then crashes or stops rendering the image. Often, the error message is displayed when playing a certain portion of the window. In this post, we will talk about this issue and see what you need to do to resolve the issue.

Premiere Pro says Media Pending then crashes or stops rendering
When you are playing a video you are about to edit, if Premiere Pro is unable to process the video, it will say Media Pending. Sometimes, it’s just a certain portion of the video but it still is important. However, it can be fixed and we will show you how to do it. So, if Premiere Pro says Media Pending then crashes or stops rendering, follow the solutions mentioned below to resolve the issue.
- Disable and then enable everything
- Clear Media cache
- Try a workaround
- Create new sequence
- Update the Graphics driver
- Quit all the programs running in the background
- Update Adobe Premiere Pro
Let’s talk about these solutions in detail.
1] Disable and then enable everything
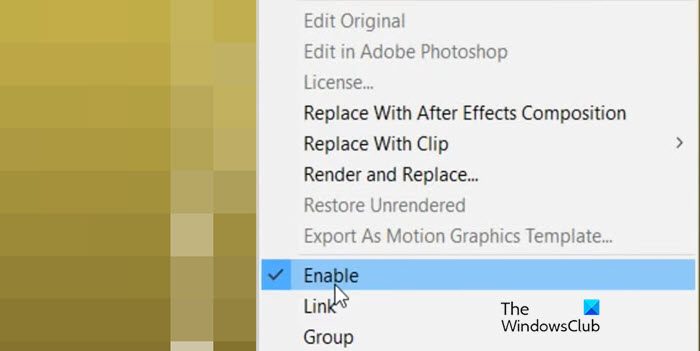
Sometimes, Premiere Pro is unable to render the clip due to some temporary glitches. So, we have to force the app to start rendering the video again. To do that, just right-click on the clip and then select Enable to disable it. Now, right-click again and click on Enable to re-enable the clip. This will do the job for you. There are some other things you can do to force Premiere Pro, that is, increasing the length of the clip by just a frame or adding some inconsequential changes to the clip.
2] Clear Media cache
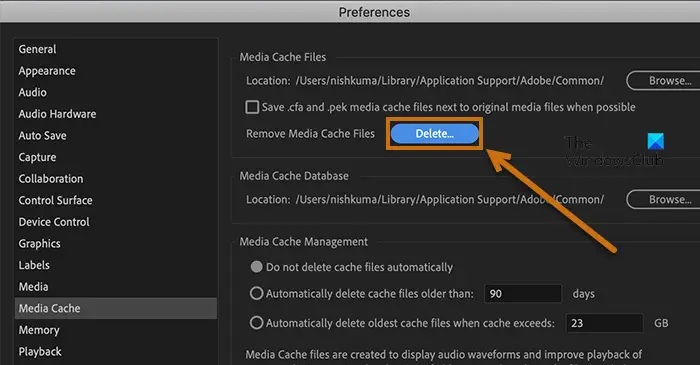
Caches are the files that every program creates for faster and easier access, however, sometimes these create a problem. Over time, they get easily corrupted, due to which the software starts suffering. This can also be the cause here, so we are going to clear these caches. Follow the steps mentioned below to clear Premiere Pro Media Cache.
- Open Adobe Premiere Pro, and click on the Edit tab.
- Click the Preference option, and then search and go to Media cache.
- Select the Delete button present beside Remove Media Cache Files.
- Next, click on the Delete all media cache files or Delete unused media cache files option.
- Lastly, select the OK button to finalize the steps.
Once all the cache files are deleted, relaunch the app, and then see if you are able to use the app. If there are still hindrances in doing so, move on to the next solution.
3] Try a Workaround
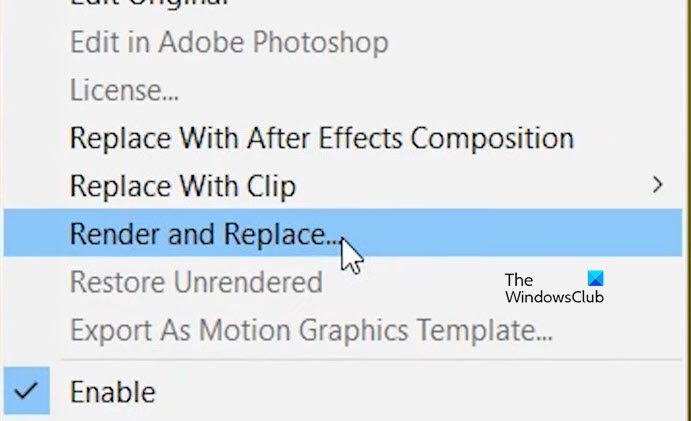
You might have noticed that Premiere says Media Pending when rendering Dynamically Linked and Nested Sequences. We have a workaround that can resolve the problem with those types of clips.
If you are trying to render a Dynamically linked clip, after making all the changes, right-click on the clip and then click on Render and Replace.
However, if you are working on Nested Sequence, set the in and out points, export that particular section, and then place it right on top of your actual clip. It will work like a charm.
Do keep in mind that it is a workaround and not the solution.
4] Create a new sequence
It is very likely that when creating a sequence you made some mistakes or the sequence has some kind of glitch. In that case, we can create a new sequence, and paste all your clips there. For that, create a new sequence, copy the clips from the previous sequence, the one throwing error, and paste it there. Make sure to test and save the new sequence before clearing the previous one.
3] Update the Graphics driver
The word Video and Graphics driver go hand in hand. So if there’s anything wrong with the Graphics driver, the app is also gonna suffer the impact. In simple terms, if you are using an outdated or corrupted graphics driver, you are definitely going to face this crash and issue.
Therefore, to avoid this situation, always keep the Graphics driver updated. You can update the driver by clicking Win + I to open Settings. Next, click on the Windows Update > Advanced options > Optional Updates option and install driver updates. There are other options available to you as well such as the Device Manager app, official websites of the graphics card manufacturer, or free driver updater software.
4] Quit all the programs running in the background
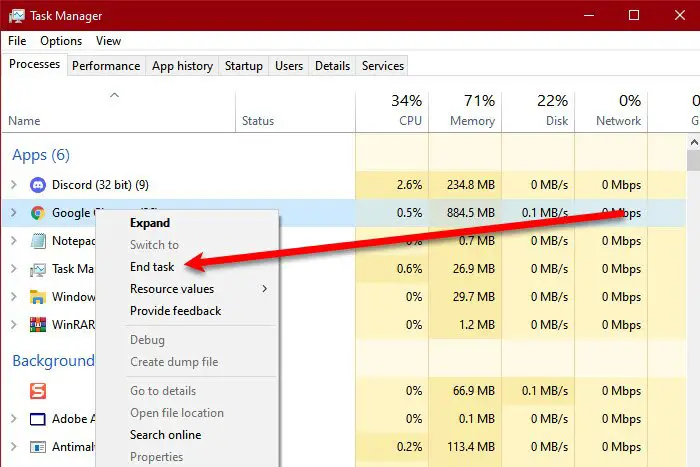
Using the Adobe Premiere App at the same time while running multiple programs can be one of the contributing factors. This creates a situation where the app we are using has to fight with other tasks for resources. And you should always avoid this from happening, so click Ctrl + Delete +Alt to open the Task Manager. Right-click on the processes that may interfere and cause this issue and then select the End Task button for each one. Once done, relaunch the app and check if it is still crashing.
5] Update Adobe Premiere Pro
If Premiere Peo is unable to process media update the app. To do so, launch Adobe Premiere Pro, and click on the Help menu. Click on the Updates option, and if there are any available, select the Update button. After the update is installed, you’ll be asked to restart the app.
Hopefully, now you are able to import, edit, render, and export videos without any problems.
Read: Premiere Pro: There Was an error decompressing Audio or Video
Why I can’t export media in Premiere Pro?
The app needs to have permission to access all the files and resources. And any situation contrary to this is the reason why exporting media in Premiere Pro is a failure. So give all the necessary permissions to overcome this barrier and have successful media export.
Why is my Premiere Pro always crashing?
There are various reasons why Premiere Pro is crashing. Some of the basic ones are outdated or corrupted hardware, incompatible codecs, corrupted caches, and so on. Moreover, outdated Premiere Pro software, and interfering apps in the background can also be contributing factors to the situation at present. Long story short, check our guide on what to do when Premiere Pro is crashing.
Also Read: How to stabilize Shaky Video Footage in Adobe Premiere Pro.