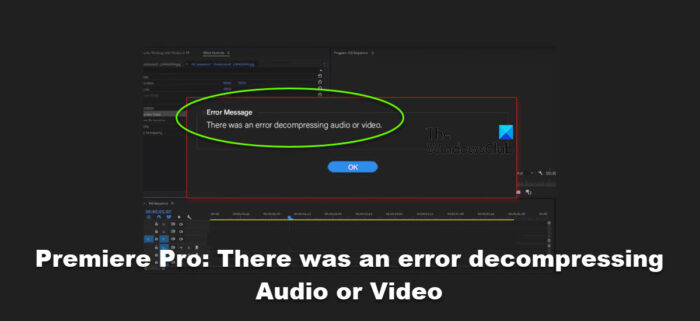
A lot of Premiere Pro users reported that they are encountering an error when trying to decompress audio or video files. More often than not, it has been noted that the error is caused because of unsupported file format, but there are instances reported by users when the format that was previously working fine, started having some weird issues. Following is the exact error message users see.
Adobe Premiere Pro Error Message: There was an error decompressing audio or video

In this post, we will talk about this issue in detail and see what you can do to resolve it.
Fix Premiere Pro: There Was an error decompressing Audio or Video
If Premiere Pro says There Was an error decompressing Audio or Video, follow the solutions to resolve the issue.
- Make sure that the file format is supported
- Change the format from .MP3 to .WAV
- Clear Premiere Pro Cache
- Rename or Remove Media Cache Folder
- Compress files with a different tool
- Reinstall the app
Let us talk about them in detail.
1] Make sure that the file format is supported
The very first thing you should do is check if the file format that you are using is supported. Adobe supports most file formats, you can go to helpx.adobe.com and check all the supported file formats for yourself. In case the file that you were using has a format that’s not on the list, it won’t work. If you want to make it work, use programs such as Adobe Media Encoder or Adobe Audition. They will change the format of the file, and hopefully, this issue will be resolved.
2] Change the format from .MP3 to .WAV

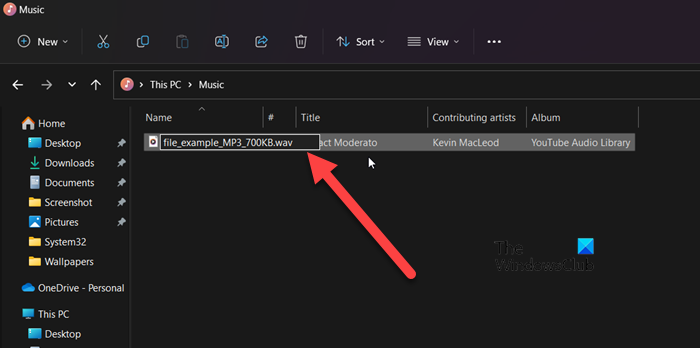
Some users were able to resolve the issue just by changing the extension of the file from .MP3 to .WAV. The process to do the same is pretty simple; we don’t even need a third-party app; follow these steps to do the same.
- Open File Explorer by Win + E.
- Go to the location where your MP3 file is stored.
- Click on View > Show > File name extension.
- Right-click on the file and select Rename.
- Remove .mp3 and add .wav.
- You will be asked to confirm your action; click Yes when prompted.
Finally, add the file to Premiere Pro and see if the issue is resolved.
3] Clear Premiere Pro Cache

You can also encounter the said error if the cache of Premiere Pro is corrupted. There are various factors that are responsible for corrupting your cache. However, since it is a cache and not data of the app that’s corrupted, we can easily clear it without any repercussions. To clear the cache of Premiere Pro, follow the prescribed steps.
- Open Adobe Premiere Pro on your computer.
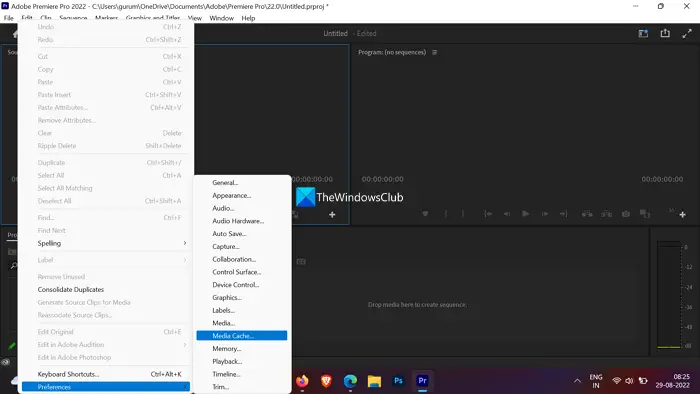
- Now, click on the Edit option.
- Select Preferences > Media Cache.
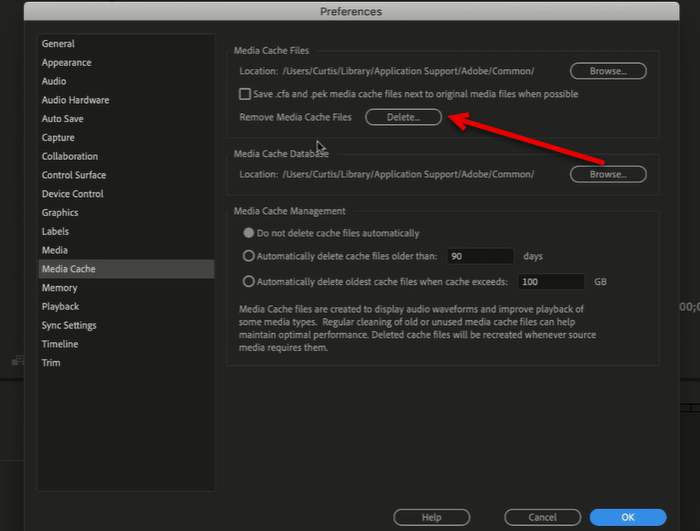
- Click on the Delete associated with Remove Media Cache Files.
- Now, select Delete all media cache files or Delete unused media cache files and click Ok to confirm.
Finally, restart your app and see if the issue is resolved.
4] Rename or Remove Media Cache Folder

Removing the cache of the Adobe app is one thing, but sometimes, this issue can be caused due to corruption in the Media Cache folder. We are not going to remove the folder; instead, we will be renaming the folder, making it impossible to find the folder; hence, it will be forced to create a new one. To do the same, first of all, close all the processes related to Adobe Premiere. For that, open Task Manager, right-click on the process, and select End Task.
Open File Explorer and go to the following location.
C:\Users\User-Name\AppData\Roaming\Adobe\Common
Change the User-Name to your actual username.
Go to Cache and rename the folders to Media Cache Files_OLD and Media Cache_OLD respectively.
If this doesn’t work, try removing the Media Cache. In case the issue is caused due to corruption in the Media cache, removing the same will do the trick. To make alterations, follow the prescribed steps.
- Launch Premiere Pro app.
- Navigate to File > Preferences > Media Cache
- Click on the Delete button associated with Delete Media Cache Files.
- Delete all caches.
Finally, open the app and check if the issue is resolved.
5] Compress files with a different tool
If Adobe Premiere Pro doesn’t work, you should decompress the file with a different tool. If you are unable to import or make any adjustments to that file, we can say that the file is corrupted. If you can alter the file using an alternate tool, move to the next solution, as we will try to repair the Adobe Premiere Pro.
6] Reinstall the app
If nothing works, your last resort is to reinstall the Premiere Pro. This might look like a bit of a hassle, but if, after making all the alterations, you are still not able to decompress a file, we can say that there is something wrong with your app. So, go ahead and uninstall Premiere Pro. Then install a fresh copy of the same to resolve the issue.
Hopefully, you can resolve the issue using the solutions mentioned in this post.
Read: How to save or export Premiere Pro projects to MP4
How do I fix audio error in Premiere Pro?
It depends on what error you are seeing in Premiere Pro while using an audio file. However, if you get an error while decompressing it, you need to go through the above-mentioned solutions. That said, you need to ensure the file format first. Then, you can clear the cache, remove the Media Cache folder, and compress the file with a different tool.
How do you fix an importing error in Premiere Pro?
If you are unable to import a file, first of all, check if the file format is supported. We have mentioned a link to the official Adobe website, go to that and see if the file you are trying to import is supported or not. If you still cannot import files, check the solution mentioned in this post.
Leave a Reply