In this post, we will show you how to prevent the uninstallation of Chrome extensions by tweaking the Registry in Windows 11 or Windows 10. Like any other browser, Google Chrome also comes with an Extensions manager that helps to turn on/off and remove the installed extensions. You can also right-click on an extension icon and use the Remove from Chrome… option to uninstall it. But, if you don’t want someone else or you to uninstall the extensions installed by you, then use this Registry trick.
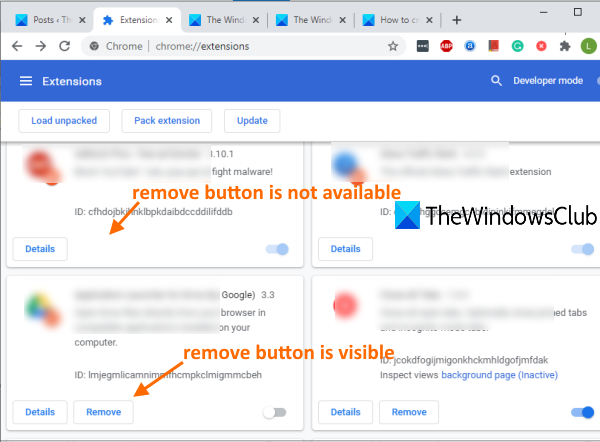
Once the trick is applied, you will notice that the Remove button has vanished for the extension(s) for which you’ve enabled the prevention. The turn on/off button will also don’t work. Also, right-click option will also be removed that is used to uninstall an extension.
This trick won’t affect the working part of the extension. It will work as it should be. You will also be able to access Options for that extension and customize them. Later, you can also undo the changes made by you anytime.
Prevent uninstallation of Chrome extensions
As this is a Registry change, it is recommended to backup the Registry so that you can restore it anytime if anything wrong happens. Now follow these steps:
- Open Registry Editor
- Access Policies key
- Create Google key
- Create Chrome key
- Add ExtensionInstallForcelist key under Chrome key
- Create a String value and rename it as 1
- Open Google Chrome
- Open Extensions manager page of Chrome
- Copy an extension ID
- Double-click on the String value that you created
- Paste extension ID in the Value data field
- Save & Relaunch the Google Chrome browser.
In the first step, you can use the Search box, Run Command box, or some other option to launch Registry Editor.
After that, access the Policies key in Registry Editor. The path is:
HKEY_LOCAL_MACHINE\SOFTWARE\Policies
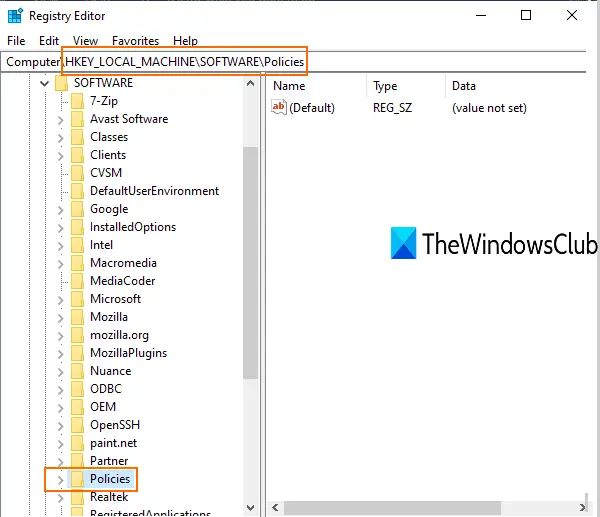
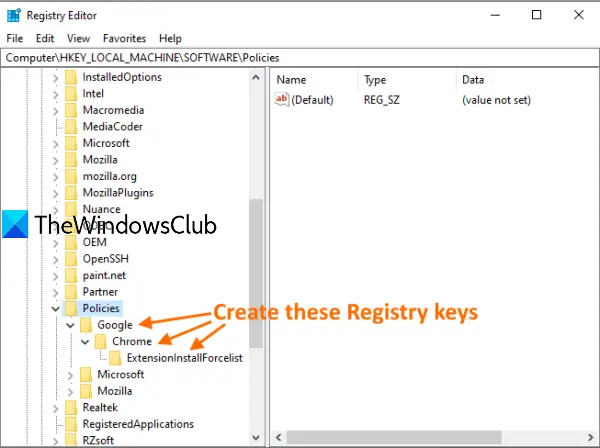
In the next step, create a new Registry key under this Policies key and set its name as Google.
Now, create another key in Google key, and name it Chrome. Again, create a new key under that Chrome key, and set the name to ExtensionInstallForcelist.
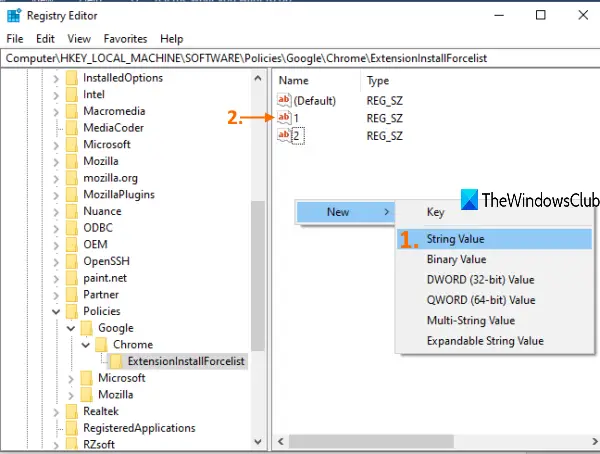
Under that last key, create a new String Value and give it a name 1. You can create this value by right-clicking on the empty area, selecting the New menu, and then clicking on the String Value option. When the value is created, rename it to 1.
Do not close Registry Editor yet.
Now open the Google Chrome browser using the Start menu, Search box, or its shortcut. Access Extensions manager of Google Chrome. For this, click on the three vertical dots icon visible on the top right corner, access the More tools section, and select Extensions.
Alternatively, you can type chrome://extensions in the Omnibox (or address bar) and press Enter to open it.
On the Extensions page, you can see the extension ID for all the extensions. Copy ID of an extension that you want to prevent from uninstallation.
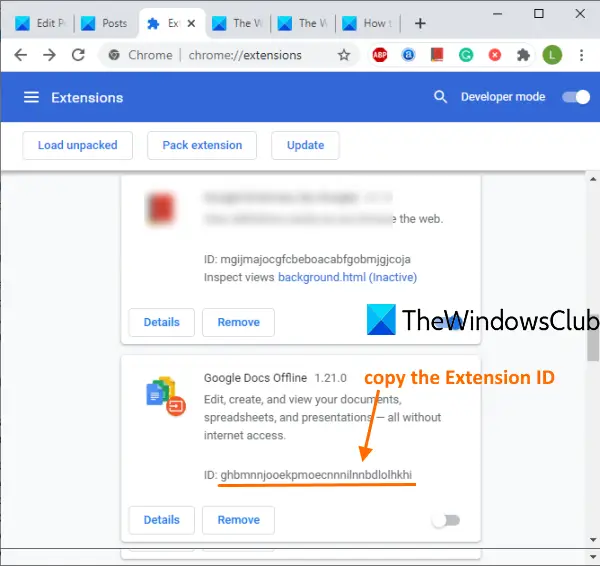
Go back to Registry Editor and double-click on ExtensionInstallForcelist String Value that you created above. In the Value data field, paste the extension ID. After that, append the following text:
;https://clients2.google.com/service/update2/crx
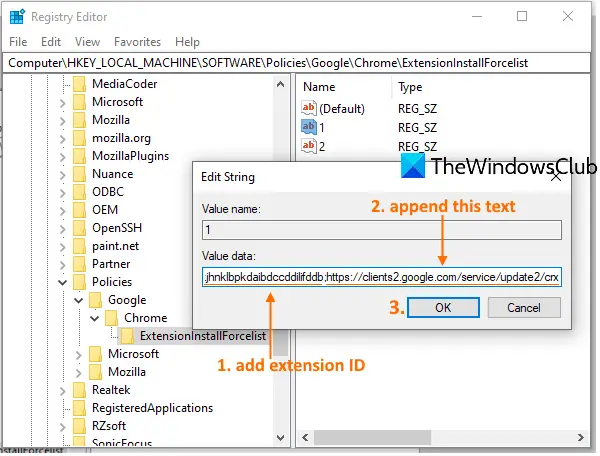
Press the OK button.
Now relaunch Chrome browser and access Extensions page.
You will notice that the Remove button is not visible for that particular extension. Also, when you will right-click on that extension icon, then the Remove from Chrome option won’t visible.
That simply means the option to uninstall that particular Chrome extension is disabled.
You can follow the above steps to prevent uninstalling any other extension installed on your browser. You need only the extension ID and the text mentioned above.
To undo the changes, simply follow the above steps and delete any String value you created. Uninstallation prevention for that specific extension will be removed.
That’s all!
Read:
Leave a Reply