If the Print to PDF option is missing in Windows 11 or Windows 10, you can get it back with the help of this guide. If you deleted it by mistake, you could revert the change using these simple steps. There could be several reasons why the Print to PDF is missing from your computer, and this guide explained almost all the possible causes and solutions.
Microsoft Print to PDF helps you print documents, images, etc., to PDF without using third-party software. In short, it is pretty handy for almost everyone who wants to turn something into PDF. However, if this option is missing on your computer, this guide will help you get it back.
Print to PDF is missing in Windows 11/10
If Print to PDF is missing in Windows 11/10, follow these steps:
- Check Windows Features
- Add Print to PDF manually
- Remove Print to PDF driver/device and reinstall
- Reinstall using Windows PowerShell
How to Reinstall Microsoft Print to PDF
1] Check Windows Features
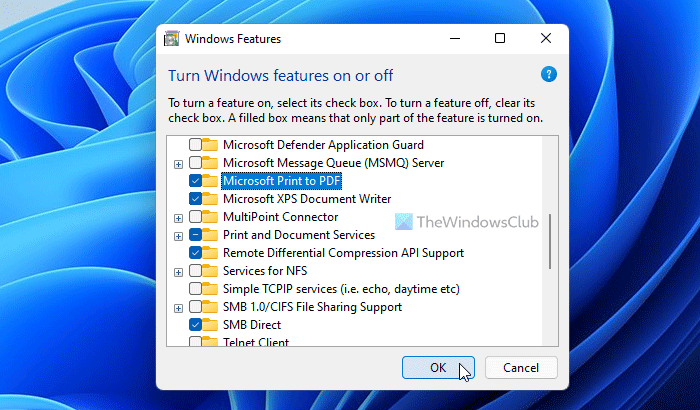
If Print to PDF is missing on your Windows 11/10 computer, you need to check the Windows Features panel first. As it is an optional feature, you can add or remove it manually as per your requirements. If you removed it by mistake, you need to install the feature again. For that, do the following:
- Search for windows features in the Taskbar search box.
- Click on the individual search result.
- Tick the Microsoft Prit to PDF checkbox.
- Click the OK button.
- Let it finish the installation.
You may need to restart your computer to get the change. Once done, you can find the Microsoft Print to PDF option in the printer’s list.
2] Add Print to PDF manually
If Windows 11/10 is not detecting the Print to PDF option automatically, you need to add the printer manually. However, in this case, you need to make a few changes since it is not a physical printer.
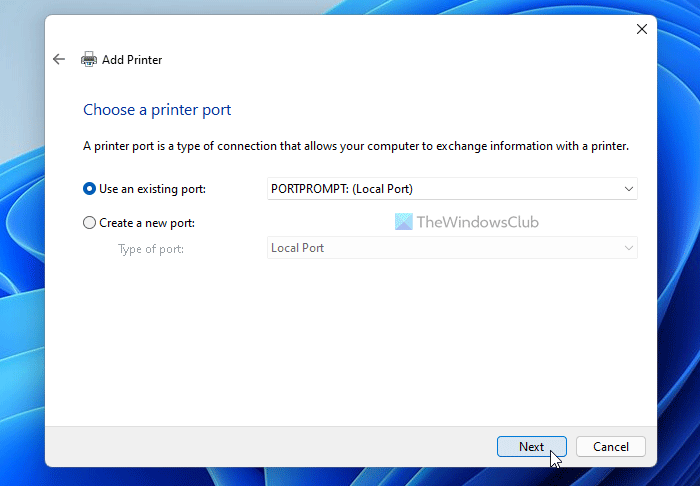
For that, you need to choose the Add a local printer or network with manual settings option to get started. Then, choose the PORTPROMPT: (Local Port).
Following that, you can select Microsoft on the left side and choose the Microsoft Print to PDF option on the right side.
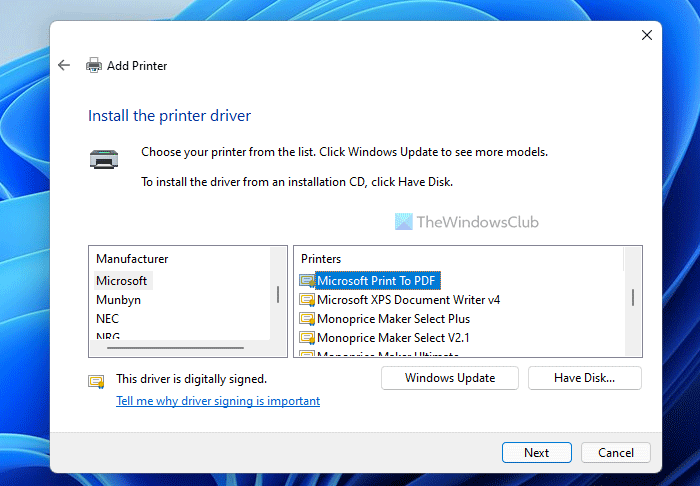
However, if you cannot find it, click the Windows Update button to update the list. Once done, you can find the Microsoft Print to PDF option.
Select it and click the Next button. Then, name your printer and click the Finish button.
3] Remove Print to PDF driver/device and reinstall
At times, the corresponding driver may cause the issue. That is why you can remove the Print to PDF driver from your computer and reinstall it. For that, you need to take the help of the Device Manager. To get started, press Win+X and select Device Manager from the list.
Expand the Print queues, right-click on Microsoft Print to PDF and select the Uninstall device option.
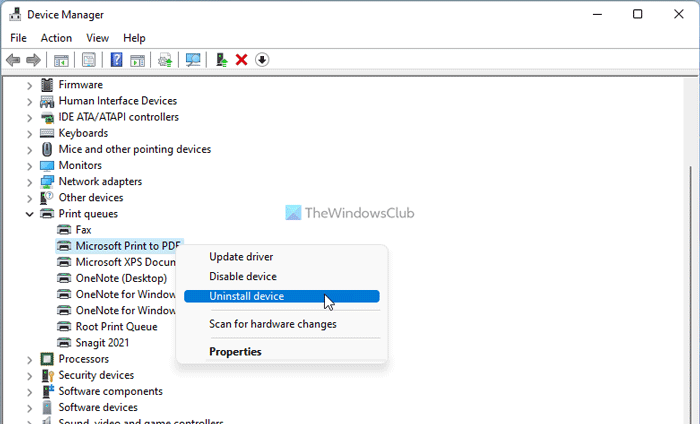
Confirm the change. Once done, you need to go through the same steps as above to reinstall the Print to PDF on your computer.
4] Reinstall using Windows PowerShell
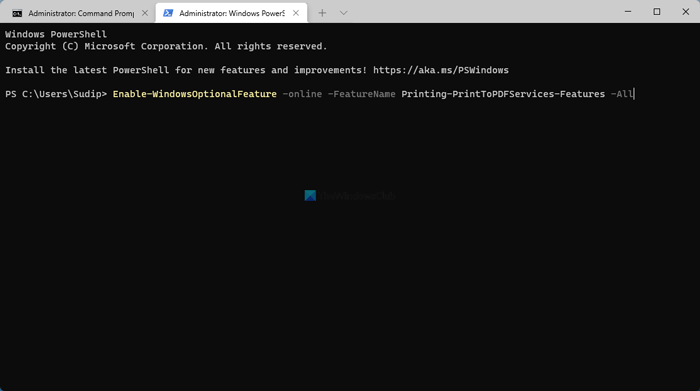
It is almost same as the first solution mentioned in the article. However, in this case, you need to use Windows PowerShell. For that, do the following:
- Press Win+X and select Windows Terminal (Admin) option.
- Click the Yes button.
- Enter this command:
Enable-WindowsOptionalFeature -online -FeatureName Printing-PrintToPDFServices-Features -All - Restart your computer.
Why do I not have the option to Print to PDF?
There could be several reasons why you don’t have the Print to PDF option on your computer. However, you can fix the issue by following the aforementioned solutions. You need to check the Windows Features panel first. Then, you can add the Print to PDF printer manually.
Where did my Microsoft Print to PDF go?
If you cannot find the Microsoft Print to PDF option or printer, you can get it back by following the above-mentioned solutions. You need to start the troubleshooting by verifying it in the Windows Features panel. Next, you can add it manually on your PC. However, you can also try removing the driver and reinstalling it.
Leave a Reply