The Print Spooler in Windows 11/10 occasionally generates an error when attempting to print, and so, no output comes from the affected printer. At other times, you might see the printer not printing in color. If you too have been experiencing this issue, we have some suggestions for you.
Printer not printing in color in Windows 11/10
If Windows 11 or Windows 10 is not printing in color try the following troubleshooting suggestions:
- Verify if the Print in Gray Scale option is enabled
- Reset Printer to default factory settings
- Uninstall and fresh install the Printer software
- Update or reinstall the Printer driver
- Run Printer Troubleshooter
- Troubleshoot in Clean Boot.
1] Verify if the Print in Gray Scale option is enabled
In this case, you might want to first check if the ribbon is full and also check the printing preferences, and also verify if the Print in Gray Scale option is enabled.
- Launch the Run Dialog box.
- Type control printers and hit Enter.
- Choose your Printer.
- Right-click it and select Printing Preferences
- Scroll down to Color
- Choose Print in color option.
- Close and exit.
When the printer is not printing in color, it is possible that its settings have been set to print in greyscale. Changing this back to Print in color option should solve the problem.
Press Windows Logo key + R, to open the Run dialog box.
In the empty field of the box that appears, type control printers and hit the OK button.
When directed to the Devices and Printers page, scroll down to the Printers section.
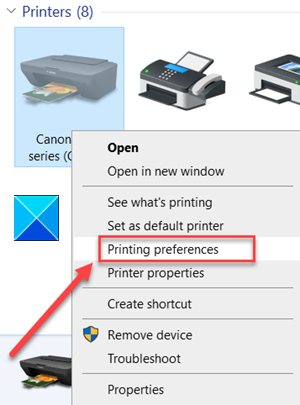
Here, right-click on the printer icon that you are using and choose the Printing Preferences option.
Read: Printer keeps printing documents in inverted colors.
Now, navigate to the Color section. Here, 2 options are displayed, namely –
- Print in color
- Print in grayscale
Make sure to choose the Print in color option.
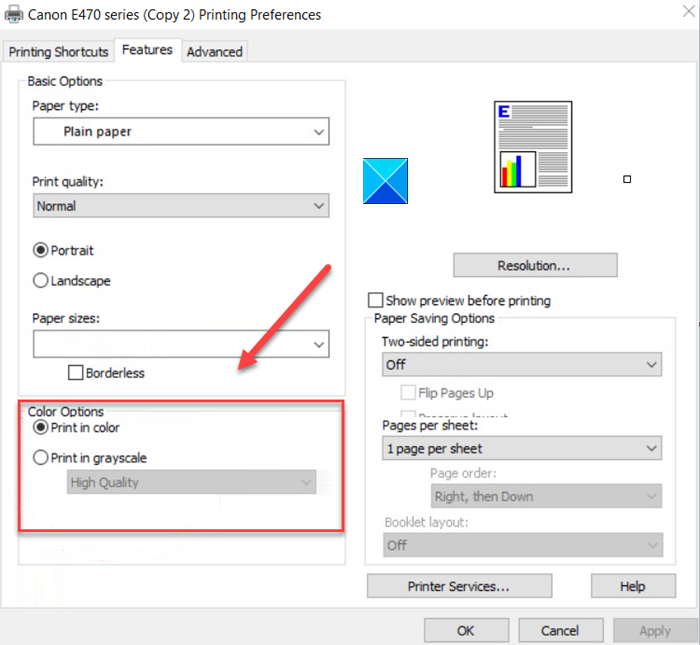
If you do not see the Color tab, check the Advanced Options and see if the Print in Grayscale is turned off.
Once done, close the Printing Preferences window and you’ll see the printer printing in color.
2] Reset Printer to default factory settings
You might want to reset the Printer to default factory settings and see if that helps.
3] Uninstall and fresh install the Printer software
If your Printer has installed printer software on your PC you might want to uninstall it via Control Panel or Settings and then, go to the manufacturer’s website and download the latest version of the software and install it.
Read: Fix Printer color problems on PC
4] Update or reinstall the Printer driver
You need to make sure that your Printer Drivers are up-to-date. Go to your Printer manufacturer’s website to download the latest drivers for your Printer and Windows version.
Alternatively, you can follow one of the methods below to update your device drivers:
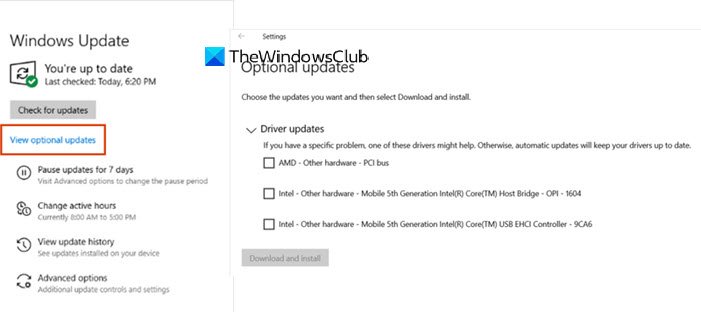
- You may check for Driver & Optional Updates via Windows Update to update your drivers
- Use a free driver update software
- If you have the INF driver file already on your computer then:
- Open Device Manager.
- Click the driver category to expand the menu.
- Then choose the relevant driver and right-click on it.
- Select Update Driver.
- Follow the on-screen wizard to finish updating your audio drivers.
5] Run Printer Troubleshooter
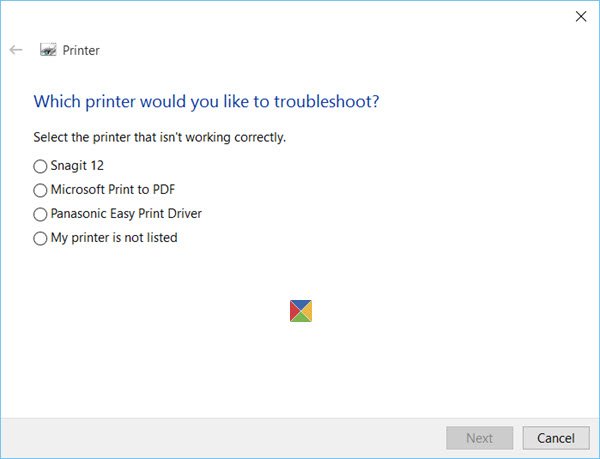
Run the Printer Troubleshooter and see if that identifies and fixes your printing problems.
6] Troubleshoot in Clean Boot
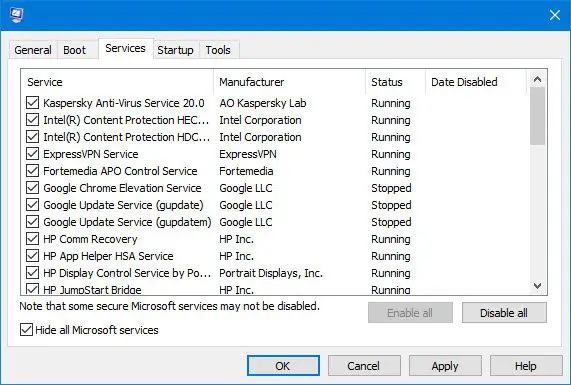
If nothing helps, and you find that your settings keep getting reversed or changed, then perform Clean Boot and try to manually identify the offending process.
Similar: How to enable Color Printing on Printer in Windows
No color option in printing preferences Windows 11
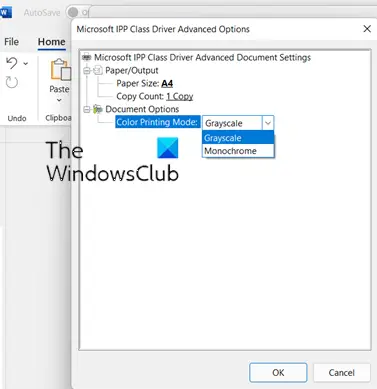
If you do not see the color option in printing preferences Windows 11 then you can follow the troubleshooting suggestions as explained above in this post – Reset Printer to default factory settings, Update or fresh install the Printer software & driver, Run Printer Troubleshooter and Troubleshoot in Clean Boot.
How do I change printer settings in Windows 11?
The following steps will help you open and change the printer settings on your Windows 11 computer.
- Launch the Settings app by pressing Win + I keys.
- In the Settings app, select Bluetooth & Devices from the left side.
- On the right pane, you will see a tab named Printers & Scanners. Click on it.
- Now, you will see the list of all the printers that you have added to your computer. Click on the printer, the settings of which you want to change.
- Click on the tab named Printing Preferences. This will open a popup window where you can change your printer settings, like layout, paper quality, etc. There is also an Advanced button that lets you change some advanced settings of your printer.
I hope something helps.
Related:
Leave a Reply