Microsoft Publisher is Microsoft’s multi-purpose software for creating flyers, brochures, booklets, calendars, layouts, and much more. After all the hard work, you want to print your document. But what if you find that the printer is not printing Publisher documents correctly?
There are things that you can do to troubleshoot and fix the printer and Publisher. Depending on what the error is, you will need to apply a different fix.
Printer not printing Publisher documents correctly
If you find that your printer is not printing Publisher documents properly, there can be a few reasons for this. This article will take you through a few ways to troubleshoot what is the cause.
- Check the printer
- Check the page setup for the document
- Check the print settings
- Check the printer properties
1] Check the printer
Publisher documents may not print correctly because of a problem with the printer. Make sure that your printer is plugged in correctly to the power. If you are using a wireless connection, check the connection. You may need to use a wired connection if you suspect your wireless connection is the problem. You should check the printer’s consumables, such as ink or toner and paper. If all those are working ok, print a test page directly from the printer using the button combinations or settings on the printer. If the test page prints ok, then something is wrong with the computer or connection to the computer.
Read: Printer not printing anything on paper
2] Check the page setup for the document
Different documents will have different page setups based on the software and printer type. If the printer is not printing publisher documents correctly, there could be a conflict between the setup for the document in Publisher and the printer. The printer may not support the setup that you have for the document. You should go to print setup for the document in Publisher. You should change the settings for the document and the target paper. If your printer has multiple trays, ensure that the print is being directed to the correct tray. Some printers may or may not automatically send the document to the correct tray.
If you had the document setup for a laser printer that supports a narrower margin, you may have to change the margin setup if you plan to use an inkjet printer. If you have multiple documents printing on one paper, you may need to adjust the space between them to stop them from cutting off.
3] Check the print settings
When you go to print, ensure that you have the correct color settings, pages per sheet, paper size, print side, and color settings. If these settings are not default, you may have incorrect printing if you forget to set them up before sending them to the printer.
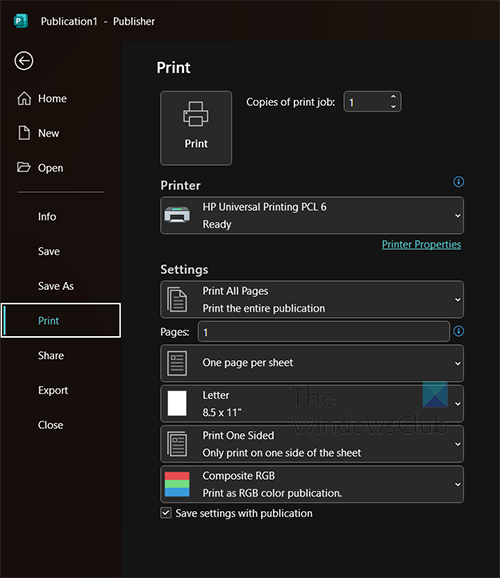
To check the printer settings, go to File then Print.
You will see the current print settings for the selected printer. You can click the dropdown arrow to select another printer if the current one is not the one you want to print to. You may think that the printer is printing incorrectly when you have selected the incorrect settings.
Pages per sheet
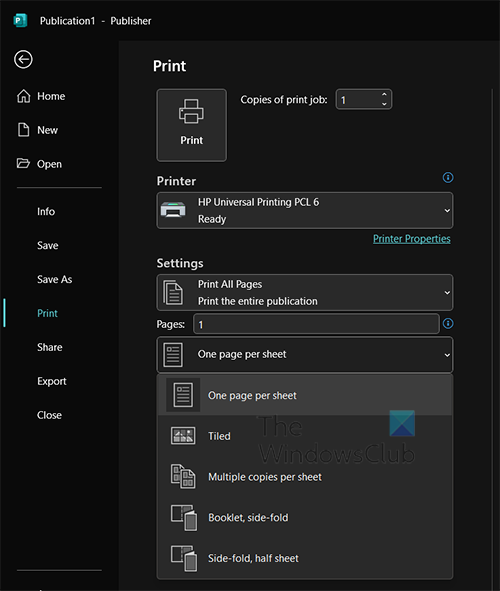
Ensure that the correct pages per sheet are selected to correspond with your document. You can choose to place multiple pages on one sheet of paper, ensure that what you expect is what you place in the settings.
Page size
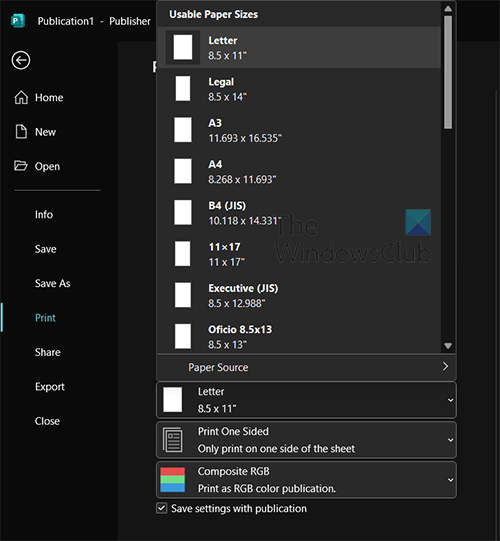
Select the correct page size for your document. If you have multiple items printing on the same page, you would need to make sure that the page size is correct to fit them. Select the correct page size that corresponds with your document.
Print on sides
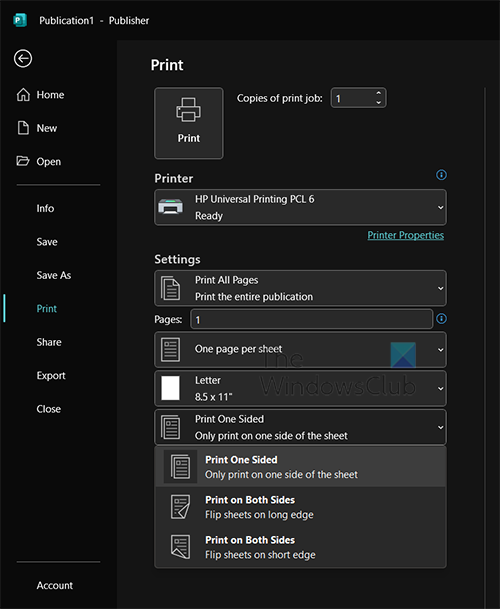
If you have a document that you want to print on both sides or one side, you will have to select the correct one.
Color or grayscale
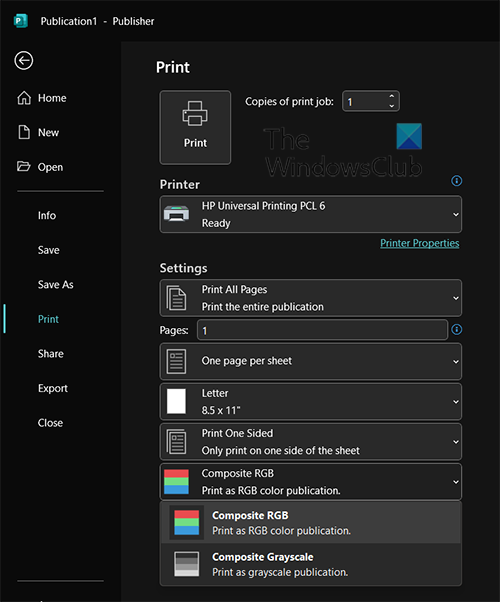
When you decide to print, you can tell Publisher to print a color document in color or grayscale. Just be sure that you have the correct one selected.
4] Check the printer properties
Sometimes you need to make changes to the printer properties but it can only be done from within Windows. Changing these settings can help with print quality and color. If your ink is running low you can increase the print quality by allowing the printer to use a bit more ink. If your printer supports certain papers, you may need to select the settings for these papers.
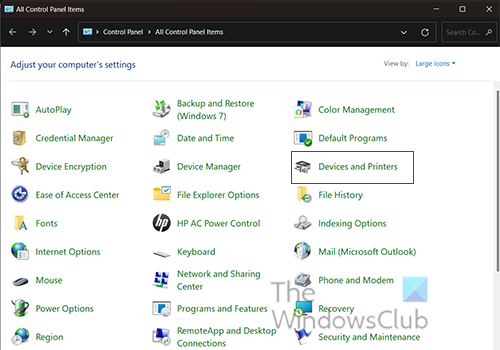
To get to the printer properties, go to Start, then search for Control Panel. When the Control Panel window opens, click Devices and Printers.
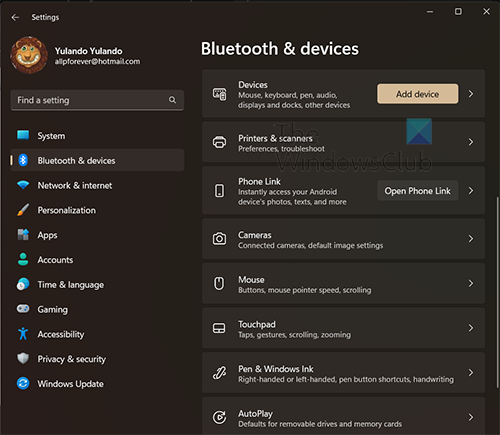
When you click Devices and Printers you will be taken to the Bluetooth and Devices window. Click on the Printer and Scanners button.
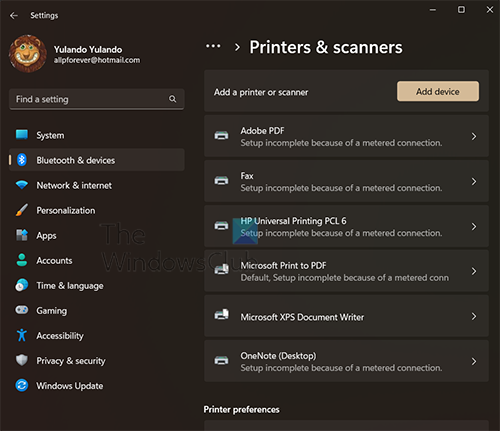
In the Printers and Scanners window, you will see a list of all the installed printers. Click on the printer that you want to access the properties for.
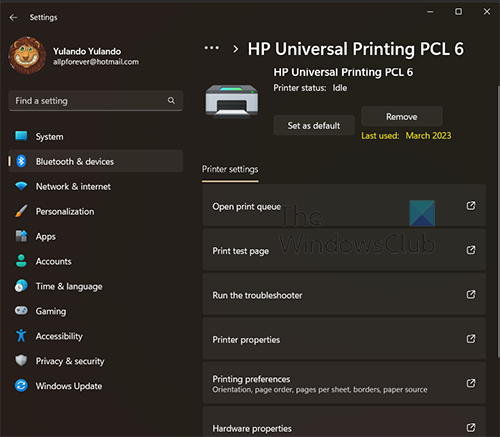
Now that you are in the settings for the printer, click Printing Preferences. You will now click Advanced, and here you can adjust the available settings for your printer, such as paper size, color settings, and print quality. When you are finished, click OK.
Read: How to design Greeting Cards in Microsoft Publisher
How do you print a Publisher document?
When you are ready to print your Publisher document go to File then Print. Choose the printer that you want to use to print if you have multiple printers. You can also choose to make changes to the settings for your print, when you are finished, click Print to send the document to the printer.
Why is the printer cutting off the edges when I print?
Printers will cut off content from your document if the content is outside of the printable area for the printer. The printable area will differ from printer to printer, Laser printers are usually able to print closer to the edge of the paper. Printers need to be able to hold the paper to pass it through the printer. To ensure that your work will not cut off, do a print preview before you print.
Leave a Reply