Certain features in Office settings, such as Privacy Options, are enabled by default. Microsoft says this is done to attempt to identify or contact users, but if you feel it poses a threat to your privacy, you can manage it from the Trust Center.
How to change Account Privacy settings in Office
The Trust Center in Microsoft Office is where you can find security and privacy options for Office programs. The options available therein, allow you to share documents with the people you want or find and remove hidden information you may not want to disclose.
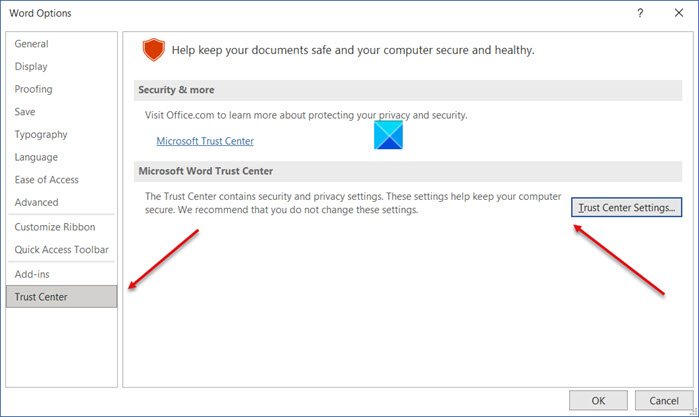
- Open an Office app and choose the File tab.
- Select Options from the left panel.
- Choose Trust Center.
- Hit the Trust Center Settings button.
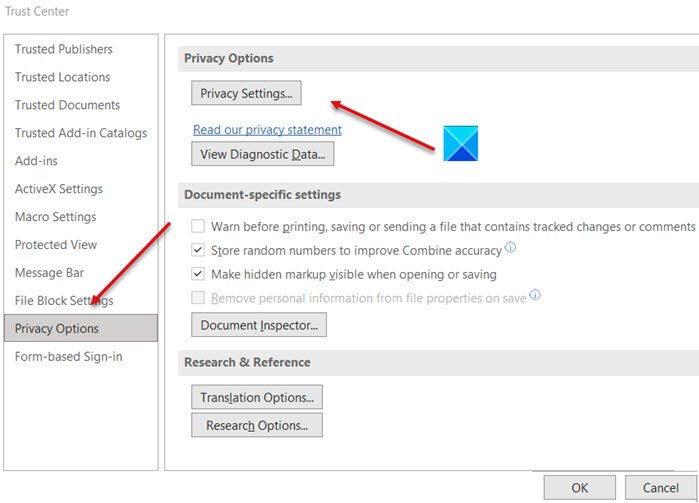
- Scroll down to Privacy Options.
- Choose the Privacy Settings button.
- Enable or disable the various options by checking or unchecking the box marked against them.
When changing privacy options, you should configure settings allowing you to control the level of Office privacy you want.
Open Word and click on the File tab under the Ribbon menu.
Next, from the left sidebar choose the Options menu.

This will open the Word options window. In the window, locate the Trust Center tab and when found, choose the Trust Center Settings option to open a new window.
In the ‘Trust Center’ window, scroll down to Privacy Options.

Hit the Privacy Settings button. Here, uncheck the unwanted options that are enabled by default. Likewise, you can enable the options you want for the Office apps by checking the boxes marked against them.
When you are done, hit the OK button and exit. This should help you in addressing your privacy concerns in Microsoft Office.
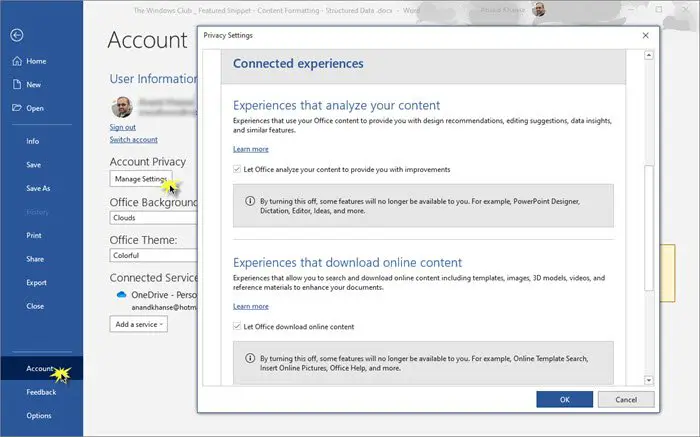
You can also access Office Privacy setting as follows: Open any Office app – eg. Word > File > Options > Account > Click Manage Settings.

If you need more information, you may read the Privacy Statement for Microsoft Office.
This post will show you how to Opt-out of Data Tracking & Targeted ads on the Internet.