Several programs on the web today were designed to deliver real-time CPU optimization and automation. We have spoken about quite a few of them over the years, but that won’t stop us from looking at another.
How to use Process Lasso for Windows computers
One of the best tools for real-time CPU optimization and automation is the Process Lasso free version. The program is feature-rich and, in many ways, better than the Task Manager tool found in Windows 11/10.
If you are new to this thing, you may want to install Process Lasso and leave it to do its thing automatically. However, if you are the type of person who wants to control your future, keep reading to learn more about this special free software.
1] Process priority optimization is important
If there is one thing we like about Process Lasso, it would have to be its “process priority optimization” and “system automation utility.” These features allow the user to establish protocols and processes that are not too essential.
It also modifies each process’s behavior, but most importantly, it keeps the computer running smoothly.
2] The tech that is ProBalance
In order for Process Lasso to work effectively, it must take full advantage of the ProBalance (Process Balance) technology. It is all about being simple to use yet smart enough to establish a harmonious relationship with all users.
To put it simply, it transforms Process Lasso into a less intimidating Task Manager, and that is a good thing for novices and advanced users alike.
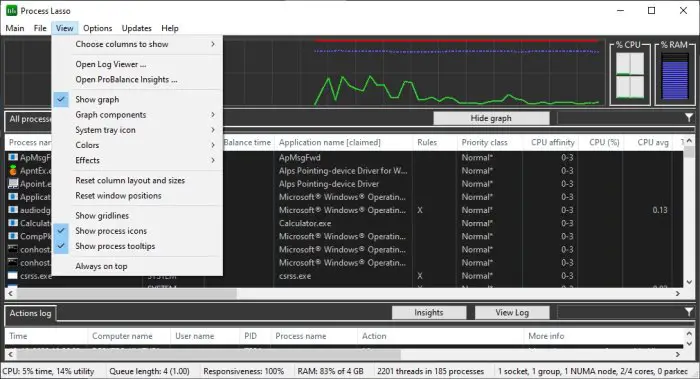
To get historical data on how ProBalance performs, click on View, then navigate to Open ProBalance Insights.
3] Take a look at the Main window

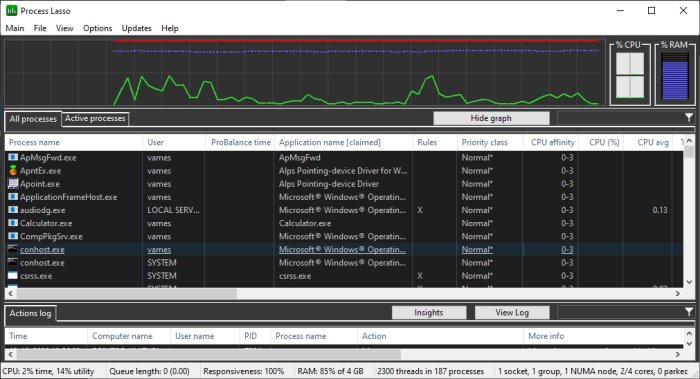
After installation, the main window is the first thing you will see when the program launches. This is where most of the information is located, and you’ll be looking at it quite often. You will see All Processes, Active Processes, Processor Use, Responsiveness, and Memory Load.
It’s a lot to take in at first, but it should become much easier to understand over time with regular use.
Additionally, if you click on the section that says Main, you will realize there are quite a few things you can activate or deactivate on the main screen. We like to keep the main section free from clutter, but you can add whatever makes sense for your needs.
From this same area, you can make changes to your PC’s power plan. Now, the tool, Process Lasso, will not perform unique changes. It takes advantage of features already available in Windows 10. Therefore, any changes to the power plant will be done from the core. If the app is removed, the changes will still factor in.
4] All and Active Processes

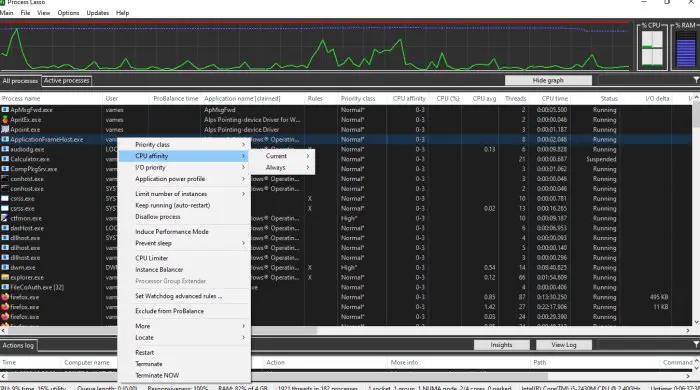
The section that showcases the Active Process is a crucial aspect of the program. From here, you can view all the running processes or applications. If you right-click on a process, you can make several changes.
For example, you can terminate a program, restart it, induce performance mode, and more. The option to set CPU Affinity and I/O priority for each program should you wish to do those things is also there.
5] The visual Graph
Users can visualize what is happening with their computer system by looking at the Graph. This tool within Process Lasso will highlight the percentage usage of your RAM and processor. Not only that, but it shows how responsive the entire system is.
6] The View tab

OK, so if we look above, we should see the View tab, and it does a similar job to the Main tab. From here, you can remove the Graph and re-add it whenever. Furthermore, you could disable the graph components if too much information is shown.
Are you not too pleased with the default color of Process Lasso? Worry not because the View tab allows you to choose Dark, Light, Custom Colors, and more.
7] Options

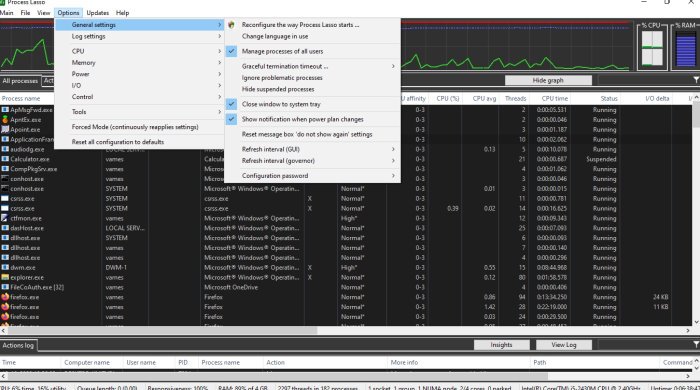
So, what can we do via the Options area, then? Well, quite a lot if you think about it. The user can configure how the CPU and RAM operate from this application section. Additionally, when it comes down to logging data, this can be deactivated and activated at will.
The Options menu is where you need to be for those who feel the need to configure their I/O and determine how the program launches at boot.
Visit bitsum.com and click on the blue Download button to download the free version. The free version has some limitations.
Leave a Reply