One way of enhancing security and ensuring better privacy during web browsing in Windows is switching a DNS server. Some widely popular public DNS providers like Comodo Secure DNS, OpenDNS, Google Public DNS, Yandex Secure DNS, Cloudflare DNS, Angel DNS, etc, provide phishing protection.

While you can always change the DNS settings manually, tools like DNS Jumper, QuickSetDNS, NetSetMan let you do so easily with a click. Today we will take a look at another free DNS changer software called Public DNS Server Tool version. The tool too lets you easily set the domain name servers without hassles.
Free DNS changer software

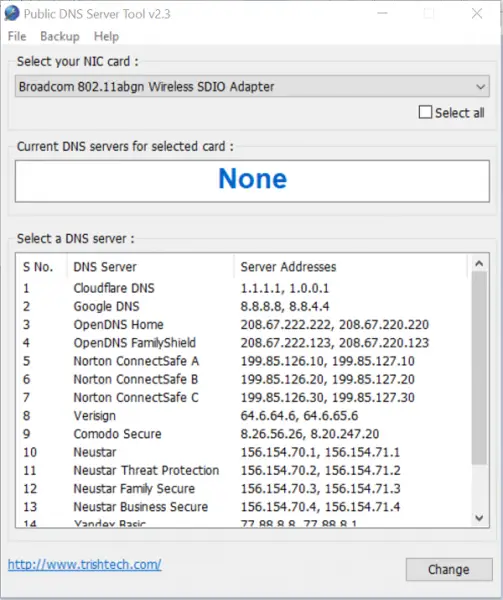
Public DNS Server Tool offers a pre-configured list of public DNS servers to choose from. This includes the following:
- Google Public DNS
- Cloudflare DNS
- Verisign DNS
- OpenDNS
- OpenDNS FamilyShield
- Yandex Basic DNS
- Yandex Safe DNS
- Yandex Family DNS
- Norton ConnectSafe A
- Norton ConnectSafe B
- Norton ConnectSafe C
- Comodo Secure DNS
- Neustar General
- Neustar Threat Protection
- Neustar Family Secure
- Neustar Business Secure
It lets a user easily change the DNS servers of their Windows PC in a click.
How to use Public DNS Server Tool
Simply download the ZIP file and double-click the application to launch it. A good feature about Public DNS Server Tool is that it’s not cluttered. Also, its simple User Interface makes the application quite suitable for all type of users.
Begin by creating a backup of your current DNS servers by selecting ‘Backup’ from the menubar. This is useful in case you would like to restore your original DNS servers.
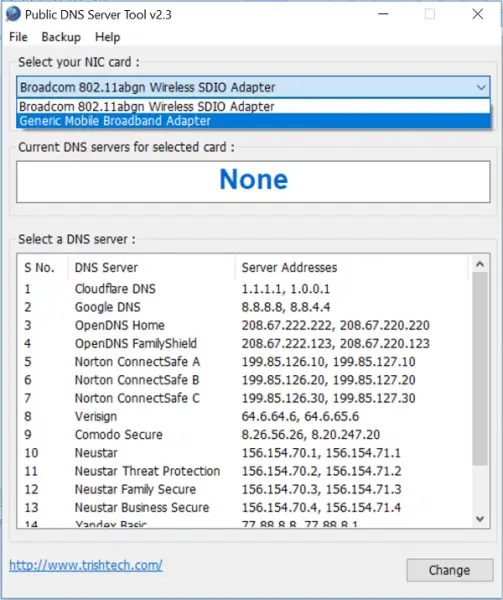
Next, select your Network Interface Card (NIC) from the dropdown list as shown in the screenshot below. Please note that if you have only one NIC, then it will be selected automatically.

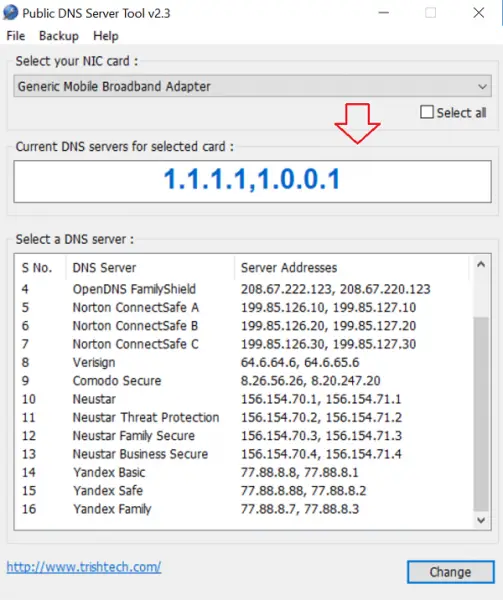
Once done, the current DNS server configured for the selected NIC would be displayed under ‘current DNS Server’ heading.
Now, choose the desired set of public DNS servers from the list. Once selected, its description will be shown alongside.
Finally, hit the Change button visible at the bottom of the window.
If, even after configuring the desired options you notice the browser showing previous DNS servers, then either press Ctrl+F5 to reload the webpage.

Unlike most installers, Public DNS Server Tool makes no changes to Windows registry settings. As such, it leaves so no traces behind after the removal.
You can download Public DNS Server Tool from its homepage.
How do I change DNS settings in Windows 11?
To change the DNS settings in Windows 11, you need to open the Network Connections panel first. For that, press Win+R to open the Run prompt, type ncpa.cpl, and hit the Enter button. Next, right-click on the internet source, select the Properties option, and double-click on the Internet Protocol Version 4 menu. Then, select the use the following DNS server addresses option and enter the DNS settings as per your requirements.
How do I change my DNS to 1.1 1.1 in Windows 11?
There are three ways to change your DNS to 1.1.1.1 in Windows 11. You can use the Network Connections panel – like said above. On the other hand, you can also use the Windows Settings panel. The last option is to use a third-party app. There are multiple DNS changer software available in the market, but Public DNS Server Tool is one of the best options.
Hope this app helped.
Thanks for this tip, will give it a try (especially since I’ve heard about the new Cloudflare 1.1.1.1 server); this might make an easier alternative to faster/more secure dns than SimpleDNSCrypt. Cheers!
The only reason why I don’t use this tiny program is that I don’t see the advantages of the given DNS’s. It could be a good idea adding an “Information” field telling a short explanation of the main advantages like, say,speed, more security, children protection…)
Without knowing which the advantages are, it’s likely I could select a worse DNS than the one I have configured.
Thanks.
you can try GRC’s – DNSBench.. its not a changer but its a benchmarker
at least it got some info.. go to their site for more info
PS: i cant even run this small app ahaha
I think, Simple DNSCrypt is not an DNS Resolver Server like Cloudflare Public DNS. Simple DNSCrypt is just software to change your DNS to Available DNS Resolver list, but with proxy, DNSCrypt protocol feature, bypass some Government’s Transparent DNS Proxy and Protects your traffic from DNS Poisoning/Hijacking.
Even, you can use Cloudflare DNS Resolver on Simple DNSCrypt :)
CMIIW
But, if you meaning is about difference between Simple DNSCrypt and Public DNS Server Tool. I think, you’re right, that Public DNS Tools is more easier to use.
CMIIW