Over the years, we have discussed several ways how to keep up with system performance. There are several third-party tools to get the job done, and also ways via built-in features in Windows 11/10 as well. However, there are times when we have come across quality software that needs a discussion. The software in question is called Quick CPU, and the general idea behind it is to help users fine-tune their computer and monitor system performance.
Monitor CPU performance & Power consumption with Quick CPU
With Quick CPU, you can check on CPU Temperature (Package and Core Temp), CPU Performance, Power, Voltage, Current, Core Parking, Frequency Scaling, System Memory, Turbo Boost, C-States, Speed Shift FIVR Control, and more.
From our long use of this program, we can say for certain that it is impressive, and works as intended. It is not the best of its kind, but for the most part, we believe most users will be completely happy with what it brings to the table. In this post we will review the following features:
- Information about Power Data
- Information about CPU data
- CPU performance
- CPU temperature
- Change system performance to fit your needs
- Power Plan Management
- Information on Installed Memory
- What is CPU core parking?
1] Information about Power Data
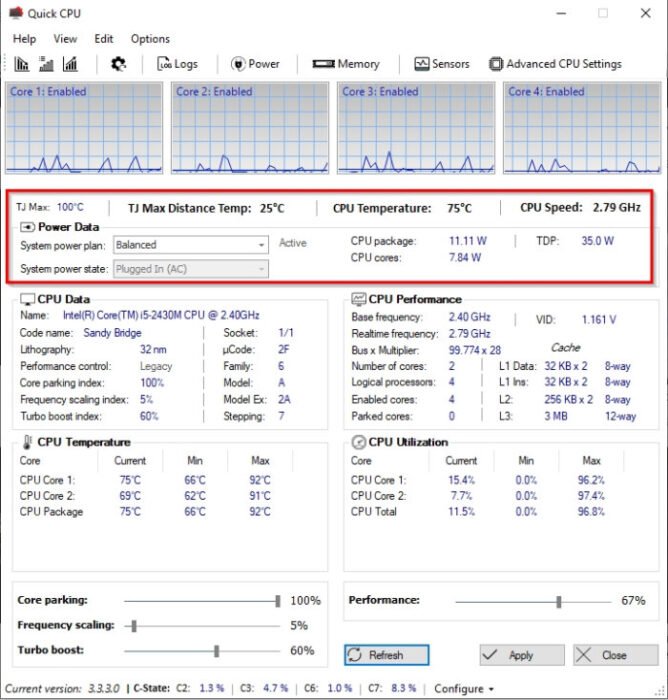
OK, so from the Main Menu, you should see quite a few options, and one of them is Power Data. This section showcases information that has to do with the power of your computer. For example, you can change the System power plan, System power state, check CPU temperature, speed, and more.
2] Information about CPU data
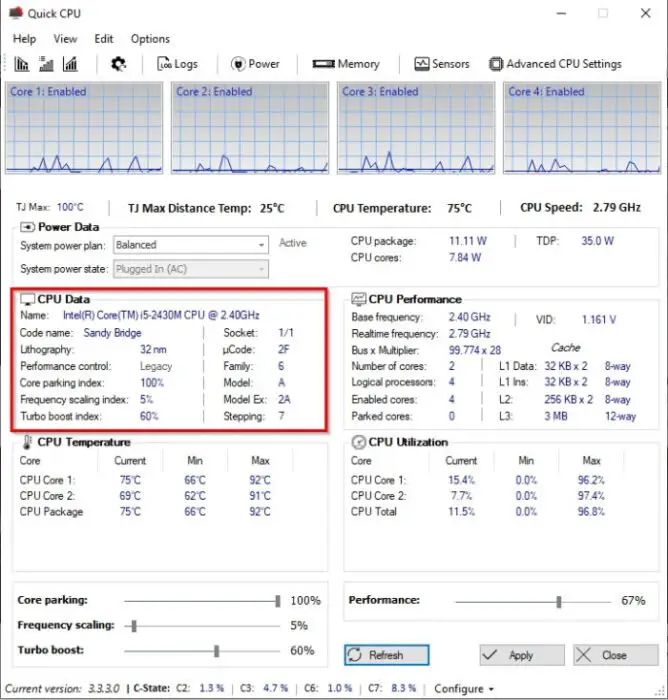
This section is perfect if you lack certain knowledge of the processor inside of your computer. It will show the name of the processor, the codename, the Lithography, socket, and more. Now, everything under this area can only be viewed, so do not attempt to interact.
3] CPU performance
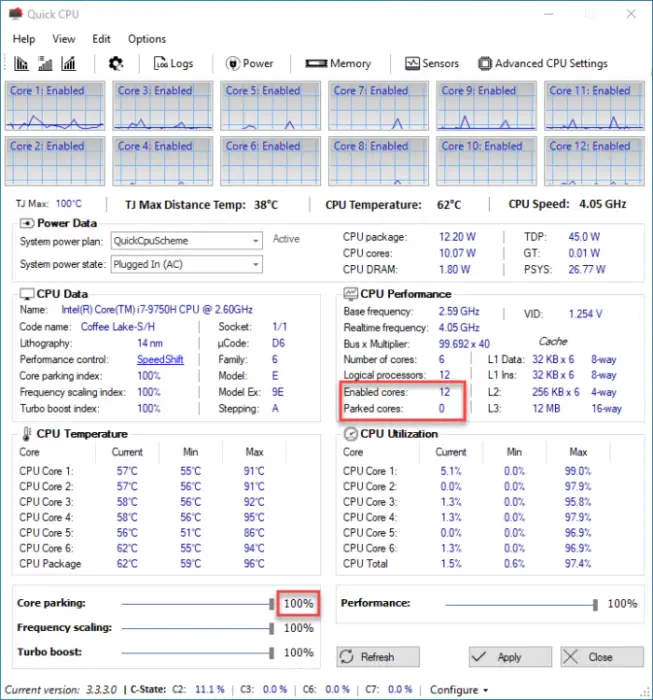
When it comes down to the CPU performance area, it is similar to CPU data wherein it only shows the information, but there is no ability to interact. If you want to know the base frequency pertaining to your processor, then this section will highlight such data.
It also shows evidence of the real-time frequency, number of cores, L1 data, and much more. If you are an advanced user, then you will certainly enjoy the data made available here.
4] CPU temperature
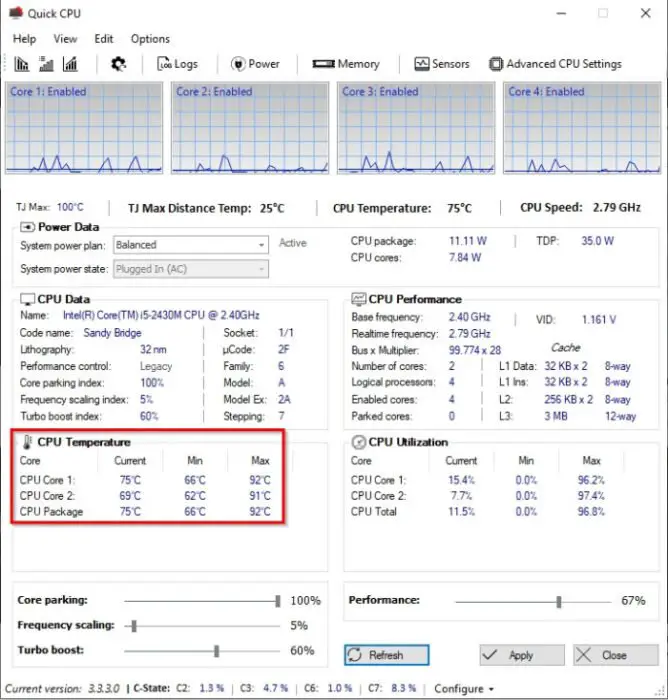
While it is possible to have a look at the CPU temperature via the Power Data section, it does not showcase everything. For example, you may need to know the temperature given off by each processor core, or even the package.
The CPU temperature area will bring such information to light. It doesn’t end there because it highlights the minimum and maximum temperature numbers that have been collected from the system.
5] Change system performance to fit your needs
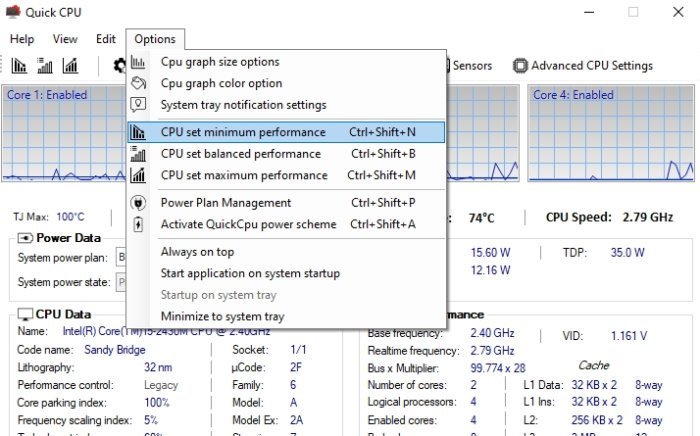
You will see three graph icons at the top of the Quick CPU tool. Selecting any will change your computer’s performance in real time. For example, the first option involves switching to Minimum Performance, the second sets your system to Balanced Performance, and the third focuses on Maximum Performance.
6] Power Plan Management
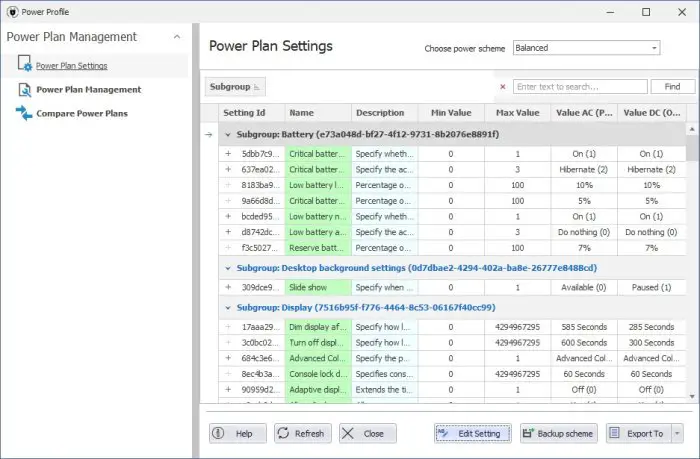
Managing your power plan is not that difficult in Windows 10 since the operating system comes with some built-in features designed for this. However, we believe the process is better when Quick CPU is the preferred choice.
To use this feature, click on the button that reads Power at the top, and right away a new window should appear.
You can change your Power Plan from here and get key insights about each plan. Furthermore, you can compare two power plans if that’s your thing.
7] Information on Installed Memory
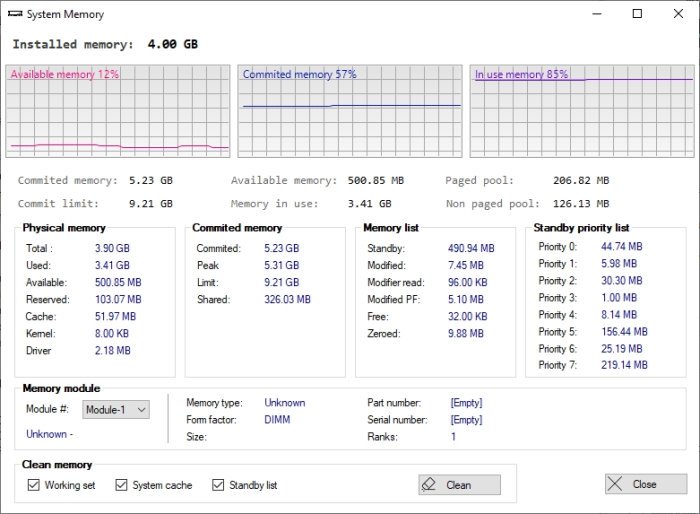
What is happening with your computer’s memory, you ask? Probably nothing, but it doesn’t hurt to know more. You see, by clicking on the Memory button, a new window will appear, which displays the memory in use, the amount committed, and the memory currently available.
You can look at this via raw numbers or just from a percentage point of view.
8] What is CPU core parking?
This feature has been around since Windows Server 2008 R2, which is quite a long time ago. From what we have gathered, whenever CPU core parking is active, the processor power management (PPM) engine works alongside the scheduler to dynamically modify the number of cores that are accessible to run threads.
From our point of view, the primary reason to use CPU core parking is to potentially increase energy productivity while reducing usage.
Still, we should point out that if you don’t do heavy gaming, you don’t need to fiddle with CPU parking at all. Furthermore, if you don’t run your computer 24/7, having parking disabled won’t increase your electrical bills. You can download it from coderbag.com.
TIP: ParkControl lets you tweak Core Parking and CPU Frequency Scaling settings.
Leave a Reply