The Razer Audio Visualizer allows the Razer Chroma Keyboard’s RGB lights to get synchronized with the audio that’s playing. However, a lot of users reported that Razer Audio Visualizer is not working on their Windows 11 or Windows 10 computers. According to them, even though, the app is running in the background, their keyboard’s RGB doesn’t seem to move as per the music that’s playing in the background. In this post, we will be talking about this issue and see how it can be resolved.

Fix Razer Audio Visualizer not working on Windows 11/10
If Razer Audio Visualizer is not working on a Windows 11/10, the user can execute the following solutions.
- Check if your device is compatible
- Make sure that Razer services are running
- Install or Reinstall Chrome SDK
- Update Auto Visualizer
- Enable Chrome Apps
- Download and Install the latest version of Visual C++ Redistributable
- Reinstall Razer Synapse App
Let us talk about them in detail.
1] Check if your device is compatible
The first thing you need to do is check if the device you want to run Razer Audio Visualizer actually supports the feature. To do the same, razer.com and check if the device is compatible. If it is a Razer device, then most probably, it will be compatible. In case, it is not compatible, there is no point in probing further.
2] Make sure that Razer services are running
Next up, we should check if the Razer services are running in the background or not. In case, they are not working, you won’t be able to use the Razer Audio Visualizer. To do the same, open Search by Win + S, type “msconfig” and hit Enter. Look for Razer Chroma SDK Server and Razer Chroma SDK Service. If the box of these services is unticked, tick the box associated with both these services and restart your computer. Hopefully, this will do the trick for you.
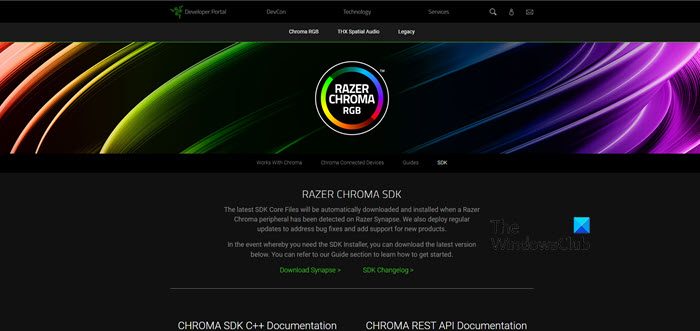
3] Install or Reinstall Chrome SDK

In order for you to use the Razer Audio Visualizer, Chrome SDK is a must-have. So, go and check if you have this tool. In case, you don’t have this tool, go to developer.razon.com and download the Chrome SDK. In case, you already have Chrome SDK, uninstall it from your computer and then reinstall the same. Hopefully, this will do the trick for you.
4] Update Audio Visualizer

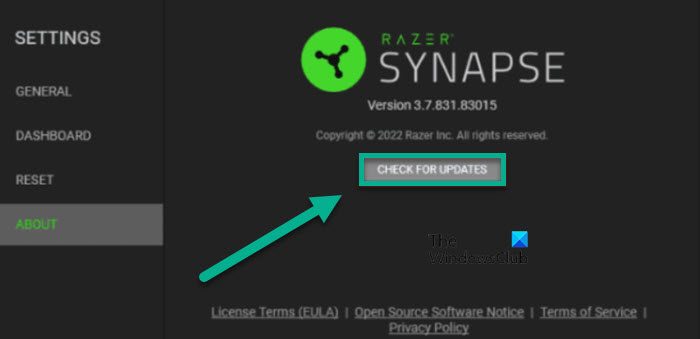
Maybe you are facing this issue because of a bug. Since we are not developers at Razer, we can not do anything other than wait for an update to fix this issue. Keep in mind though, most probably, there is an update available by the time you are reading this post. To update the Audio Visualizer tool, follow the prescribed steps.
- Launch the Ryzer Synapse app by searching it out from the Start Menu.
- Go to the Settings.
- Finally, click on ABOUT > CHECK FOR UPDATES.
If there is an update available, it will be downloaded, and hopefully, your issue will be resolved.
5] Enable Chroma Apps
Since the feature relies on Google Chrome, it is necessary to enable the Chrome Apps in the Ryzer Synapse program. This feature is enabled by default, but sometimes, it gets disabled and stops the user from using this feature. To enable Chrome Apps, follow the prescribed steps.
- Launch Razer Synapse.
- Go to Dashboard and then to Chroma Connect.
- In the APPS tab, enable to toggle of CHROMA APPS.
Finally, check if the issue is resolved.
6] Download and Install the latest version of Visual C++ Redistributable
Another tool that’s required for the Razer Audio Visualizer to work is Visual C++ Redistributable. This tool is needed to create an environment for all apps that are written in C++ to work. More often than not, Visual C++ Redistributable is installed on a Windows PC, but it may get outdated or corrupted. Either way, we need to install the latest version of Visual C++ Redistributable and then see if the Audio Visualizer is working or not.
7] Increase Amplitude
Sometimes, the Amplitude is so low that it can’t allow the RGB to change its colors. Some users reported that they were able to make the RGB of the keyboard reverberate with the music that was playing. We will be doing the same and see if that helps. Follow the prescribed steps to do the same.
- Open the Razer Synapse app on your computer.
- Go to the Keyboard Window.
- Look for Amplitude (%), and in the field, type a number above 7000.
- Finally, save your settings and close the window.
Hopefully, this will allow the Audio Visualizer to catch the music that’s playing and change the color of RGB strips accordingly.
8] Reinstall Razer Synapse App
If nothing worked, your last resort is to reinstall the Razer Synapse app. So, go ahead and uninstall the Razer Synapse app, then go to razer.com to download a fresh copy of the app. Finally, go to the Download folder, open the installation media and follow the on-screen instructions to install the app. Hopefully, this will do the job for you.
Hopefully, you can resolve the issue using the solutions mentioned in this post.
Read: Fix Razer Synapse does not recognize or detect my Razer device
How do I turn on my audio Razer Visualizer?
In order to turn on Razer Audio Visualizer, first you have to download the Audio Visualizer app from razer.com/chrome-workshop. Once the app is downloaded, open it, change the Amplitude because sometimes, it just doesn’t pick up, and finally, play some music. You will notice that the RGB on your keyboard will change its color depending on the beats of the music.
Read: Razer Synapse not opening on startup in Windows 11/10
What is Chroma Visualizer Razer?
Chrome Visualizer or Audio Visualizer is an app that allows the keyboard to dance to the beat of the music that’s playing in the background. It picks up the sound wave of the music that’s playing and then changes the color of your keyboard’s RGB based on those waveforms. This will not only work with songs but will also catch the waveform of videos and games.
Also Read: Razer Cortex Game Booster helps boost Gaming performance.
Leave a Reply