Connector Retasking feature in Realtek Audio Console allows you to reassign the function of audio jacks on your computer. It enables you to change the functions of each audio jack as per your requirements. However, this function doesn’t seem to work for some Windows users.
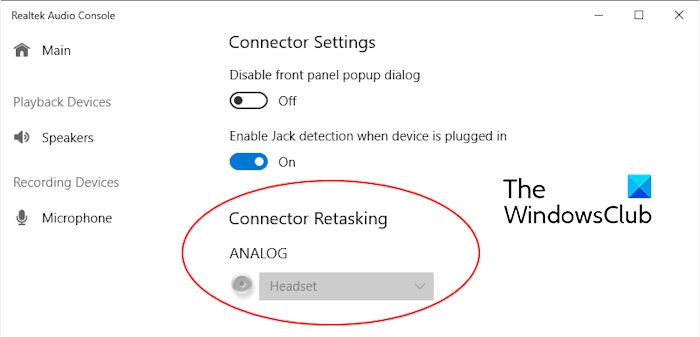
As reported by some, Connector Retasking is either greyed out or disappeared from the app. Now, if you’re facing the same issue, we’ll help you fix it. Take a look at the fixes below.
Realtek Audio Console Connector Retasking greyed out or disappeared
If the Connector Retasking option is greyed out, disappeared, or not working correctly in your Realtek Audio Console on Windows 11/10, you can use the below solutions to fix the issue:
- Use some generic troubleshooting methods.
- Update or reinstall your audio driver.
- Roll back to a previous version of the audio driver.
- Change sound settings.
- Disable the front panel auto popup dialog.
- Uninstall and reinstall Realtek Audio Console.
1] Use some generic troubleshooting methods
At first, we recommend trying some standard troubleshooting methods to fix this issue. Here are some of these methods:
- Restart your computer and then open Realtek Audio Console to see if the problem is fixed.
- This issue could be a result of a connection fault. So, ensure that your audio devices are correctly connected to the right ports on your system.
- You can also try running the Audio troubleshooter to fix the issue. To run it, open Settings using Win+I, go to System > Troubleshoot, click on Other troubleshooters, and click on the Run button next to the Audio troubleshooter.
- Also, try using a generic version of Realtek Audio Console instead of a custom one and check if it works.
If the above solutions don’t work, you can follow another suitable fix from this guide.
2] Update or reinstall your audio driver
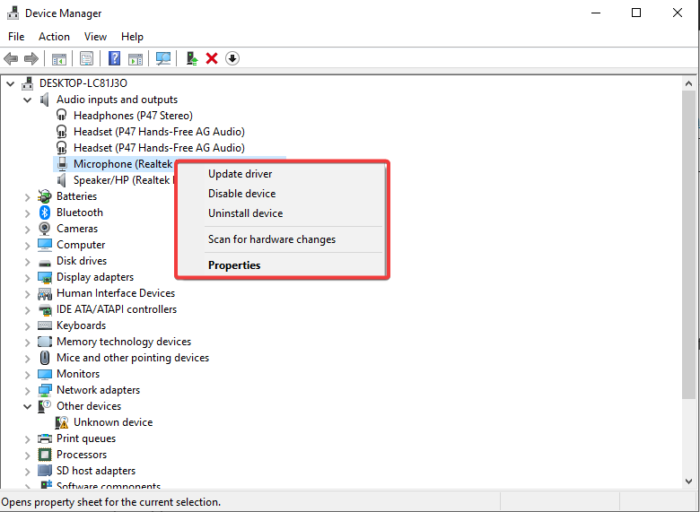
Outdated, corrupted, or problematic audio drivers can also cause this issue. Hence, ensure that you have up-to-date Audio drivers installed on your computer.
In case you have already updated your audio driver still this issue occurs, your audio driver is likely to be faulty. So, in that case, go ahead and uninstall and reinstall your audio driver.
3] Roll back to a previous version of the audio driver
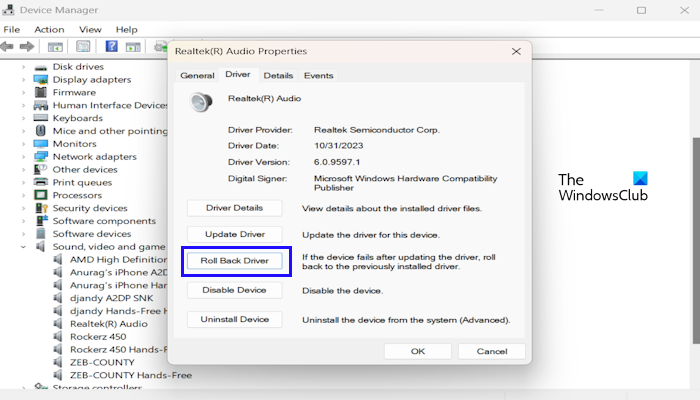
In a few instances, this problem might be caused right after installing an audio driver update. Hence, if the scenario applies, you can rollback your audio driver to a previous version and then see if the issue is resolved. Here’s how:
- First, open Device Manager from the Win+X menu.
- Now, expand the Sound, video, and game controllers category and right-click on your audio device.
- Next, choose the Properties option.
- After that, go to the Driver tab and click on the Roll Back Driver button.
- Once done, check if the Connector Retasking feature is working fine.
Read: Install Realtek HD Audio Driver Failure, Error 0x00005b3.
4] Change sound settings
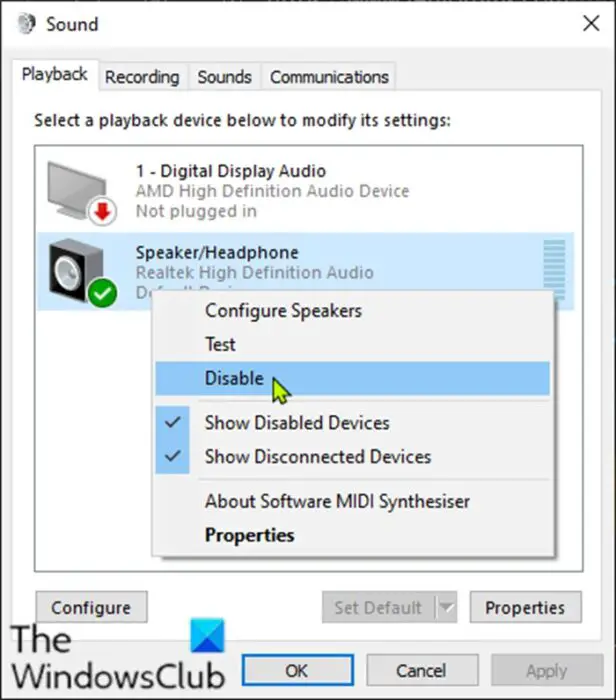
Some of your PC’s sound settings might be causing this problem. So, you can try adjusting Windows sound settings accordingly and see if it helps. Here’s how:
- First, open the Control Panel and set the View by option to Large icons.
- Now, click on the Sound option and move to the Playback tab.
- After that, right-click on the correct speaker device and make sure it is enabled.
- Then, choose the speaker and click on the Set Default button.
- Next, select the device again, click on Properties, and go to the Advanced tab.
- Next, uncheck the Allow Application to take exclusive controls on this device box and press the OK button.
- Once done, restart your PC and see if the issue is fixed now.
Read: Realtek HD audio manager not working or showing on Windows.
5] Disable the front panel auto popup dialog
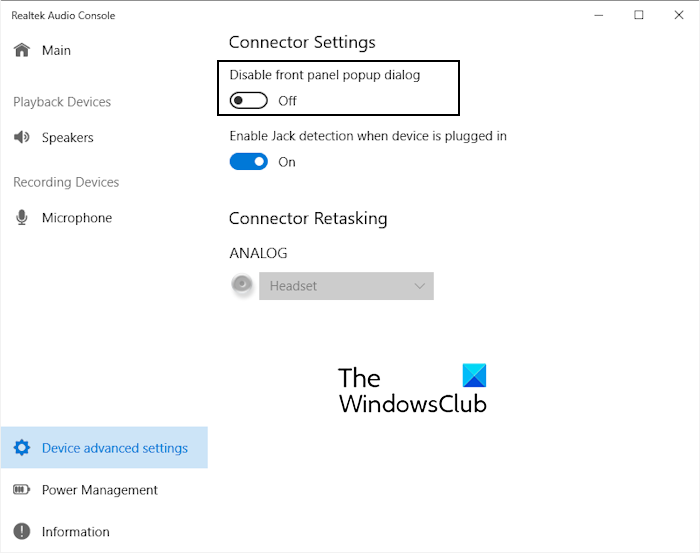
Some users have recommended disabling the front panel auto popup dialog to fix the problem. So, you can try doing the same and see if it helps. Here are the steps to do that:
- First, open the Realtek Audio Console and go to connector settings by clicking on the Device advanced settings option.
- Now, turn on the toggle associated with the Disable front panel auto popup option.
- Next, turn on the toggle associated with the Enable jack detection when device is plugged in option.
- Once done, restart the application and see if the issue is resolved.
6] Uninstall and reinstall Realtek Audio Console
If nothing helps, it might be corruption in the application itself. Hence, as a last resort, you can uninstall Realtek Audio Console and then reinstall the app on your system to fix the issue.
See: Realtek Audio Console missing from the Microsoft Store.
I hope this helps!
Why can’t I connect to Realtek audio console?
If your Realtek Audio Console shows the Cannot connect to RPC service error, it is likely that your Realtek audio driver is outdated. Hence, update your audio driver to its latest version and check if the error is gone. Besides that, you can also uninstall and then reinstall the driver to remove driver corruption that might be causing the error.
How do I fix Realtek audio console loading?
If the Realtek Audio Console is not loading, you can try using Realtek HD Audio Manager. You can also update your audio driver via Device Manager, reinstall it, or roll back to an older version to check if the problem is resolved.
Now read: Realtek Audio Console doesn’t support for this machine.
Leave a Reply