Now, never miss a single key point in a lecture with Microsoft OneNote! It is the right tool for users who always want to have an audio/video copy of the lecture to verify notes taken in class. Students can use a video recording to capture an important demonstration. All you need to have is OneNote with you. We have already seen create Text-based OneNote Flash Cards and Image-based Flash Cards. Today we will see how to record Audio or Video with OneNote.
Most current models of laptops and portable computers have a built-in microphone that allows you to record audio in OneNote using no additional hardware. For a video, you need to have a digital camera capable of recording movie clips, such as a webcam connected.
How to record Audio or Video with OneNote
You require Microsoft DirectX 9.0a or later and Microsoft Windows Media Player 9 or later to record audio or video clips in OneNote.
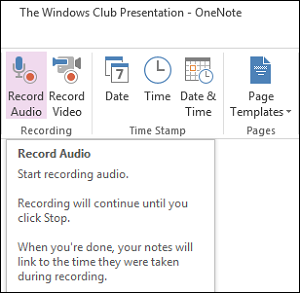
Open the OneNote app and click the location on the page where you want to place the recording. Now, select the ‘Insert’ tab and click the ‘Audio Recording’ option. On the Standard toolbar, you can click the arrow next to the Record button and then click either Record Audio Only or Record Video.

You can display the icon above or below the ribbon to quickly access the toolbar. Just right-click the mouse button and select the desired option.
![]()
Once you select ‘Audio Recording’ option, a timestamp will be placed on the page. Start recording your audio notes. You can see a notification indicating the recording has started.
![]()
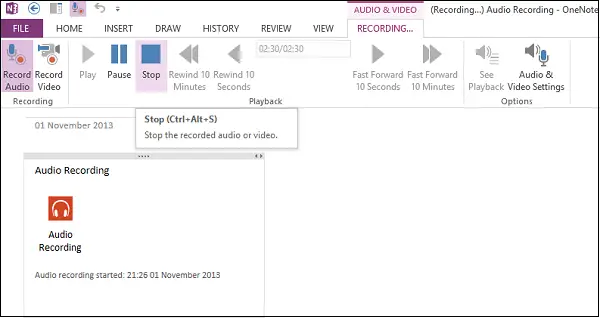
To stop the recording, click Stop Button image on the Audio and Video Recording toolbar. OneNote records the sound clip as a .wma file. Click the icon next to the notes to see or hear the portion of the recording that’s associated with those notes.

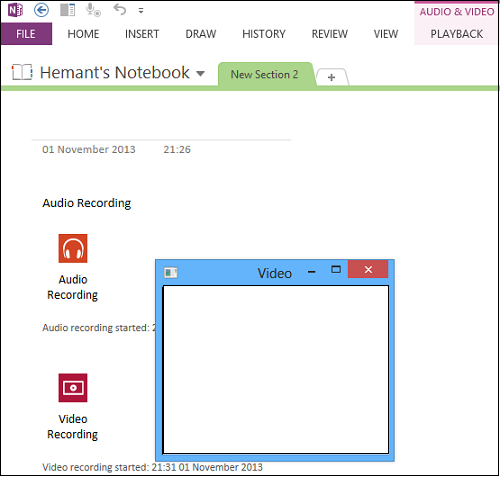
For video recording, select the option adjacent to Audio Recording – Video Recording. A window should appear confirming video recording has started. To stop the recording, simply hit the ‘Stop’ button. OneNote combines audio and video in a .wmv file.

By default, the See Playback button on the Audio and Video Recording toolbar is active.
In this way, you can use OneNote to record audio or video.
OneNote audio recording is not working

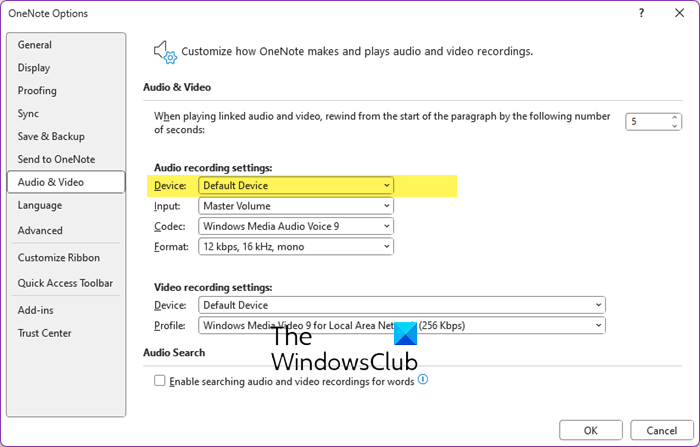
If OneNote audio recording is not working, you have to make sure that the input device is not muted or bypassed. Open OneNote > File > Options > Choose Audio & Video and make sure the correct microphone is selected in the dropdown menu – usually Default Device. Now start the audio recording capture within OneNote and see. If that does not help, update or repair OneNore and see.
TIP: These instant tips to make Office OneNote more productive will interest you too.
Also read about the voice Recorder app in Windows.
Thanks, Hemant. Following your instructions I was able to quickly make a video in my OneNote 2013. DO you find that the video and audio are out of sync on playback?
You won’t see Playback button for an audio
clip, despite the button’s name. Also, you will not observe playback controls when hovering over
prerecorded clips; the controls show up only with clips that you
recorded using OneNote.
Thanks for the reply.
I created a test video in OneNote 2013.
It worked as expected.
It is not usable, however, as there is a delay between the audio and video on playback so that my voice is out of sync with the video. I wonder what can be done to minimize or remove the delay?
You might try acethinker free screen grabber, It’s a free web-based application. I always use it to record audio and screen on my laptop. It works perferly. Never had the video and audio ouf of sync problem.