Xbox One not only takes screenshots, but it also allows gamers to record, share, and manage game clips. That said, while Xbox One allows basic functions natively, the Xbox Team has a dedicated application – Upload Studio – to enhance the overall experience. But let’s first learn how to capture game clips.
How to capture Game Clips on Xbox One
- Launch a game. You can start playing it for the best results.
- When you find a moment of which you want to take a screenshot, press the Xbox Button on your controller.
- Press X button on your controller, and it will record 15 seconds of that gameplay.
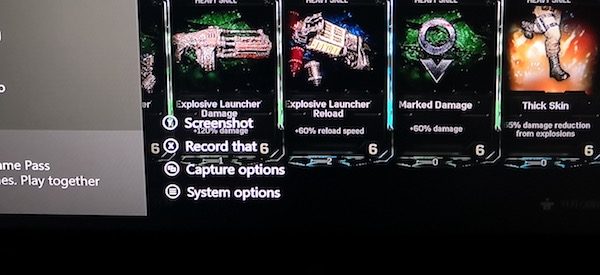
If that’s not enough, there is more.
1] Increase Instant Recording Time:
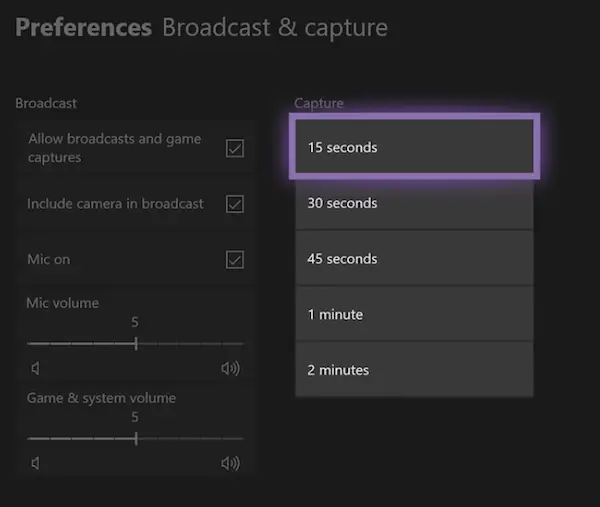
- Go to Settings > Preferences > Broadcast & capture > Capture
- Here, you can change the duration of the default recording from 15 seconds to 2 minutes.
- In case you are set to 720P video recording, you can switch to 1080P as well.
Read: Multiple ways to record Xbox One Gameplay Videos with Audio
2] Record Previous Moments of GamePlay:
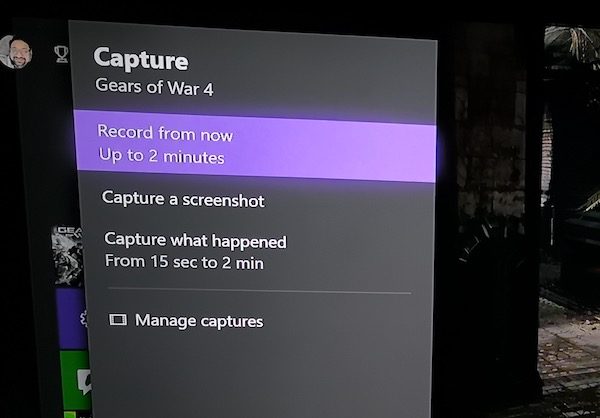
You would want to record something amazing that you just did seconds ago. To do this, you can open the Capture Option and select Capture what happened from 15 sec to 2 min. The game will not pause when you do that, so you might have to think about crucial moments before recording it.
Download & Install Upload Studio
The app is not installed, but whenever you try editing, it will take you to the Store and ask you to download it.
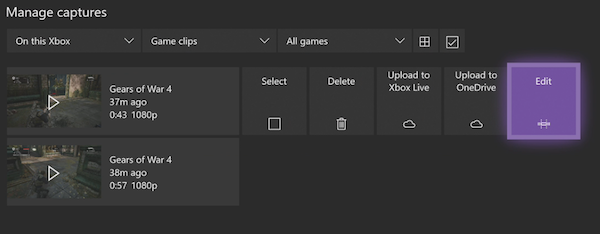
- Open the Guide, and using the View Button, open Capture Options > Manage Captures.
- Filter to display only Game Clips.
- Now select the Game Clip you want to edit and then more actions > edit
- This will launch the Upload Studio in the Store if it’s not installed.
- Select Game DVR, and then select View all captures.
- Launch Upload Studio when it finishes installing.
Upload Studio is no simple editing tool, by this, I mean, it offers a lot of features, and the ability to upload 30 minutes of clips that you don’t really need a dedicated PC unless you are a professional.
Upload Studio features:
- Add up to 15 unique segments, i.e., effects.
- If you are recording yourself with Kinect, you can add yourself there too.
- Upload Clip Templates along with 140+ new effects to apply to your clips.
- Option to add a voiceover to individual clips or your entire video.
- Add text, all-new intros, outros, transitions and splash screen.
How to edit your game clips on Xbox One
Open Upload Studio, and then select Manage Clips. This will open the Xbox DVR, where you can see all your Captures. Filter with On this Xbox and Game clips. Navigate to the clip you want to edit, and Select EDIT. It will launch Upload Studio with that game clip.
You get all editing options, including Trimming and Add Voiceover. Select Trim to make sure you can remove things that weren’t needed. Here, you must use the Xbox One controller sticks to trim parts from left and right. You can also change the timeline by moving down and shifting the entire timeline.
If you want to combine multiple clips, you can use the Plus button, available both on left, and right, to add clips accordingly from the DVR.
You may click on the following images to enlarge them.
Once done, you can upload it to OneDrive by selecting Finish. It will also be uploaded to Xbox Live, and it sends out a warning about the Privacy & Xbox Live code of conduct.
In Short, All clips uploaded to Xbox Live need to follow the Xbox Live code of conduct. If they don’t fall into the guidelines, the clip will not be shown to all. So if your clip takes a bit of time to show in the Live feed, that’s the reason.
About Privacy & Online Safety
It is always a good idea to check who can see your game clips and screenshots. Go to Settings > Account > Privacy & online safety. Here you can configure the following options:
- Who can see your videos outside of XBox Live? You can choose between Friends and Everybody or completely block it.
- Choose to block sharing outside Xbox Live.
- The same configuration can be selected for your profile, live broadcast, and Kinect or Webcam.
Read next: How to edit and share game clips with Game DVR in Xbox app.
How to share game clips from Xbox One
- Open Manage Captures
- Filter Game Clips
- Select Game Clip you want to share
- Select the Share Icon, and from here you can share to Activity Feed, Message, Club, Twitter, and OneDrive.
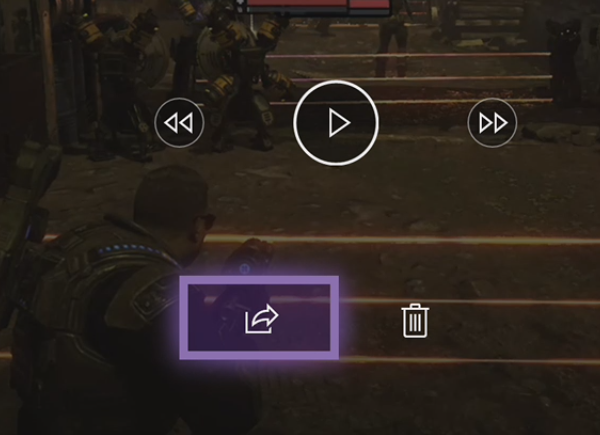
Game Clips you edited using Upload Studio are instantly uploaded to Xbox Live. However, if your settings don’t allow it, then you can always come back here and then share it manually.
Read: How to share Xbox game clips to Social Networks from your Phone
How to delete Gameclips on Xbox Live
If you wish to delete any clip that you uploaded to Xbox Live, then go to Manage Captures, make sure Xbox Live is selected, and then filter out Screenshots. Then, use the right bumper to select the multi-select option, which is at the extreme right. Here, you can select one or multiple game clips to delete.
This covers most of the things you will need to edit your clips right on Xbox One. If you need professional editing, it’s a good idea to use an external drive and save everything there. However, you will have to appreciate the kind of features you get from Upload Studio, which helps so many.
Read: How to use Game Bar or Game DVR Screen Recorder in Windows.


Leave a Reply