There are various releases of Windows like Windows 11, Windows 10, Windows 7, and so on. With every release, Microsoft releases a set of new feature sets for applications called APIs. These APIs helped these developers build applications in such a way that they can utilize the whole potential of the new Windows Operating System release. Therefore, there were often problems encountered by older applications on newer operating systems.
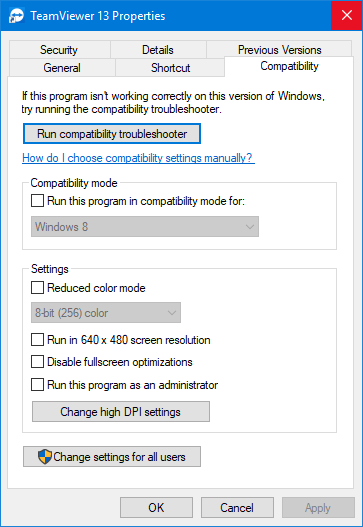
To solve this, Microsoft started providing a Compatibility Tab with all the actionable measure to help these older applications to run on newer Operating Systems.

At times, system administrators might need that tab disabled. This can be adopted by smaller businesses to prevent their employees from messing up with the compatibility settings and messing up the normal execution of all the programs. Because with the help of the automatic Program Compatibility troubleshooter or by adjusting the menus and dropdowns manually, you can modify how the application executes on your computer.
Based on the operating system, you can even control what the real execution method be internally in the operating system, or what colors and DPI scaling the applications use when executed. You can also control the permissions that the application gets upon its execution like if it is allowed to run in windowed mode or full-screen mode or if it gets an Administrator-level permissions every time the application is executed. Now, without any further ado, let us just check now how to disable this tab in the File Properties window.
Remove Compatibility Tab from File Properties
First, make a System Restore Point just in case something gets messed up, and you need to undo those errors.
Method 1: Using the Registry Editor
Start by hitting the WINKEY + R button combination to start the Run box and type in regedit and then finally hit Enter.
Now, navigate to the following registry path,
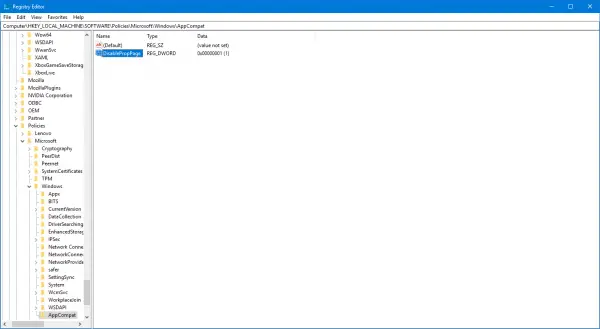
HKEY_LOCAL_MACHINE\SOFTWARE\Policies\Microsoft\Windows
Right-click on the Windows folder in the left pane and click on New > Key.

Name this key as AppCompat and then hit Enter.
Now right click on AppCompat, select New > DWORD (32-bit) Value.
Name this newly created DWORD as DisablePropPage and then hit Enter.
Double click on DisablePropPage key and set the Value data to 1. Make sure that the base is selected as Hexadecimal.
Now, click on OK.
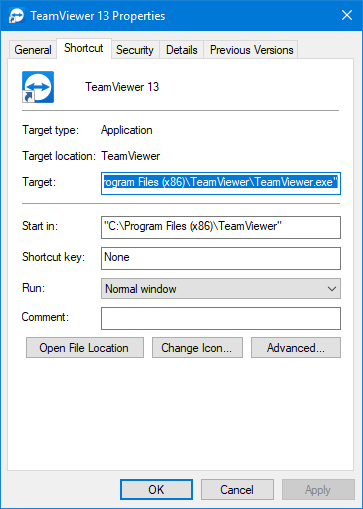
Now, the Compatibility Tab that you find under the properties of an executable file is now gone.
In case, you decide to undo these changes; you can just navigate to the path mentioned.
Method 2: Using the Group Policy Editor
It is worth a note that this method would not work if you are running Windows 11/10 Home edition.
First of all, start by hitting the WINKEY + R button combination to start the Run box and type in gpedit.msc and then finally hit Enter.
Now, navigate to the following path inside the Group Policy Editor-
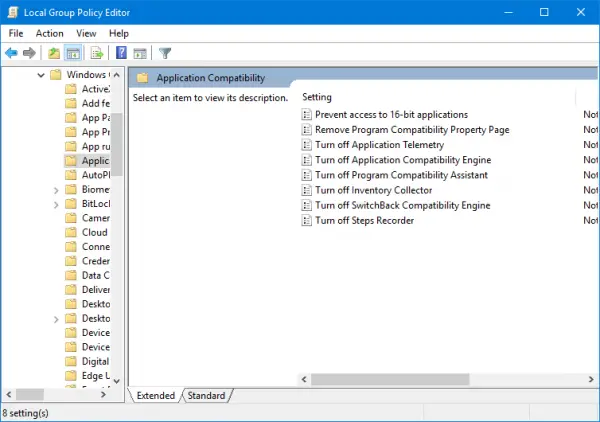
Computer Configuration -> Administrative Templates -> Windows Components -> Application Compatibility
After you reach to that path, double-click on Remove Program Compatibility Property Page.

Now, if you wish to remove the Compatibility Tab select the radio button labeled as Enabled. Or if you want it to be enabled, select either Not Configured or Disabled.
After that, first, click on Apply and then click OK.
Reboot your computer for the changes to take effect.

Now, this is how your File Properties would look like after disabling the Compatibility Tab.
No Compatibility tab in Properties in Windows 11/10?
If you find that the Compatibility tab is missing in Properties in Windows 10. you now know what to do, you need to check your Registry or Group Policy settings as discussed above and do the needful.
Basically, make sure that the value of DisablePropPage key is set to 0 and ensure that the Remove Program Compatibility Property Page setting is set to Not Configured.
Leave a Reply