When the computer boots, and you get to the login screen, The user image with the name is displayed. The image is one you have uploaded in the User account picture or the profile picture connected with your Microsoft account. In this post, we will share how to remove the default Windows 11/10 Sign in Picture.

Remove Windows Sign in User Account picture
Many a time, users don’t want to use a personal image, and the default image looks terrible. So it’s best to remove it. Follow these steps remove the Windows 11/10 sign in picture by following these steps:
- Replace the picture holder from Account pictures.
- Disable the feature via Registry or using Group Policy Editor
Make sure to create a restore point before going ahead with the methods.
1] Replace the Default PNG

Open the File Explorer, and under view, options enable hidden folder option and also enable the option to allow visibility option for extensions of files.
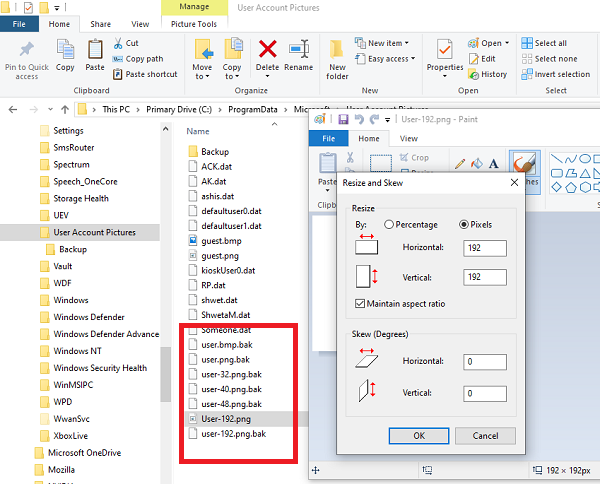
Then, navigate to C:\ProgramData\Microsoft\User Account Pictures.
Locate images with the name user.png, user-32.png, user-40.png, user-48.png, and user-192.png files. Rename the extension to anything random like user.png.twc and so on.
Create a PNG or transparent image of size 192X192 using your favorite image editor. Save it with the same respective names. As the photos will be transparent, it will be not visible.
If you want to have a different default image, you can create pictures with the same name, and resolution and place it here.
2] Disable via Registry or Group Policy Editor
In both cases, we are forcing the OS to use the default image placed by us for all users.
Using Registry

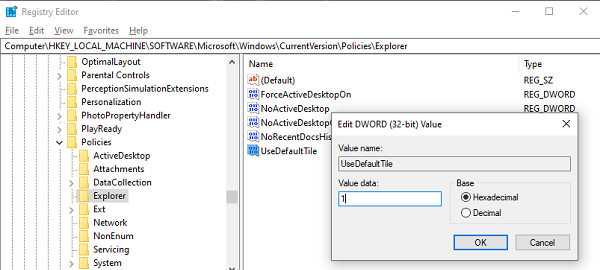
Open the Registry Editor and navigate to:
HKEY_LOCAL_MACHINE\SOFTWARE\Microsoft\Windows\CurrentVersion\Policies\Explorer
Now follow these steps:
- Right-click anywhere in the blank space in the right pane.
- Select New > DWORD (32-bit) Value.
- Set the name as UseDefaultTile.
- Double-click on UseDefaultTile to edit value
- Set the Value Data to 1.
Disable via Group Policy Editor

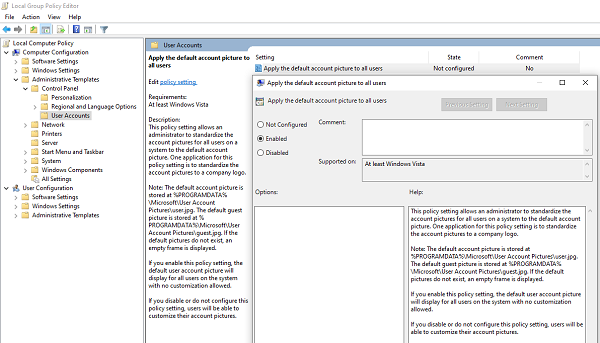
Open the Group Policy Editor and navigate to:
Computer Configuration\Administrative Templates\Control Panel\User accounts
Find the policy which says Apply the default account picture to all users. Double-click on it to open its configuration panel. Select Enabled and click on OK/Apply and exit.
We hope you found the steps easy to follow, and you were successful in making the changes.
Leave a Reply