The Java application runs on most of the systems, including Linux, Mac, and Windows. Installing Java poses a high-security risk and it is not recommended to use Java unless you require it for your business environment. Generally, users remove Java either to improve the system security or to remove the older Java versions in order to install the latest versions.
Java listing in Control Panel remains even after uninstalling it
Uninstalling Java is not at all a strenuous task. Java users can uninstall the versions of Java manually, identical to how you would uninstall any other software application from the Windows system. However, some users still see the Java icon in the Windows Control Panel even after uninstalling the Java program. This happens due to the incomplete uninstall process. After Java uninstallation, the Java registry keys are still present in the Windows registry despite removing the Java program from the system. This usually occurs if the Java installer fails to remove the registry keys from the Windows registry during the Java uninstalling process. Since the registry key is still present in the Windows registry, Java is still visible on the Windows Control Panel.
To fix this problem, users may have to clean up the corrupted registry key that leads to incomplete installation. Additionally, users may want to run the Microsoft utility or manually edit the registry. In this article, we explain how to remove the Java listing in Windows Install/Remove programs.
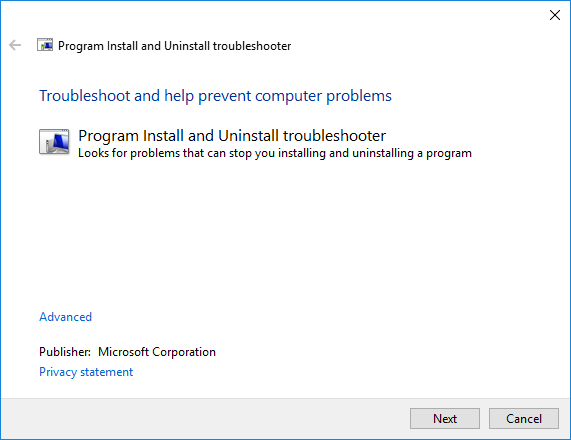
1] Run the Program Install & Uninstall Troubleshooter
If you face difficulty removing software, the corrupted registry keys are the main culprit. Running the Program Install & Uninstall Troubleshooter will repair the corrupted registry keys automatically. Following steps will guide you on how to run the Microsoft utility
Click on Run or Open in the File Download dialog box.

Follow the steps to run the troubleshooter and once done, restart your computer and check.
2] Edit the Windows Registry Editor
Open Run [Windows + R] and type regedit and click on OK to open the Windows Registry Editor.
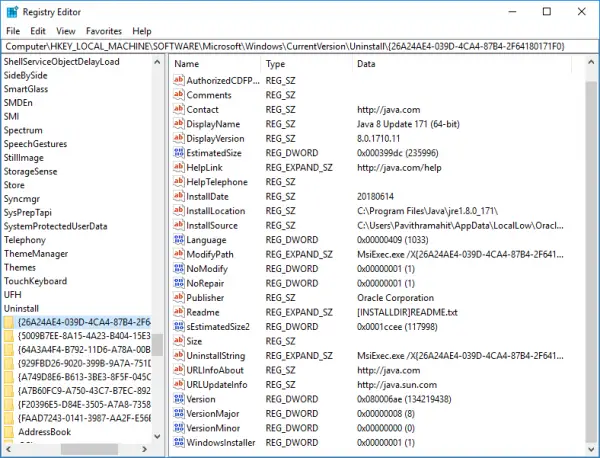
Go to the following path-
HKEY_LOCAL_MACHINE/Software/Microsoft/Windows/CurrentVersion/Uninstall

Under the Uninstall folder, you will see the registry entry names enclosed in the curly bracket. Click on each registry entry name to find the Java keys and its associated on the right pane of the Registry editor.
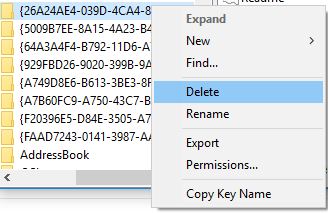
Once you locate the keys, for the respective Java version, right click on the registry key name and click on Delete.

Now navigate to Windows Control Panel and confirm that the Java icon is no more visible.
I hope this works for you.
Leave a Reply