If you have upgraded your Windows 11/10 to the latest version currently available and are very sure that you do not want to roll back Windows to an earlier installation, you may run the Disk Cleanup Tool to remove previous Windows installations after the Windows Upgrade and free up disk space.
Delete Previous Windows installation(s)
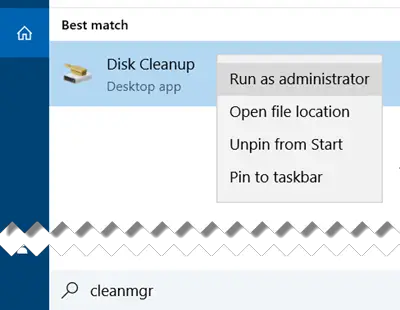
After upgrading Windows 11/10 to a newer version, you can free up several GBs of disk space by using the Remove previous Windows installations option in Disk Cleanup Tool. To do this, type cleanmgr in Start search, right-click on it and select Run as administrator to open the Disk Cleanup Tool in an elevated mode.

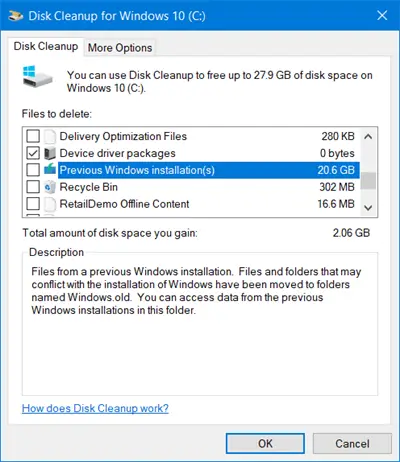
Once the tool opens, scroll down till you see Previous Windows installation(s). This will remove the Windows.old folder. Check this option and press on OK.

You will be warned that if you clean up the previous Windows installations or Temporary installation files, you will no longer be able to restore the machine mack to the previous version of Windows.
Click on Yes to proceed.
While there you may also want to delete these upgrade & installation files:
- Windows upgrade logs files: These files contain information that may help you troubleshoot the upgrade & installation process. If your process has gone smoothly, you may delete these files.
- Windows ESD installation files: If you do not need to reset or refresh your PC, you may delete these files.
- Temporary Windows installation files: These installation files are used by Windows setup and they can be safely deleted.
Of course, if you do not do this, Windows will still run a scheduled task later on to remove these installation files.
Is it safe to delete previous Windows installations in Windows 11?
Yes, it is safe to delete previous Windows installations in Windows 11 if you don’t plan to return to an earlier version. Removing these files can free up significant hard drive space, improving system performance. However, ensure your current setup is stable and satisfactory before deleting the old version.
How to remove old Windows installation files after you upgrade?
To remove old Windows installation files post-upgrade, use Disk Cleanup. Search for ‘Disk Cleanup’ in the Start menu, select the drive, and click ‘Clean up system files.’ Check ‘Previous Windows installation(s)’ and confirm to delete.
Leave a Reply