Task View is a desktop feature in Windows 11/10 that allows users to create multiple desktops on the same Windows PC. This is something similar to the Expose in OSX. This button on the taskbar also allows for quick switching between open files and quick access to any desktops you create. You can create additional desktops, and switch between them easily. This post shows how to use Virtual Desktops in Windows 11/10.
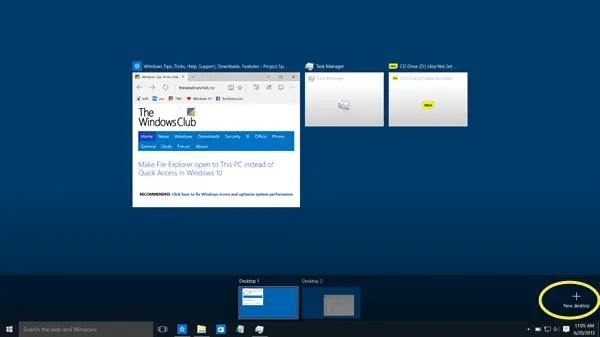
Task View is a virtual desktop manager for Windows 11/10, and is launched, when you click on its button, next to the Search bar on the taskbar. Using this feature, you can create different arrangements for your running apps and open programs.
Create new Desktops, open different apps in each, work in each or any of them whenever you want, close the opened desktops when you finish work, etc. You can switch between applications, and you can also move an application from one desktop to another.
This feature augments a snapping feature called Snap Assist, which can help you snap different windows in any arrangement, a little more easily.
Read: Task View or Virtual Desktop features.
Remove Task View button from Windows 11 Taskbar
You can remove the Task View button from Windows 11 Taskbar by the following two methods:
- By unpinning it from the Taskbar.
- From the Settings app.
Let’s see both of these methods.
1] Remove the Task View button from Windows 11 Taskbar by unpinning it
This is the simplest method to remove the Task View button from Windows 11 Taskbar. Follow the steps below:
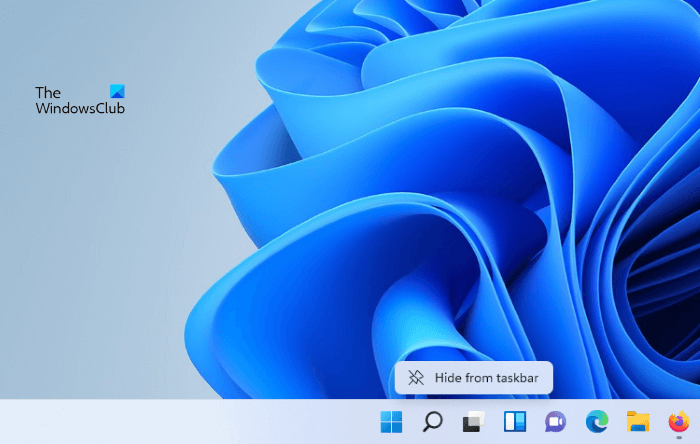
- Right-click on the Task View button on the Taskbar.
- Click Hide from Taskbar.
This will unpin the Task View button from your Windows 11 Taskbar. To pin the Task View button again on the Taskbar, turn the task View button on via Windows 11 Settings. We have described the process below.
2] Remove the Task View button from Windows 11 Taskbar via the Settings app
Now, let’s see the procedure to remove the Task View button from Windows 11 Taskbar via the Settings app.
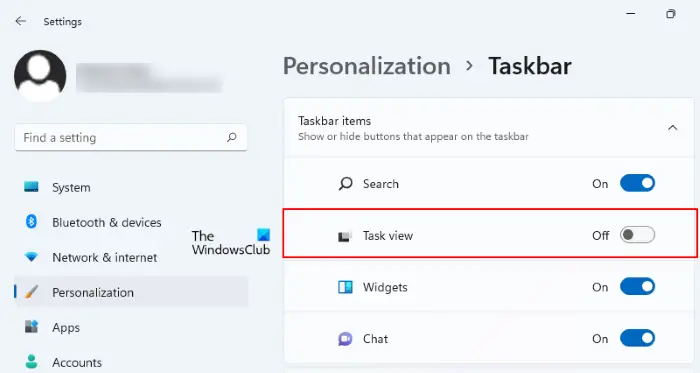
- Press Win + I hotkeys to launch the Settings app.
- Select Personalization from the left side.
- Scroll down the right side and click on the Taskbar tab.
- Click on the Taskbar items tab to expand it.
- Now, click on the Task View button to turn it off.
To add the Task View button again on the Taskbar, turn the Task View switch on.
Remove Task View button from Windows 10 Taskbar
If you have no use for this feature, you can easily disable and remove the Task View icon or button from the taskbar.
Simply right-click anywhere on the taskbar and uncheck the Show Task View button. It’s so simple!
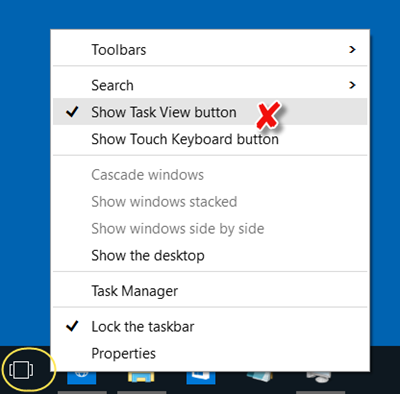
No need to touch the registry. Do this and you will find the Quick View icon disappears.
Remove the Task View button from Windows 11/10 using Registry Editor
Here, we are going to explain how you can remove the Task View button from the Taskbar via the Registry Editor. For this, you have to do some modifications to the registry. Follow the process carefully as any incorrect entry in the Registry key may lead to serious errors on your system. Therefore, it will be better if you create a backup of your Registry. You can restore the Registry from this backup in case any error occurs.
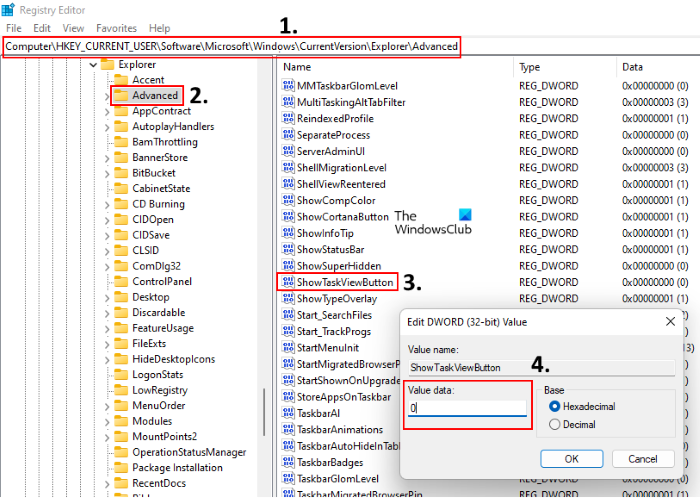
Navigate to the following Registry key:
HKEY_CURRENT_USER\Software\Microsoft\Windows\CurrentVersion\Explorer\Advanced
Here, change the value of the ShowTaskViewButton DWORD:
- 0 = Hide Task view button
- 1 = Show Task view button
Where is the Task View button on the Taskbar?
In Windows 11, the Task View button is available next to the Search icon on the Taskbar, whereas, in Windows 10, it is available next to the Search Bar on the Taskbar. It lets users create multiple desktops on a single computer.
How do I disable virtual desktops?
You can disable the virtual desktops on Windows 11/10 computers by disabling the Task View button. We have explained the process above in this article. If you want to permanently disable the virtual desktops, you have to modify a key in the Registry Editor.
TIP: You can Disable the Cortana & Search Box too if you do not use it.