If you’re encountering the Error 0x80070718: Not enough quota is available to process this command message when working with files/documents on your Windows 11/10 device. This post is intended to help you. In this post, we will provide the most appropriate solutions you can try to help you remediate this issue.

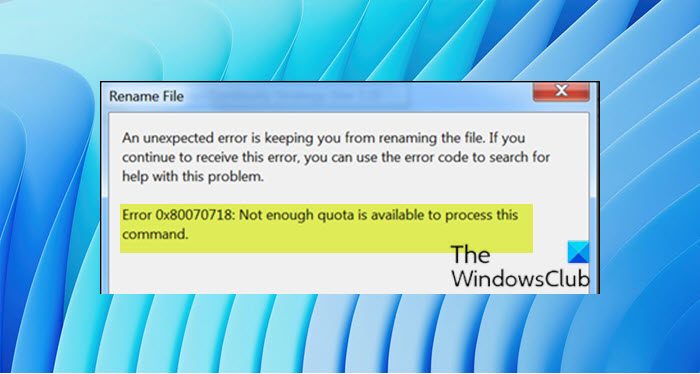
When you encounter this issue. you’ll receive the following full error message;
Rename File
An unexpected error is keeping you from renaming the file. If you continue to receive this error, you can use the error code to search for help with this problem.
Error 0x80070718: Not enough quota is available to process this command.
Several different culprits might be causing this error message, and they are as follows:
- Disk Usage limits are too low.
- Default Save location is on an SSD.
- File or Folder corruption.
Rename File error 0x80070718, Not enough Quota is available to process this command.
If you’re faced with this issue, you can try our recommended solutions below in no particular order and see if that helps to resolve the issue.
- Change the Disk Usage setting.
- Change the default Save location
- Repair Windows file & folder files
- Increase the Paging file size
Let’s look at the description of the process involved concerning each of the listed solutions.
1] Change the Disk Usage setting

Do the following:
- Press Windows key + R to invoke the Run dialog.
- In the Run dialog box, type control and hit Enter to open Control Panel.
- Set the View by Small icons and then click Sync Center.
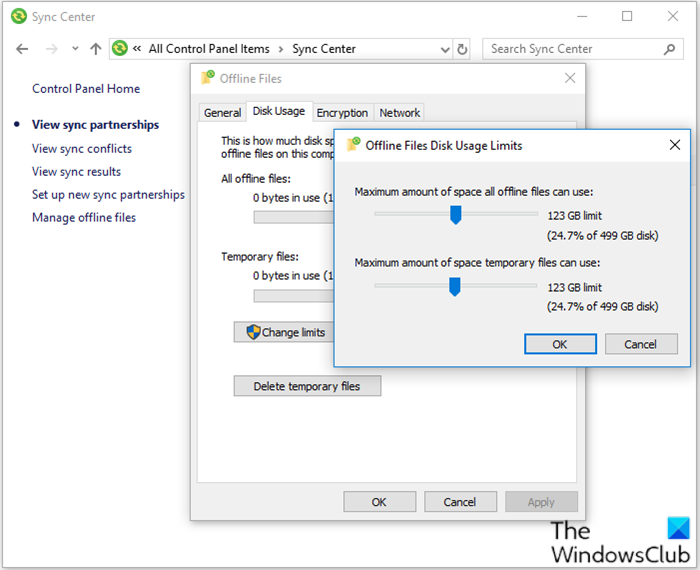
- Click Manage offline files to open the Offline Files window.
- Go to the Disk Usage tab and then choose Change limits.
- Drag the sliders to increase the Maximum amount of space all offline files can use and the Maximum amount of space temporarily files can use.
- Click OK to save the changes.
- Click Apply and OK on the Offline Files window and then close it.
- Reboot your computer.
On boot, check if the issue is resolved. Else, continue with the next solution.
2] Change the default save location
Do the following:
- Invoke the Run dialog.
- In the Run dialog box, type
ms-settings:savelocationsand press Enter to open the Default Save Locations window of the Settings app. - Change, the default drive that is used for saving, from your SSD to the traditional HDD.
- Use the drop-down menu associated with every type of folder found inside the Default Save Location window.
- Click the Apply button for each folder that has the default location changed.
Restart your computer and see if the issue is resolved. If not, continue with the next solution.
3] Repair Windows file & folder files
This procedure will be successful if the error occurs due to the folder issue.
To repair Windows file & folder files, do the following:
- You need to use the File and Folder Troubleshooter.
- Once the download is complete, double-click on winfilefolder.DiagCab.
- Once the File and Folder Troubleshooter is opened, click on Advanced Settings and check the box associated with Apply repairs automatically.
- Click Next to proceed to the next screen.
- Wait until the initial diagnostic scan is finished scanning your system.
- From the next screen, check the box associated with Others or I don’t know.
- Click Next once again.
- Leave all the checkboxes associated with each repair strategy checked and hit Next to advance to the following menu.
- Wait until the reparations are finished – hit Yes if prompted to with specific repair strategies.
After the repair, check if the issue is resolved. If not, continue with the next solution.
4] Increase paging file size
You may encounter this error if the paging file size in the Virtual Memory settings is small. This solution requires you to increase the paging file size and see if that helps.
Let us know if any of these solutions work for you!
How do I increase the folder quota?
You can use the File Server Resource Manager (FSRM) tool to increase the folder’s quota in Windows Server. The properties section offers the Enable quota management option to set the new quota limit in the Quota limit (MB) field. You will need an administrator account to set this up. The admin can also set up action to send an email or trigger an entry in the event log when the limit exceeds.
What happens when a quota is reduced?
Based on the configuration set by the administrator, the user will be limited from saving any additional data inside the folder. The limit will apply until the user removes some files to match the new quota limit. The administrator will also get an email and event log about it. He also needs to ensure that limiting data doesn’t cause any damage. Hence an advance notice about the change would be a good idea.