Microsoft has made a program termed the best image viewer and editor with basic capabilities in the Photos app. In this guide, we show you how you can repair and reset the Photos app on Windows 11 or Windows 10.
Photos app on Windows is the best possible image viewer available on Windows without a need for any third-party application. You can view images and also videos on the Photos app. It also has some basic editing features like crop, resize, apply filters, and do many more. The Photos app on Windows also lets you make videos, crop videos, and make videos automatically from the pictures on your PC. If you see any issues with the Photos app, you can repair or reset the app easily. Let’s see how you can do it.
How to Repair or Reset the Photos app on Windows 11/10
To repair or reset the Photos app on Windows 11/10, follow the below steps.
- Open the Settings app
- Select App from the sidebar
- Click on Apps & features tab
- Then, click on the three-dot menu beside the Photos app
- Select Advanced options
- Click on Repair or Reset
Let’s get into the details of the process.
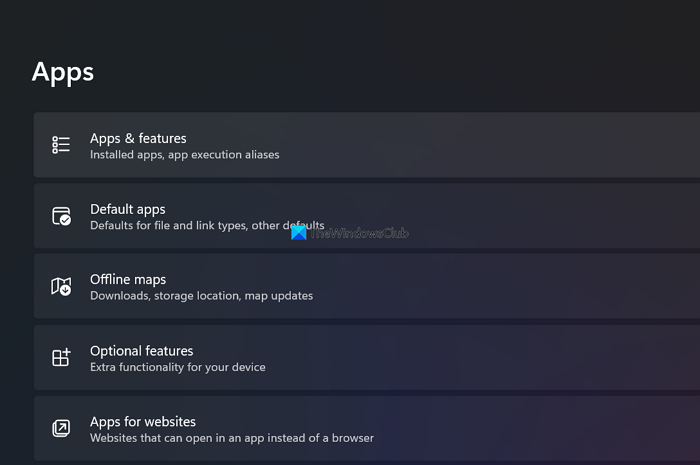
Open the Settings app on your PC from the Start menu or use the Win+I keyboard shortcut. On the Settings app, click on the Apps on the left sidebar. Then, click on the Apps & features tab.

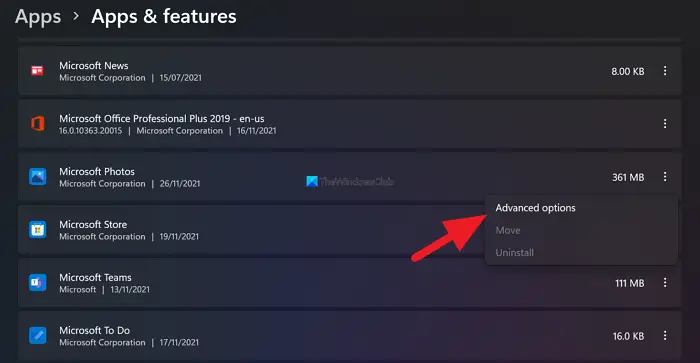
In the Apps & features, scroll down to the Microsoft Photos app and click on the three-dot button to see options. Select Advanced options.

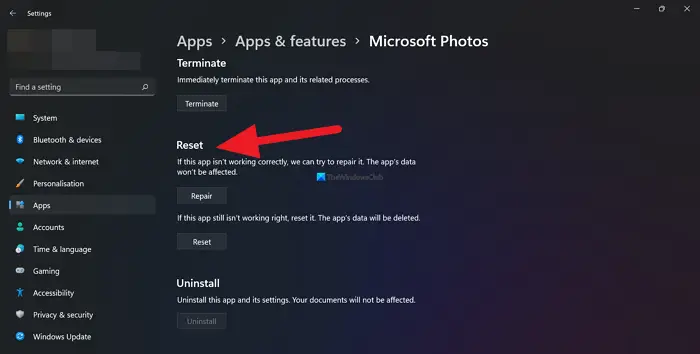
In the advanced options of the Microsoft Photos app, scroll down to the Reset section, where you can find the buttons to Repair and Reset the Photos app. Click on any of them to carry out the needed function.

- When you choose Repair, the app’s data will not be deleted
- When you choose Reset, the app’s data will be deleted.
This is how you can repair and reset the Photos app on Windows 11/10. You can also terminate the Photos app and its processes using the Terminate button under the Terminate section of its advanced options.
How do I uninstall and reinstall the Windows Photo app?

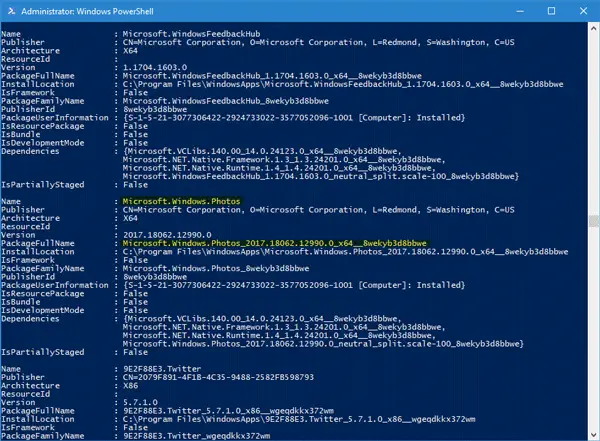
To do so, open Windows PowerShell with administrator privileges and enter this command-
Get-AppxPackage -AllUsers
Then, note down the full package name of Microsoft.Windows.Photos. In my case, you will see:
Microsoft.Windows.Photos_2017.35071.13510.0_neutral_split.scale-125_8wekyb3d8bbwe
Now enter the following command next and hit Enter-
Get-AppxPackage Microsoft.Windows.Photos_2017.35071.13510.0_neutral_split.scale-125_8wekyb3d8bbwe | Remove-AppxPackage
Once the app is installed, open Windows Store and search for Microsoft Photos and install that app right from the Windows Store. After installing, sign in using the Microsoft account if you want to use the OneDrive integration or into your iCloud account to view your photos shot from your iPhone.
How do I restart the Windows Photo app?
In the advanced options of the Microsoft Photos app in Windows settings, you can find an option to Terminate the Photos app and its processes. You can click on it to terminate it, which stops the Photos app. After that, you can reopen or restart the Windows photos app from the Start menu. If this doesn’t work, you can always restart the PC or log out of your account and launch the app again.
Related Read: How to trim Videos using Windows Photos app Video Editor.