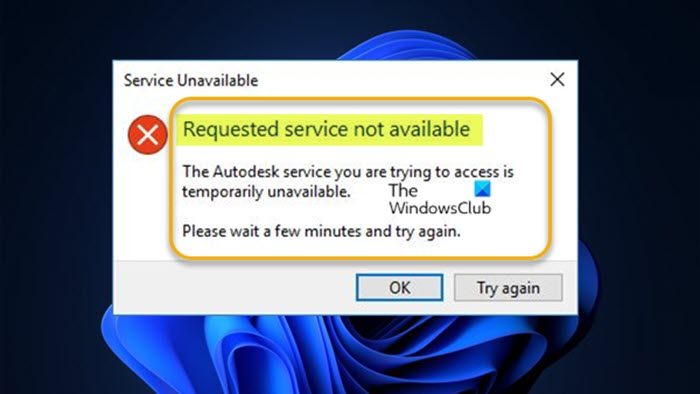
If you get the error prompt stating Requested service not available when trying to launch or sign in to an Autodesk program like AutoCAD on your Windows computer, then this post is intended to help you with solutions you can apply to resolve the issue.

When you encounter this issue on your system, you will get an error prompt with the following full message.
Requested service not available
The Autodesk service you are trying to access is temporarily unavailable.
Please wait a few minutes and try again.
What is Autodesk’s Genuine Service do?
The Autodesk Genuine Service checks for certain types of nonvalid Autodesk software running on your computer. When nonvalid software is detected, the service can inform the user through notification with options to resolve the problem. This could involve checking and making sure you are using the correct license type. and that the license has been assigned to the end user via Account Management.
Below are known reasons why this error could occur:
- Outdated Autodesk Single Sign On component (AdSSO).
- Corrupt login cache data.
- Server-side security update.
- Firewall blocking services.
- Time zone.
- Hosts file blocking access to services.
- Corrupted Windows user profile.
- Outdated Microsoft Internet Explorer.
- Proxy Filtering.
- Outdated DLL files for version before 2018.
Autodesk software that is duly licensed and genuine is guaranteed by Autodesk, and users have access to previous versions, security upgrades, and the latest features. This is because software piracy exposes customers and enterprises to security risks like malware and may result in decreased organizational efficiency.
Requested service not available — Autodesk program error
If when you try to launch or sign in to an Autodesk program on your Windows 11/10 computer and the following message is displayed Requested service not available, then these recommended solutions presented below can be applied in no particular order to resolve the issue on your system.
- Update the Autodesk program to the latest build
- Reset local login cache for Autodesk desktop software
- Create a new User Profile
- Update Autodesk Single Sign On component (AdSSO)
- Install the latest version of the Licensing Service and the Single Sign-On component
- Check Firewall and/or Proxy
- Install required hotfixes to resolve server-side security issues
- Sync the computer’s time with the Internet time
- Replace libeay32_Ad_1.dll and ssleay32_Ad_1.dll files
- Reset the Hosts file back to the default
Let’s look at the description of the process as it relates to each of the listed solutions.
1] Update the Autodesk program to the latest build
When the Autodesk program the Requested service not available error occurs on your Windows 11/10 computer, the first step you can take to troubleshoot the issue is to install all available Updates in the Autodesk desktop app or from your Autodesk Account.
To update from your Autodesk Account, do the following:
- Go to the Product Updates tray in Autodesk Account.
- Find the updates and hotfixes that have been released for your product.
- Select and install the updates you want.
To update from the Autodesk desktop app (Windows only), do the following:
- Open the Autodesk desktop app.
- Review product updates are automatically available in the Autodesk desktop app.
- Select and install the updates you want.
2] Reset local login cache for Autodesk desktop software
This solution requires you to reset the local login cache for Autodesk desktop software on your Windows 11/10 PC to resolve login and/or access issues. The login cache for Autodesk software is stored in the LoginState.xml file locally on the machine which you need to delete.
You can automatically delete the file referenced by downloading the Login Reset Tool from help.autodesk.com/reset_login_win.zip, then extract the loginerror_window.bat to your desktop, double-click the file and wait until it completes. Once done, launch the Autodesk software – you will be asked to sign in again.
Alternatively, you can manually remove the cache file by following these steps:
- Open Task Manager.
- Go to the Details tab.
- Find and terminate the following processes, if present (right-click > click End task).
- AdSSO.exe
- AdAppMgrSvc.exe
- AutodeskDesktopApp.exe
- AdskLicensingAgent.exe
- ADPClientService.exe
- Next, press the Windows key + R to invoke the Run dialog box or open File Explorer and copy and paste the environment variable below, and hit Enter:
%localappdata%\Autodesk\Web
- At the location, find the LoginState.xml file and delete it.
- Exit File Explorer.
- Restart PC.
- Launch your Autodesk software and perform a new login.
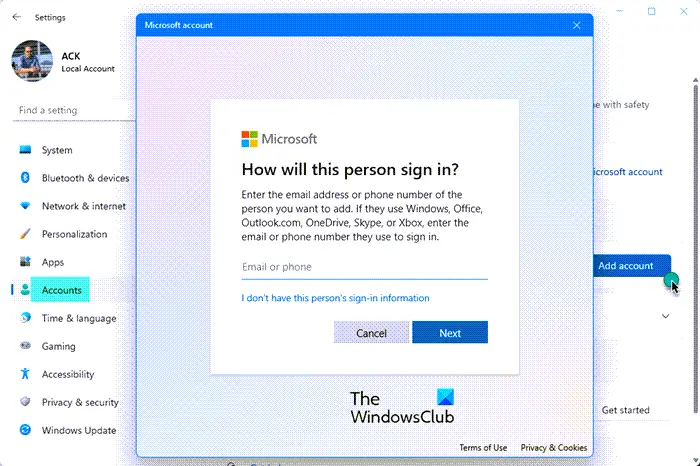
3] Create a new User Profile

You may encounter the error in view due to a corrupted Windows user profile. In this case, to test if you have the issue, you need to create a new user account and sign into the new account. If your Autodesk software works fine without throwing the error, you can first attempt to repair the corrupt user profile and see if the issue is resolved. Otherwise, you need to recreate your user profile to resolve the problem.
Do the following:
- Back up the user profile data files on the old user account:
- Open Folder or File Explorer Options.
- In the Folder Optionsdialog, in the View tab, look under Advanced settings, and set the following settings:
-
-
- Show hidden files, folders, and drives button needs to be selected.
- Hide extensions for known file types needs to be unchecked.
- Hide protected operating system files (Recommended) needs to be unchecked.
-
- In File Explorer, locate the C:\Users\Old_Username folder, where C is the drive that Windows is installed on, and Old_Username is the name of the profile you want to back up.
- Select and copy all of the files and folders in this folder, except for the following files:
-
-
- NtUser.dat
- NtUser.ini
- NtUser.log (or if it does not exist, instead exclude the two log files called ntuser.dat.log1 and ntuser.dat.log2)
-
- Paste the files to a backup location of your choosing. You can retrieve your old user account profile from this backup location if needed – but keep in mind that all the files residing in that account may be corrupted.
- Next, sign out of the old user account. If you have e‑mail messages in an e‑mail program, you must import your e‑mail messages and addresses and transfer your files/data to the new user profile before you delete the old profile. If everything is working correctly, you can now delete the old account/profile.
4] Update Autodesk Single Sign On component (AdSSO)
This solution requires you to update the AdSSO to the latest version. You can download the available Autodesk Single Sign On Component (AdSSO) update for 2020 – 2023 product versions at knowledge.autodesk.com/support. Once done, clear out the login cache as described above in Solution 2], and then launch the software to see if the issue is resolved. If the latter is the case, you can proceed with the next solution.
5] Install the latest version of the Licensing Service and the Single Sign-On component
This solution requires you to uninstall and then install the latest version of the Licensing Service and the Single Sign-On component (versions 2020 and later). To uninstall the Autodesk Desktop Licensing Service component on your computer, follow these steps:
- Open File Explorer.
- Navigate to the directory path below:
C:\Program Files (x86)\Common Files\Autodesk Shared\AdskLicensing
- At the location, right-click uninstall.exe.
- Select Run as administrator from the context menu.
- Wait until the folder becomes empty.
Autodesk Desktop Licensing Service is now removed for the computer. Now, to uninstall the Single Sign-On Component on your Windows 11/10 PC, you can do so via the Settings app or via Control Panel > All Control Panel Items > Programs and Features.
Once you’re done with the uninstallation, you can install the latest version of the Autodesk Desktop Licensing Service and the Autodesk Single Sign-On Component from your Autodesk Account.
6] Check Firewall and/or Proxy
The Autodesk issue you are currently experiencing could be a symptom of a firewall/proxy filtering the connection between the machine and the Internet. In which case, you can cycle through the troubleshooting steps below and see if anything worked – you may require assistance from your System or Network Administrator.
- Allow access through the proxy/firewall for the domains as listed on knowledge.autodesk.com. You need to ensure that the proxy is configured to allow unrestricted and anonymous access to all those URLs for optimal functionality. The default port number for HTTP is 80 and for HTTPS is 443.
- For the Login Verification-specific domains in the domain list, you need to add these domains either one by one or by using a wildcard.
- Make sure TLS 1.2/1.3 is enabled on both the client and server machines.
- Make sure the domains in the category Third-party Certificate download. The certificate verification sites are all using HTTP and not HTTPS.
- Verify that HTTPS Inspection is disabled for the domains *.autodesk.com.
- Verify that your domain has no Group Policy Object (GPO) that restricts third-party certificate registration or revocation. In your domain Group Policy Management console, navigate to Computer Configuration > Windows Settings > Security Settings > Public Key Policies. On the right pane, double-click on Certificate Path Validation Settings. Under Root certificate stores select Third-Party Root CAs and Enterprise Root CAs radio button. Click Apply > OK. Now, navigate to User Configuration > Windows Settings > Security Settings > Public Key Policies and open each Certificate Service Client Properties and verify that the configuration model is not disabled. Once done, update the new GPO either by restarting your computer or running the gpupdate /force command in an elevated CMD prompt.
- Disable or disconnect from VPN if in use.
- Turn off the Windows Firewall or any other firewall (refer to the product manual) in use, launch the Autodesk program and sign in, and then turn the firewall back on.
- Disable Windows Defender or any other antivirus software you have installed on your system before launching/signing into the Autodesk program.
7] Install required hotfixes to resolve server-side security issues
This solution requires you to install all required hotfixes to resolve server-side security issues. For this task, do the following:
- Install Autodesk Licensing Hotfix for the AutoCAD 2014 – 2015 based products available at knowledge.autodesk.com/support/autodesk-licensing-hotfix.
- Install Single Sign-On Security Hotfix for the AutoCAD 2012 – 2013 based products available at knowledge.autodesk.com/support/single-sign-security-hotfix.
- Install SSLv3 (Poodle) Hotfix for Revit products available at knowledge.autodesk.com/support/SSLv3-Poodle-Hotfix.
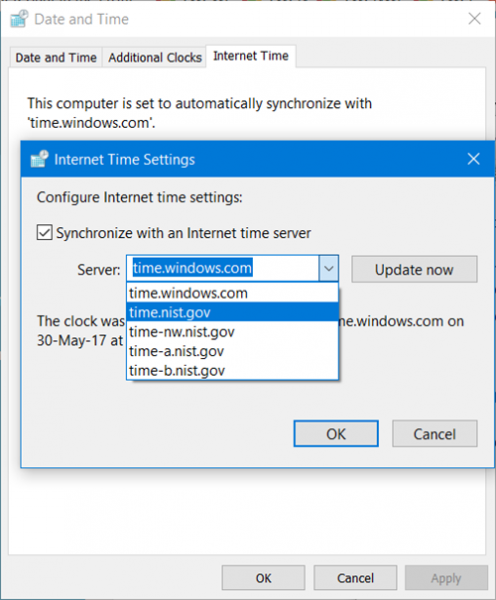
8] Sync the computer’s time with the Internet time

This solution requires you to sync the computer’s time with the Internet time by following the instructions for Solution 3] in the guide on how to fix Windows clock time wrong. If the machine is part of a domain, the Internet Time tab will be greyed out, in which case, you will need to contact your IT administrator.
Read: Change Internet Time Update interval in Windows 11/10
9] Replace libeay32_Ad_1.dll and ssleay32_Ad_1.dll files
This solution applies only if you’re getting the error in view in the AutoCAD program or Revit 2018. If on your computer, you have no version newer than 2018 installed, then you need to do the following to update/replace the DLL files in question. Note that installing a version newer than 2018 may replace the DLL files.
- Download the ZIP from help.autodesk.com containing the two files libeay32_Ad_1.dll and ssleay32_Ad_1.dll.
- Unzip the archive package and copy both files.
- Next, close any instance of AutoCAD or Revit 2018 as the case may be.
- Next, open File Explorer.
- Navigate to either of the path below for the Autodesk program:
C:\Program Files\Autodesk\AutoCAD <YEAR>
C:\Program Files\Autodesk\Revit 2018
- At the location, paste the copied DLL files to replace the existing files of the same name.
- Exit File Explorer.
Read: How to download Windows 11/10 exe, dll, etc, OS files from Microsoft
10] Reset the Hosts file back to the default
This solution requires you to check if the Hosts file is blocking access and then make the necessary changes, or you can reset the Hosts file to default on your Windows 11/10 computer.
I hope this post helps you!