Google Docs is a free online application that lets users create and edit documents. It offers many advantages to users, such as the ability to download their documents and spreadsheets in multiple formats, access them from any device by signing in to their account, and more. While creating or editing a document, sometimes, we need to edit images. In this article, we will show you how to resize, rotate, flip, and crop images in Google Docs.
Resize, rotate, flip and crop images in Google Docs
Like Microsoft Word, you can also edit and crop images in Google Docs. We will show you the process to:
- Resize an image in Google Docs.
- Rotate an image in Google Docs.
- Flip an image in Google Docs.
- Crop an image in Google Docs.
1] How to resize an image in Google Docs
Select the image that you want to resize and place your cursor on any of the small boxes displayed at its edges. Now, press and hold the left click of your mouse and move it to resize the image.

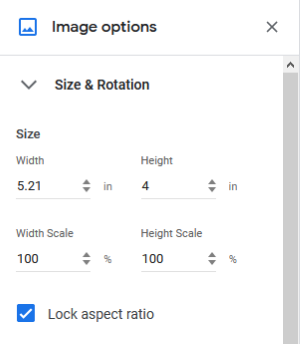
If you want to resize an image to specific dimensions, follow the below-listed steps:
- Right-click on the image and select ‘Image options.’
- Expand the ‘Size and Rotation‘ option on the right side.
- Enter the values in the required fields and press Enter.
You can also select whether to lock the aspect ratio or not.
2] How to rotate an image in Google Docs
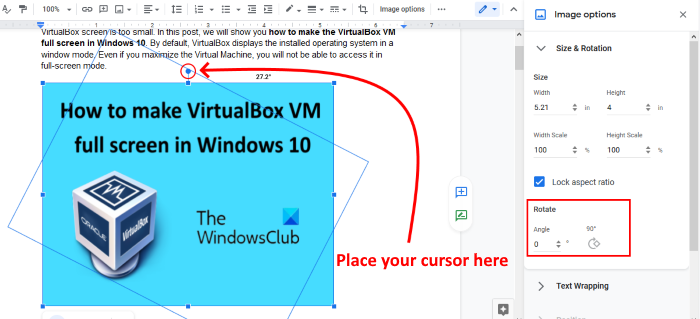
To rotate an image in Google Docs, select it and place your mouse cursor as shown in the below screenshot. Press and hold the left click of your mouse and move it to rotate the image. The angle of rotation is also displayed during rotation.

The above method is a bit difficult if you want to rotate an image at a specific angle, say 43.5 degrees. For this, follow the first two steps in the above method and enter the angle of rotation in the required field. You can also rotate the image at 90 degrees by clicking on the respective button.
Read: How to download and save images from Google Docs.
3] How to flip an image in Google Docs

The steps to flip an image in Google Docs are listed below:
- Select the image that you want to flip.
- Copy the selected image.
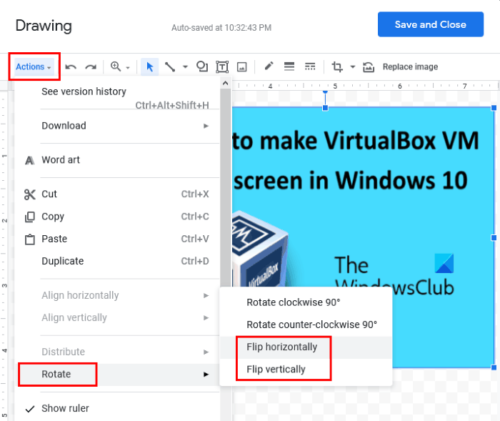
- Go to ‘Insert > Drawing > New.’ This will open the Drawing window.
- Paste the image in the Drawing window.
- Go to ‘Actions > Rotate.’ There you will find the options to flip an image horizontally and vertically.
- After flipping the image, click ‘Save and Close‘ to insert the flipped image into Google Docs in the place of the old image.
4] How to crop an image in Google Docs

Select the image that you want to crop. Right-click on it and select the ‘Crop image‘ option. Now, drag the corners inside the image to crop it. When you are done, press Enter to finish.
That’s it. Feel free to add your views in the comments below.
Related post: How to Create a Folder in Google Docs.
Leave a Reply