The Run as different user feature is an essential tool that allows users to execute apps with different credentials without logging or switching accounts. However, users are facing a dilemma where this option is not visible in the context menu, leading to frustration and workflow disruptions. In this article, we are going to see what to do if the Run as different user is not showing in Windows 11/10.
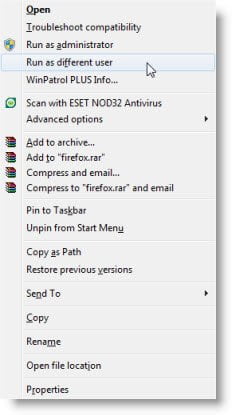
To run a program as a different user, you have to press the Shift key right-click on the shortcut or executable, and then select Run as different user.
How to add Run as different user in Windows 11?
There are various ways users can add Run as different user feature. The first method involves using the Local Group Policy Editor, while the same thing can be achieved using the Registry Editor. Users can also utilize the Command Prompt to accomplish this. In the next section, we will explore how to do this.
Fix Run as different user not showing in Windows 11
If the Run as different user option is not showing on the Windows 11/10 PC, execute the solutions mentioned below.
- Restart the Secondary Logon Service
- Add Run as different user context via Local Group Policy Editor
- Uninstall recent Windows update
- Adjust UAC settings
- Add Run as different user context menu item via the Registry Editor
- Perform a System Restore
Let’s get started.
1] Restart the Secondary Logon Service
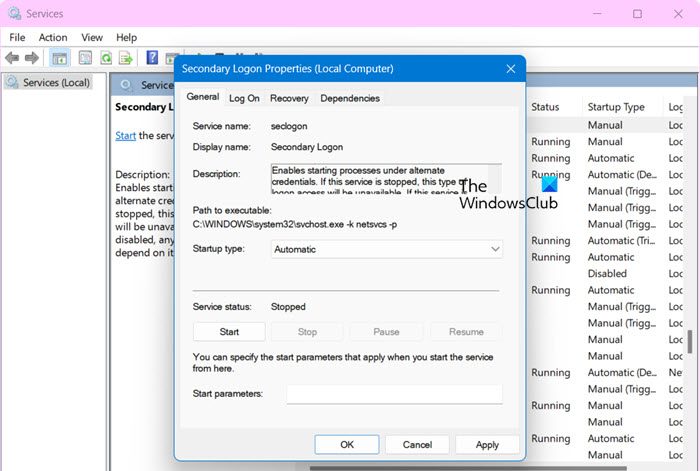
We are going to start the troubleshooting process by restarting the Secondary Logon Service, which is responsible for using alternate user credentials to launch apps. If this service is disabled or experiencing problems, the system may not display the “Run as different user” context, so we will restart it.
Follow the steps mentioned below.
- Click Win + R to open the Run dialog box.
- To open the Services app, type services.msc and hit OK.
- Once the Windows appears, scroll down, double-click on Secondary Logon, and then select Properties.
- Go to the Startup Type drop-down menu, and click on the Automatic option.
- Lastly, hit the Apply button and then OK button to implement the changes.
Once done, restart the device and check whether it’s visible.
2] Add Run as different user context via Local Group Policy Editor
When the Run as different user option is not visible, users can access Local Group Policy Editor to add the context and enable the feature. Doing so can resolve the issue by restoring the Run as different user. To do so, execute the steps mentioned below:
- Click Win + R to open the Run dialog box. Type gpedit.msc and hit Enter to open the Group Policy Editor.
- Go to User Configuration > Administrative Templates > Start Menu and Taskbar
- Now, double-click on Show “Run as different user” command on Start and set it to Enabled.
- Select the Apply and OK buttons in the last to run it.
Finally, reboot your computer and check if you can see Run as different user option.
3] Uninstall the recent Windows update
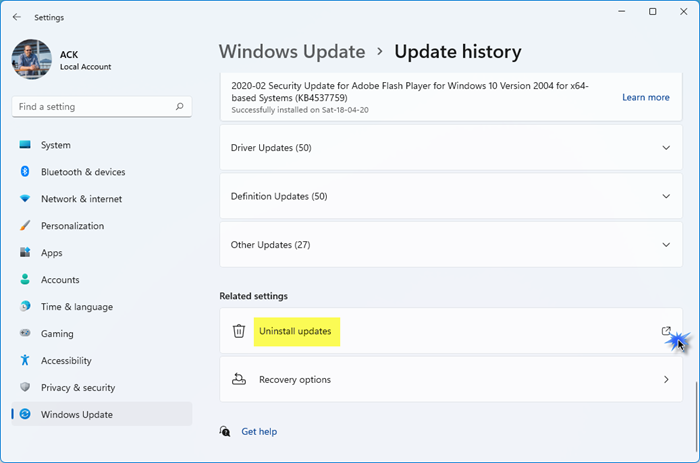
A recent Windows update can cause this issue, as it may have introduced a bug or configuration change that removes or disables this feature. Rolling back the update can restore the previous system state in such circumstances. To do this, click Win + I to open Settings, and then click the Windows Update section. In the More Options tab, click the Update History option, then select Uninstall Updates. Now, select the recent one and hit the Uninstall button.
4] Adjust UAC settings
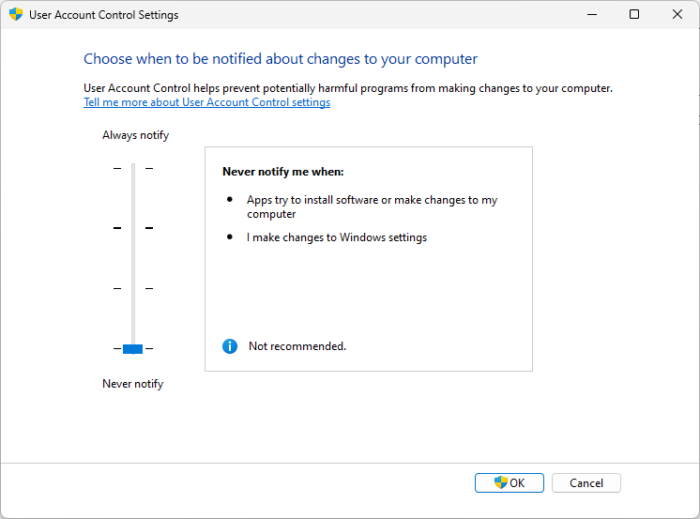
Higher UAC settings can restrict certain actions or options, including Run As Different User. Therefore, we will adjust UAC settings and see if this is the reason behind the missing option.
- Open the Run dialog box.
- Now, open the System Configuration Windows by typing in msconfig, and clicking the Enter button.
- Navigate to the Tools tab, click on the Change UAC Settings, and select the Launch button.
- Once the User Account Control Settings windows appear on the screen, adjust the slider to the left slide toward the Never notify option.
- Click on the OK button to complete the process.
5] Add Run as different user context via the Registry Editor
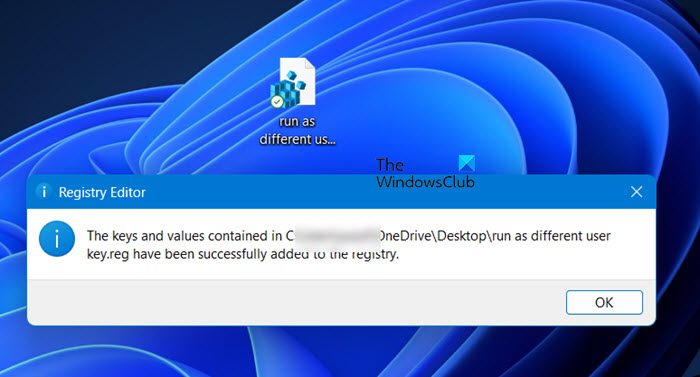
Apart from the Local Group Policy Editor method, users can enable the context through the Registry Editor. Before proceeding, it’s necessary to backup the registry. Once the registry change is applied and the system is restarted, the Run as different user option should appear in the context menu. To do so, we are going to create registry scripts that you can run the apply all the changes.
Open Notepad and paste either of the two scripts.
Add ‘Run as different users’ for all users
Windows Registry Editor Version 5.00

[HKEY_CURRENT_USER\SOFTWARE\Policies\Microsoft\Windows\Explorer]
"ShowRunAsDifferentUserInStart"=dword:00000001

[HKEY_LOCAL_MACHINE\SOFTWARE\Policies\Microsoft\Windows\Explorer]
"ShowRunasDifferentuserinStart"=dword:00000001
Add ‘Run as different users’ for a single user
Windows Registry Editor Version 5.00

[HKEY_CURRENT_USER\SOFTWARE\Policies\Microsoft\Windows\Explorer]
"ShowRunAsDifferentUserInStart"=-

[HKEY_LOCAL_MACHINE\SOFTWARE\Policies\Microsoft\Windows\Explorer]
"ShowRunasDifferentuserinStart"=-
Finally, save both files separately with any name of your choice, but make sure to give them the extension .reg.
Lastly, you need to run the file as an administrator and the changes will be applied.
6] Perform a System Restore

Lastly, if none of the above solutions can fix this issue, we recommend performing a System Restore. This will revert the system to a previous state where the feature was not affected. This process is quite effective when recent changes cause the issue.
Hopefully, this will restore the missing option.
Read: Switch User Option missing from Windows Login screen
How to enable Switch user in Windows 11?
Enabling the Switch user feature is quite simple. Users can do the same by clicking Ctrl+ Alt+ Delete, a screen with several options will pop up on the screen. Click on the Switch user option, alternatively, users can also press Win + L to lock the screen, and then select the Switch User from the lock screen.
Also Read: Run as administrator option not working in Windows.