Docker Windows Server containers allow you to run applications in isolated environments on Windows Server. These containers are designed to work with Windows executables based on Windows Server Core or Nano Server images. In this post, we will talk about them and see how you can run your first Docket Windows Server Container.

Run your first Docker Windows Server container
Docker Windows Server containers let you run programs on Windows in a lightweight and isolated environment. They work like small packages that include everything a program needs to run, such as the code, libraries, and system tools. These containers are based on Windows Server images like Nano Server or Server Core. They are faster and use fewer resources compared to traditional virtual machines. With Docker, you can easily create, run, and manage these containers. This helps developers and IT teams build and deploy applications more quickly and efficiently without interfering with other programs on the same server.
To run your first Docker Windows Server container, you need to follow the steps mentioned below.
- Install Hyper-V Role and Container feature
- Install the Docker module
- Reboot your server
- Pull and run your Docker image
Let us discuss them in detail.
1] Install Hyper-V Role and Container feature
First, we need to prepare our server for Docker by checking all the prerequisites. To do so, we need to install the Hyper-V Role and Container feature first on our system. To do so, you need to follow the steps mentioned below.
- Open Server Manager and click on Add roles and features.
- Click on Next.
- Select Role-based or feature-based installation and then click on Next.
- Now, select the server and click on Next.
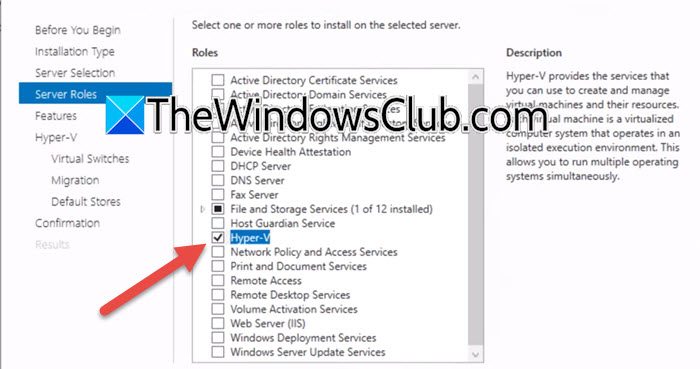
- You then have to look for Hyper-V and tick its checkbox, click on Add features if prompted, and then click on Next.
- Go to the Features tab, tick Containers, and click on Next.
- Then, click on Next to reach the Virtual Switches tab.
- You then have to tick your ethernet and click Next.
- Keep clicking on Next until you reach the Results tab, and click on Install to begin installation.
The installation will take a bit of time as it depends on your server’s hardware capabilities.
Once done, you need to reboot your server.
2] Install the Docker module
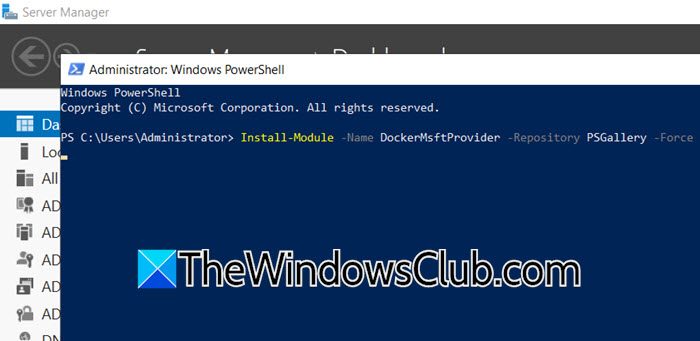
After configuring the prerequisites, we are supposed to install the Docker module. You can do that simply by running the following command in PowerShell (as an admin).
Install-Module -Name DockerMsftProvider -Repository PSGallery -Force
You need to wait for a few minutes as it will take a little while for the module to install on your computer. Once done, you need to install the Docker package. For that, run the command given below.
Install-Package -Name docker -ProviderName DockerMsftProvider
Wait for a few minutes as it will take some time for the package to install on your computer.
3] Reboot your server
Once done, you need to restart your server. For that, you can either run Restart-computer in PowerShell or restart from the Start Menu. After your computer is booted up, go to the next step.
4] Pull and run Windows Docker image
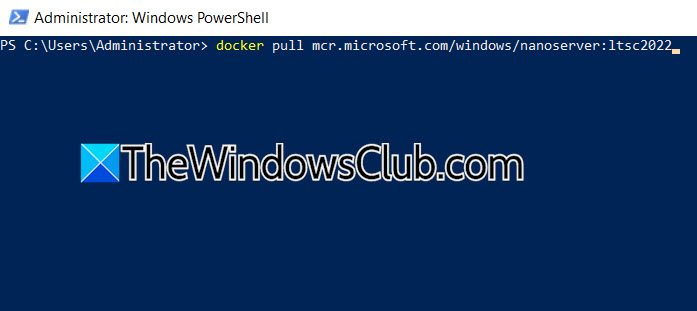
Now that your server is up, we need you to open PowerShell with admin privileges again. Then, you must run the following command to pull the Docker image.
docker pull mcr.microsoft.com/windows/servercore:ltsc2022
Once you do that, you must run the following command to check out the docker image.
docker image ls
You will see the image details testifying to the fact that you have installed docker and have the image.
Once you have pulled the image, you can go ahead and run it.
docker run mcr.microsoft.com/windows/nanoserver:ltsc2022
The command mentioned makes the session non-interactive; to make it interactive, you need to run the following command.
docker run -it mcr.microsoft.com/windows/nanoserver:ltsc2022
We are going to run the latter.
When you run the command, you will be given a different interactive prompt. You can then proceed to work in the Docker prompt.
This way, you have initiated the Docker container, and you are inside it. So, if you run the command hostname, you will see the name of the Docker container you have logged into.
We hope that you can install and run Windows Docker Container on Windows Server.
Read: Docker Desktop – Unexpected WSL error in Windows 11
How do I start a Docker container in Windows?
To start a Docker container in Windows, ensure that Docker is installed and running. Open a command prompt or PowerShell, then pull a container image by using the command docker pull [image_name] (e.g., docker pull microsoft/nanoserver). Once downloaded, use the command docker run [image_name] to start the container. You can add options like -it for interactive mode or –name [container_name] to name your container. After running the command, the container will start, and you can interact with it. To stop the container later, use docker stop [container_name].
Read: Docker Desktop starting forever in Windows 11
Can I run Docker containers on Windows Server?
Yes, you can run Docker containers on Windows Server if the server supports containers. Windows Server provides the necessary features to run Windows containers, which are isolated application environments. To use Docker, you must enable the “Containers” feature on the server and install Docker.
Leave a Reply