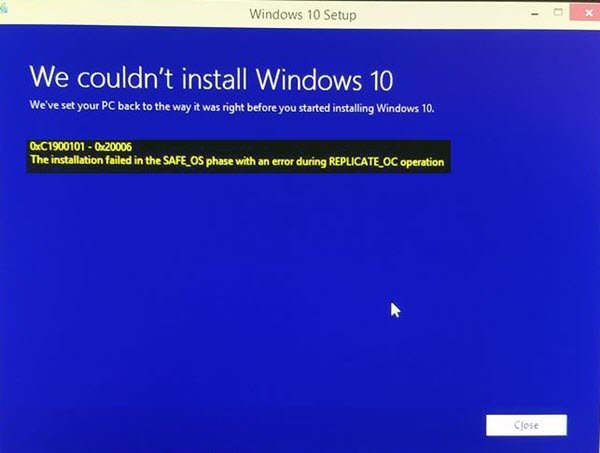
Users have been reporting on the Internet that whenever they try to upgrade Windows 7 or Windows 8.1, to Windows 10 or Windows 11, they get an error that says, Error 0xC1900101 – 0x20006, The installation failed in the SAFE_OS phase with an error during Replicate_OC operation. The error code could instead also be 0x8007001D-0x20006.
Windows 11/10 Setup error 0xC1900101 – 0x20006

Installation failed in SAFE_OS phase with an error during Replicate_OC operation
As always, I would recommend creating a System Restore Point just in case you can roll back to the current state if something goes wrong.
1] By changing the Windows 11/10 installation
One of the main causes of this error is KB3064209. This update is responsible for updating the CPU Microcode for processors made by Intel. So, if you do not use Intel processors, you need not try this fix.
Let us first make this clear that in this solution, C:\ partition is referred to as the OS Partition, H:\ partition is referred to as the USB Pen Drive.
Start by downloading the Windows 11/10 ISO from the Windows 11/10 Media Creation Tool and copying its contents to your Pen Drive H:\.
Now, press the WINKEY + X button combo or right-click on the Start button and click on Command Prompt (Admin) or just search for cmd in the Cortana search box, right-click on the Command Prompt icon and click on Run as Administrator. Click on Yes for the UAC or User Account Control prompt that you get. Then, the Command Prompt window will finally be open.

Now, type in the following command,
dism /Mount-Image /ImageFile:H:\sources\boot.wim /index:1 /MountDir:C:\Users\User\Desktop\mount
Next, navigate to the following path using the Windows File Explorer:
C:\Users\User\Desktop\mount\Windows\System32\mcupdate_GenuineIntel.dll
Right-click on the file named mcupdate_GenuineIntel.dll and then click on Properties.
Navigate to the tab labeled as Security and then click on Advanced. Change the Owner to your User Account and click on OK.
Now, in the Security Tab, click on the Edit button after selecting your User Account and check on Full Control so that your User Account has all the privileges.
Click on Apply and then click on OK.
Now delete the file we earlier saw named mcupdate_Genuine.dll.
Close all the instances of the Windows File Explorer.
Now, go back to the Command Prompt window and unmount the image we mounted before by entering the following command,
dism /Unmount-Image /MountDir:C:\Users\User\Desktop\mount /commit
Now repeat the steps from mounting until here for the following files:
boot.wim /index:2

install.wim /index:1

install.wim /index:2
Then delete the mount folder, remove the USB Pen Drive, and boot with the Installer.
2] Perform a Disk Cleanup
There is a strong chance that some unnecessary files might be interrupting the installation process. You can use the Disk Cleanup utility to fix this.
Related read: Installation failed in SAFE_OS phase with an error during BOOT operation, 0xC1900101 – 0x20017.
3] Make sure that your drivers are up to date
You need to make sure that your drivers are up to date. For that, you can either run Windows Updates or check your manufacturer’s websites for the latest driver updates for the components of your computer.
4] Update your system’s BIOS
Outdated BIOS can be a major force in preventing you from updating your operating system. Update your BIOS/UEFI and make sure that you have the latest version of the BIOS available for your computer.
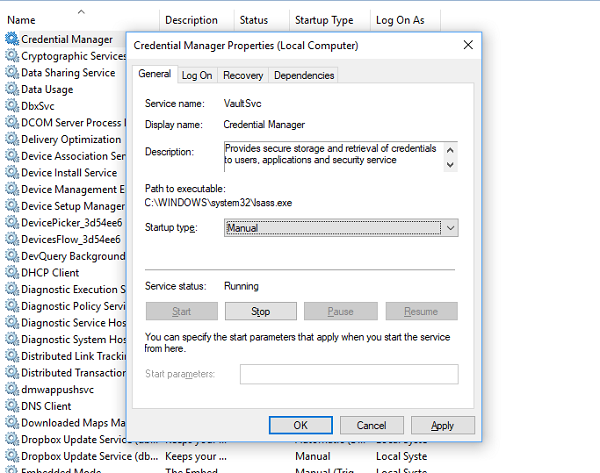
5] Check the status of Windows Services
Search Services in the search box, click on the Services icon, and open Services utility in a new window. Or just hit the WINKEY + R button combination to launch the Run window. Type in services.msc and hit Enter in order to open the same Services utility.

For the following services,
- BITS (Background Intelligent Transfer Service)
- Windows Update Service
- Cryptographic Service
Right-click on them one by one.
Click on Properties. For the drop-down of Startup Type, select Automatic.
Click on OK for each of them. Reboot your computer for the changes to take an effect.
6] Checking the RAM Modules
Many times all the components of RAM and not able to be used by the computer.
For this, I would personally recommend turning off your computer. Then take out your RAM physically. Clean it with a soft cloth. Blow some air into the RAM slot on the motherboard.
Put your RAM back in the same slot.
Try updating your computer again. If this still does not work, just try putting in some more RAM and check if this works for you.
Because sometimes, a worn-out RAM cannot perform to its fullest potential, and adding up some extra RAM would boost up the performance for your daily tasks as well as for the installation of the updates.
7] Check Registry settings
The OSUpgrade key prevents or allows the upgrade to the next Windows version, so check its value.
Run regedit to open Registry Editor and navigate to the following key:
HKEY_LOCAL_MACHINE\SOFTWARE\Microsoft\Windows\CurrentVersion\WindowsUpdate\OSUpgrade
Create a new 32-bit DWORD with the name AllowOSUpgrade and give it a value 0x00000001. If this key does not exist, create it.
Close Regedit and restart your computer.
7] Other solutions
Now, these other categories of solutions are considered due to a chance that some attached hardware might be conflicting with the installation of the new operating system update.
Some of these solutions are as follows:
- Unplug all the USB Devices and the WiFi Adapter from your machine.
- Disable your Graphics Card by uninstalling their drivers.
- Disabling your Network card by uninstalling their drivers as well.
- Modifying the RAM Modules.
All the best!
How do you fix the installation that failed in the Safe_OS phase with an error during boot operation?
This can be fixed in two ways; update the driver to a compatible version or roll back the problematic driver. It usually happens when you have either updated the driver or the OS, and they are not compatible. Make sure to download the version that is compatible with the OS from the OEMs website.
Read: Error 0x80071AA8 – 0x2000A, Installation failed in SAFE_OS phase with an error during PREPARE-SAFE-BOOT operation
How do I fix 0XC1900101 0x20017 the installation failed in the Safe_OS phase with an error during boot operation?
You can resolve this 0XC1900101 0x20017 error by updating the driver, updating Clean Boot State, and disabling the hard drive encryption. Read more about this in our detailed guide.
Related read: We couldn’t install Windows – 0xC1900101-0x20017 error.