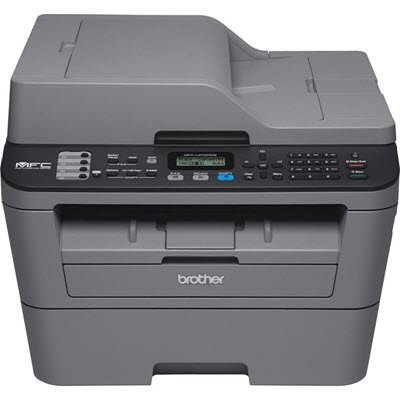
Nothing is worse than completing a project before time but submitting it late due to ‘Slow Scan or Print’ problem. Similarly, other issues with the scanner can cause frustration to the users. In today’s column, we’ve highlighted some major Scanner hardware problems alongside their troubleshooting methods and solutions.
Scanner problems, troubleshooting, solutions
The quality of your equipment is highly important, and sometimes, even brand-new, unscratched plastic carriers can degrade scan quality. Here’s how you can ensure they are always up and running!
1] The paper Logjam
You will inevitably encounter a paper jam when working with any printer/scanner. It’s an event where a paper or other printed material gets stuck or lodged into a printer and is unable to eject. In most cases, your User Guide or control panel instructions should walk you through this erroneous task easily enough. Most, scanners/printer, provide video assistance to make jam clearance a hassle-free experience.
Start by inspecting the paper path and remove any jammed material, being careful in not tearing it. If it’s caught between rollers, release the pressure slowly to remove it.
If the misalignment of the papers has caused the jam, remove the tray and position the papers correctly and reseat the tray. Also, check to see if they are squared properly and repositioned.
2] Slow Print Time
On many occasions, slow print time can be caused by a high-resolution setting. High-resolution images consume more data and require more time to process. This invariably leads to slow print times. So, if you aren’t so hell-bent on getting gallery quality images, print with plain paper in Normal or Draft quality for faster print speeds.
Second, it’s equally important to check the print driver settings as they determine speed outcome. For instance, high-end lasers are available with-
- PostScript
- PCL and the manufacturer’s host-based driver.
In general, PCL is suitable for faster office printing while the latter, PostScript is best suited for graphics-intensive applications and industries.
Lastly, switch from two-sided to simplex mode. Why? One-Sided printing takes considerably less time.
Read: How to scan a document using Scan app in Windows.
3] Bad/Inappropriate looking prints
Often, your printer works just fine but fails to yield desired results. The images might appear faded or very poor in quality, which can turn even the best creations into undesirables. To avoid this, check the cable connection. A scanner most likely has two connections located on its rear side.
- A cable plugged into a power outlet
- A cable plugged into the computer
Be sure these two cables are securely plugged in. Some scanners rely solely on the USB cable for power, and thus they don’t have a separate power cord. Connect such scanners directly to the PC USB port rather than connecting them to an unpowered USB hub. It is known that USB Hub sometimes does not generate enough power to run the scanner. Also, check the fuser adjustment. In few laser printers, the fuser has an adjustment for paper type. If your printer’s fuser can be adjusted manually, check if it’s set properly.
Related: Windows Fax and Scan not working in Windows 11
4] Wi-Fi printing takes an unusually long time
If the connection is weak and you do not get the right print, placing your printer very close to your router can increase throughput and reduce printing time. In addition to the above, you can try the following workaround to improve Wi-Fi performance while retaining the flexibility of printer placement – Use a router that supports 802.11n and offer the 5GHz band as well as 2.4 GHz. Also, ensure that its firmware is up to date. If necessary, you can add a wireless extender or a repeater to increase performance.
Read: How to install TWAIN driver.
5] Ink/Toner Issues
If images look different on screen from how they look in print, there’s likely an issue with the ink/toner cartridge. Calibrating your printer can ensure that what you print remains consistent with what you see on screen.
Having said that, it is essential to note that each product handles the calibration process differently. Besides, every calibration kit comes with their own set of standard instructions.
However, you can manually adjust the color options in the printer dialog to match the result you got from original cartridges. Within the printer driver, there are controls for fine-tuning the overall appearance of your printer’s color. So, depending on your needs, this may be enough to get the color you want.
Also, an ink/toner cartridge problem may arise if new ink/toner has just been inserted incorrectly. To avoid such instances, fix it correctly.
Read: No scanners were detected error on Windows
6] Remove other devices
As a precautionary measure, you can also check if other devices connected to the computer are interfering with the functioning of the scanner. If there are any additional, unwanted devices connected to your computer, try shutting it down and disconnecting non-essential devices. Parallel, SCSI, Firewire, and other USB devices may interfere with the scanner operations.
What causes scanner lines?
If you see vertical lines or color stripes on your scanned output, it may be caused by paper particles, dust, scratches on the scanner glass, etc. To fix this, you should clean the ADF (Automatic Document Feeder) roller and flatbed glass so that your scanner paper path is clear. You should also check if your scanner settings are OK.
What is scanner failure?
If you are using Windows PC and HP printer and your printer is unable to scan, send a fax, unable to copy a document, you may see a Scanner System Failure error on the display. To fix this issue, you should reset your printer to default settings. In addition, download and install HP Print and Scan Doctor tool on your Windows PC that helps to diagnose and fix scanner and printer-related issues. If that doesn’t help, you should re-install your printer software.
Read next: Scanner is not working on Windows.

Leave a Reply