This post offers practical solutions affected users can apply to fix the Scanning is Unavailable or Feature is Unavailable errors that may occur when using the HP Smart app on a Windows 11/10 computer. Generally speaking, you’re likely to encounter this issue if the HP Smart app may not be working for you due to some issues that your mobile device or PC may have or your internet connection problem. It could also be due to too many users using the app at same time. And in some other cases, it could be the app is outdated on your device.
Fix Scanning is Currently Unavailable HP Smart app error

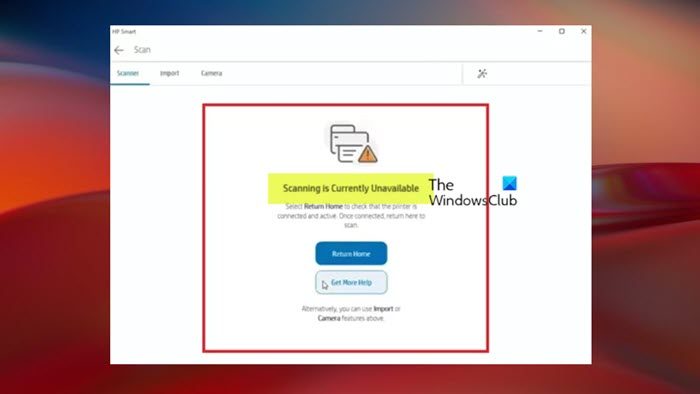
When you try to scan a document from your printer to your Windows 11 or Windows 10 PC using the HP Smart app, you may get the Scanning is Currently Unavailable message. Some affected PC users reported the scanning was working fine previously and they can print and make copies from the printer, but the HP Smart app just won’t scan documents.
So, if you are facing a scanning problem in the HP Smart app on your computer, our recommended fixes as presented below in no particular order should help you resolve the issue.
- Check the Wireless connection
- Repair/Reset the HP Smart app
- Uninstall and reinstall the printer driver
- Perform System Restore
Before you proceed, make sure Windows OS as well as your software and Windows Store apps are updated and see if the issue is resolved or not. Also make sure to stop all background processes or instances of the HP smart app in Task Manager before applying any of the suggested fixes below.
1] Check the Wireless connection
It could be the issue is with the printer’s wireless connection because sometimes the printer is not connected correctly to the router. So, to begin troubleshooting to fix the Scanning is Currently Unavailable error on your Windows 11/10 PC, do the following to check and restore the wireless connection.
- Restart the router and then the printer. You can also restart your PC for good measure.
- After the device restarts, open the HP Smart app on your computer.
- Right-click on the printer and click Hide printer.
- Now, add the printer again to the HP Smart app.
Once the printer is successfully added to the HP Smart app, you can try the scanning and see if the issue is resolved. Else, continue with the next solution.
Read: Wi-Fi Printer setup using USB fails with the HP Smart app
2] Repair/Reset the HP Smart app

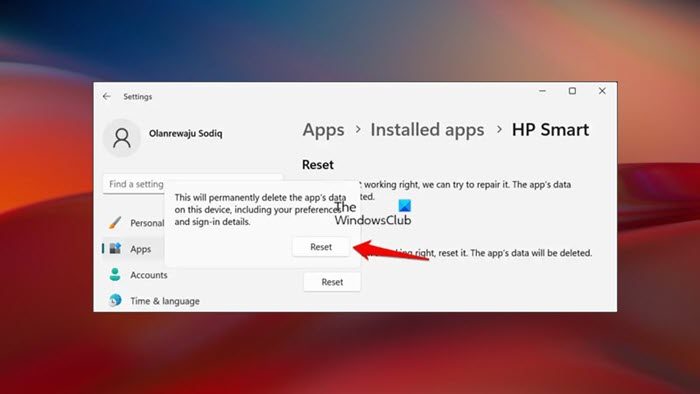
If a Microsoft Store app installed on your Windows 11/10 PC is not working as it should, you can attempt a repair or reset and see if that solves the problem. You can repair/reset the HP smart app on your computer by following these steps:
- Press the Windows key + I to open the Settings app.
- Go to > Apps > Apps & features or Installed apps depending on your version of Windows.
- Search for HP Smart.
- Select HP Smart, right-click, or click on the ellipsis (the three dots) on the right-hand side.
- Select Advanced options.
- Now, under the Reset section, click Repair or Reset for the action you want to perform.
Either of the action should resolve the issue, and now you can start scanning. If the issue persists, you can run the Windows Store Apps Troubleshooter and see if that helps. Otherwise, proceed with the next solution.
Read: HP Smart App not opening, working or detecting printer
3] Uninstall and reinstall the printer driver
This solution requires you to uninstall your HP printer via the Settings app or Control Panel, then uninstall the printer drivers from Printer Server Properties. Once done, you can now install the latest driver for your HP printer.
Do the following:
- Uninstall your HP Printer.
- Next, open Settings > Bluetooth & devices > Devices and scroll down to Related settings, and click on More devices and printer settings or Devices and printers (depending on your version of Windows) to open the Devices and Printers page.
- In the Devices and Printers window, look for your HP printer.
- Once found, right-click on the hardware and choose Delete or Remove Device.
- Close Devices and Printers.
- Next, press the Windows key + R to invoke the Run dialog.
- In the Run dialog box, type printui.exe /s and hit Enter to open Printer Server Properties.
- Next, click on the Drivers tab.
- Look for and select your HP Printer driver.
- Click on Remove.
- Select OK.
- Select Apply > OK on the Print Server Properties window and exit.
- Next, open up the Run dialog again, type in c:/programdata, and hit Enter.
- At the location, scroll down and open the Hewlett Packard folder and remove any printer-related folders & files.
- Restart the computer.
On boot, you can now use the bundled HP Support Assistant software to install the latest driver for your printer or you can head over to HP, then use your printer model to install the full-featured tool and the compatible driver version. Do not install the web version because the web version may likely have the same issue as reported on HP support forums. You can also reinstall the HP Smart app via Microsoft Store.
Read: Print driver host for 32bit applications has stopped working
4] Perform System Restore
Suppose the issue at hand persists after you have exhausted all your options, and you know the app was working perfectly fine previously. In that case, you can use System Restore to reverse any changes that may have occurred on your PC that broke the HP Smart app functionality. Keep in mind that all applications and changes made before the date selected will be removed and needs to be re-installed if need be.
Read: HP Printer Scanner not working in Windows
How do I enable the Scan feature in HP Printer Assistant?
To perform this task, follow these steps: Search Windows for your printer model name, and click the printer’s name in the list of results to open the HP Printer Assistant. Next, click Scanner Actions, and then click Manage Scan to Computer. Now, click Enable to activate the scan to computer option. If scanning is not working and your printer is connected to your PC with a USB cable, you can try a different cable to test for problems with the existing one. You can also switch to a different USB port on your computer to check if a faulty port is the culprit.
Fix Feature Unavailable HP Smart app error

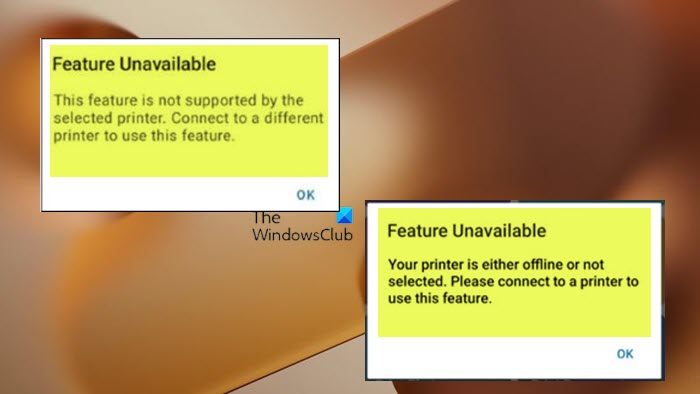
When you attempt to scan using the HP Smart app on your Android mobile device, the Feature Unavailable message may be displayed, and you will be unable to complete the scan with the app.
When you encounter this error, you will receive either of the following error messages.
- This feature is not supported by the selected printer. Connect to a different printer to use this feature.
- Your printer is either offline or not selected. Please connect to a printer to use this feature.
In any case, to successfully resolve this issue on your mobile device, you will need to perform the following tasks in the order presented below, and after each task, you can use the printer to see if the issue is resolved.
- Reset the printer
- Check the connection status in the HP Smart app
- Re-add the printer to the HP Smart app
- Clear the HP Smart app cache on your Android device
Let’s look at the description for each of the listed tasks.
Read: Scan to computer is no longer activated [Fixed]
1] Reset the printer
To begin troubleshooting the Feature Unavailable error on the HP Smart app on your Android device, you can reset the printer by following these steps:
- If your printer has a rechargeable battery, remove it.
- With the printer turned on, disconnect the power cord from the printer.
- Unplug the power cord from the power source.
- Wait 60 seconds and reconnect the power cord to a wall outlet and the printer. Make sure you plug the printer directly into a wall outlet.
- Turn on the printer to complete the reset.
2] Check the connection status in the HP Smart app
You need to confirm the printer is connected and ready in the HP Smart app by following these steps:
Open the HP Smart app, wait a few minutes for the printer to connect to the app, and then check the connection status next to the printer icon.
- If Ready displays with a green check mark icon, that means the printer is connected to the device over the same Wi-Fi network. In this case, you will need to continue troubleshooting.
- If Ready displays with a green cloud icon, that indicates the printer is in remote mode. In this mode, all printer functions such as scanning are not allowed. In this case, you can connect your device to the same Wi-Fi network as your printer.
- If Unavailable displays with a black icon, then it means the printer is not connected to the device. So, try connecting your printer to the device over the same Wi-Fi network.
Read: Fix HP Printer Status Unknown error on Windows
3] Re-add the printer to the HP Smart app
In this step, you need to remove and then re-add the printer in the HP Smart app to fix any connection issues by following these steps:
- Make sure the printer is connected to the same network as your computer or with a USB cable.
- Close then reopen the HP Smart app.
- On the app home screen, right-click or long-press the printer icon, and then click Hide Printer.
- Click Hide Printer again to confirm. The HP Smart app will now remove the printer and it will no longer show in the app.
- Next, on the app home screen, click Add Printer or the plus-sign, and then follow the prompts to re-add the printer.
Once done, the printer will now appear on the app home screen and is ready to use.
4] Clear the HP Smart app cache on your Android device
This step requires you to clear the HP Smart app cache on your Android device, and then re-add the printer to the app. To perform this task, do the following:
- On your mobile device, open the Settings menu.
- Tap Storage > Apps or Other Apps.
- Find and select HP Smart in the list.
- Tap Clear Cache to remove temporary app files.
- Tap Clear storage to delete all app data.
- Next, open the HP Smart app, and then sign into your HP Smart account.
- On the app home screen, tap Add printer or the plus sign.
- Follow the prompts in HP Smart to re-add the printer to the app.
Once done, the printer icon will now show on the app home screen and is ready to use.
I hope this post helps!
Read: Scanner is not working – Problem connecting to the scanner
How do I enable scanning on my HP Smart?
Click the Scan tile on the HP Smart app home screen, then select an option from the top menu bar. Now, on your scanner, place the original document on the printer scanner glass or into the automatic document feeder (ADF). Next, select scan job type, size, color, and resolution settings, and then click Scan in the lower right corner to start the scan job.
Leave a Reply