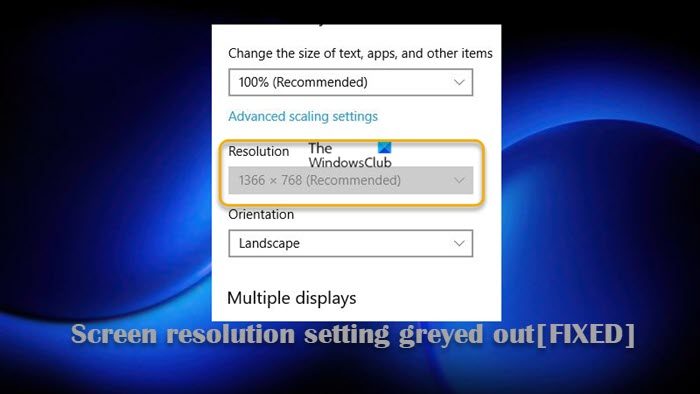
Several PC users have reported that after connecting their laptop to an external monitor, installing a new Windows update, or installing a new graphics card on their Windows 11 or Windows 10 computer, they can’t change the screen resolution because the screen resolution setting is greyed out in Display options page in the Settings app. This post offers solutions affected PC users can apply to resolve the issue.

For screen resolution problems, the cause could range anywhere from a hardware issue to minor configuration issues. This particular issue might also occur if you have a basic video driver installed. It could also be a limitation of the graphics card because in some cases, the monitor supports the resolution, but your video card is not powerful enough to drive it. However, if this isn’t the case for you, then you can continue with the rest of the post to get this current problem fixed!
The screen resolution setting greyed out in Windows 11
If you want to improve video performance or just connect a new monitor to your PC, you will want to check and change your screen resolution to the right settings for a better viewing experience. However, if you’re unable to change the screen resolution because the setting is greyed out in the Display options page in the Settings app on your Windows 11/10 device, then our recommended solutions as presented below should help you resolve the issue on your system.
- Clean Boot your PC and change the screen resolution setting
- Change the screen resolution via your graphics card Control Panel
- Update the graphics adapter driver
- Install Microsoft Basic Display Adapter driver
- Uninstall Windows update or Perform System Restore
Let’s take a look at the description of the process involved concerning each of the listed solutions.
Read: Fix Screen Resolution problems in Windows
1] Clean Boot your PC and change the screen resolution setting
Clean Boot is an environment where only basic and essential services run and there is no issue being triggered by third-party applications or additional built-in features. So, if you’ve only encountered the screen resolution setting greyed out issue after installing an app, game, or software on your Windows 11/10 device, then you can clean boot your system and see if changing the resolution in that system state works. If not, proceed with the next solution.
Read: How to change Remote Desktop Resolution in Windows
2] Change the screen resolution via your graphics card Control Panel

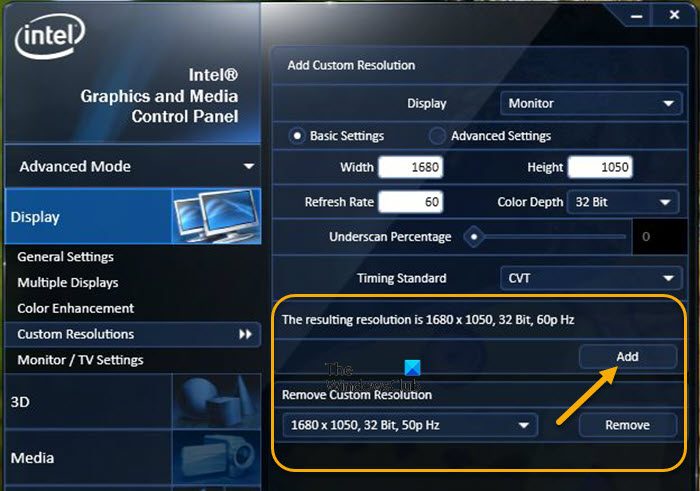
For some affected PC users, this solution or more of a workaround worked for them. This requires you to change the screen resolution via your graphics card Control Panel. For example, in Intel Graphics and Media Control Panel, as shown in the image above, there is a custom resolution option where you can create and set the custom screen resolution you want.
Read: How to get 1920×1080 resolution on a 1366×768 screen in Windows
3] Update the graphics adapter driver
If the issue in view started after you installed a new graphics card, then it’s likely the graphics driver is out of date. In this case, depending on your PC manufacturer, you can use their proprietary driver download software to update the graphics driver.
- Dell Update utility will help you download or update Dell Drivers
- Lenovo System Update enables you to download Lenovo Drivers, Software, Firmware, and Update BIOS.
- AMD users may use AMD Driver Autodetect.
- Intel users may use Intel Driver & Support Assistant.
- HP users can use the bundled HP Support Assistant.
If after updating or installing the correct graphics driver, the issue at hand is still unresolved, then it could be there’s a compatibility issue between your driver and your operating system which usually happens if you’re using an older computer. In this case, you can install the graphics driver in compatibility mode by following these steps:
- Right-click the driver setup file.
- Select Properties from the context menu.
- Tap or click the Compatibility tab.
- Checkmark the Run this program in compatibility mode option.
- Tap or click the drop-down box and select a previous operating system.
- Tap or click OK.
Now, run the driver installer file and follow the on-screen prompts to install the driver. Restart the PC afterward and see if that solves the problem; otherwise, proceed with the next solution.
4] Install Microsoft Basic Display Adapter driver

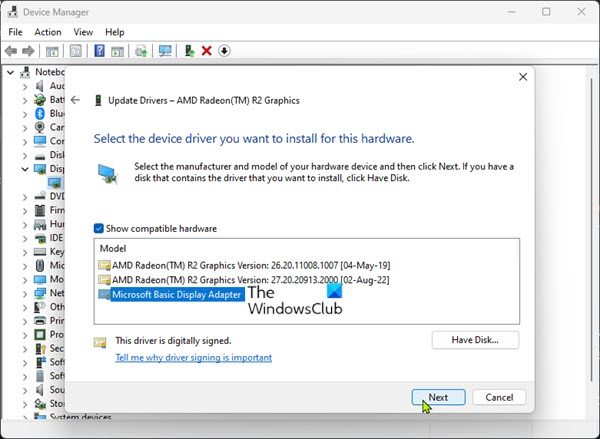
The Microsoft Basic Display Adapter is software that’s built into Windows that provides display and graphics capabilities when software from your hardware manufacturer isn’t installed. So, if you’re still unable to change the resolution on your Windows 11/10 PC, you can try switching to the Microsoft Basic Display Adapter by following the steps outlined below.
- Press the Windows key + X to open the Power User Menu.
- Tap the M key on the keyboard to open Device Manager.
- Scroll down the list of installed devices and expand the Display adapters section.
- Next, right-click on the graphics card and choose Update driver from the context menu.
- Select the Browse my computer for drivers option.
- Click the Let me pick from a list of available drivers on my computer option.
- On the next screen, select Microsoft Basic Display Adapter from the list.
- Click the Next button and wait for Windows to install the drivers.
- Once done, reboot your PC.
Read: Fix Screen Resolution Monitor problems after moving to a large, higher one
5] Uninstall Windows update or Perform System Restore
If the issue you’re currently facing started after you recently installed a new Windows update, then the applicable solution here is to either uninstall the Windows update or simply restore your system to an earlier point in time. You can still use System Restore even if you haven’t installed any system update as it’s entirely possible that the issue was facilitated by a change that your system has gone through recently.
I hope you find this post helpful!
Read next: Fix Resolution not supported Monitor error on Windows PC
Why is my resolution option greyed out?
If your display resolution is disabled or the screen resolution settings are inaccessible, it’s usually due to corrupted or incompatible display drivers. So, generally, to resolve the issue in this case, you’ll need to either update or reinstall the display drivers. You can go to your computer manufacturer’s website and download the latest driver for your graphics card.
Why can’t I change my display resolution on Windows 11?
There could be various reasons why you can’t your display resolution on Windows 11. However, to force or set a custom display setting on your Windows 11/10 computer, simply right-click anywhere on your desktop to bring up the context menu and select Display settings to open the Display options page in the Settings app. Alternatively, you can also press the Windows key + I to open the Settings app and then select System > Display. In the display settings window, scroll down to Advanced display settings and make the changes you want.
How do I restore display settings?
You can turn off Custom Scaling to restore or reset the display settings in Windows 11/10 by following these steps:
- Open Windows Settings.
- Then choose System.
- Click Display from the left navigation pane.
- On the right pane, click Advanced Scaling settings.
- Clear previous settings and choose Apply.
How do I enable custom resolution on Intel?
To enable or set the custom resolution on Intel Graphics Control Panel, follow these steps:
- Open the Intel Graphics Command Center.
- Click the Display tab.
- In the Display General Settings, click the Custom button located next to the Resolution setting.
- A warning message will appear. Click on OK to proceed.
- A new window will appear with Basic Custom Resolution settings. If desired, click Advanced Settings for more options.
- Now, input the custom resolution or mode values per your requirements.
- Click Yes to accept the changes.
Leave a Reply