Want to paste a screenshot in your Microsoft document, slide, or notebook without using a third-party screenshot app? Microsoft Office has a Screenshot tool available in Word, PowerPoint, and OneNote that offers screen clipping features.
How to use the built-in Screenshot tool in Office programs
You can use the built-in Screenshot tool in Word, Outlook, Excel, PowerPoint & the Screen Clipping tool in OneNote. We explain below, how to use screenshots or Screen clipping in Microsoft Office programs.
1] How to use Screenshot Tool in Word, Outlook, and Excel

Follow the steps below to use the Screenshot feature in Word, Outlook, and Excel.
- Go to the location where you want to screenshot.
- Click the location on the document where you want to add the screenshot.
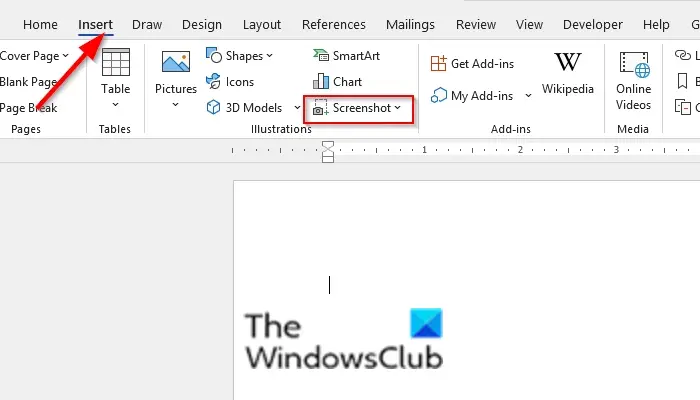
- On the Insert tab, in the Illustration group, click the Screenshot button and select Screen clipping from the drop-down menu.
- The Screen will become white with a cross pointer on the location you want to screenshot.
- Drag and select the part of the screen you want to capture.

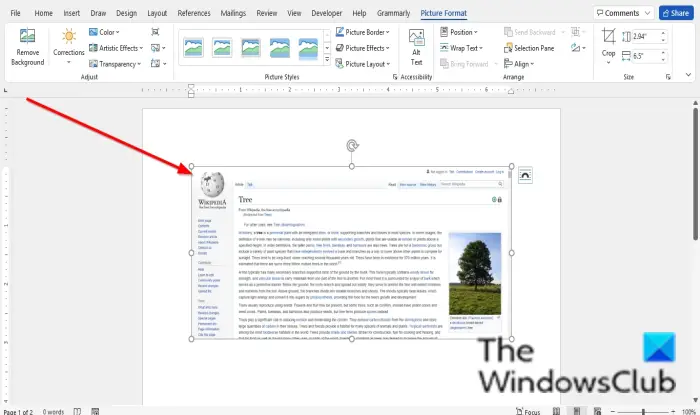
The captured screen will appear on your document.
2] How to use Screenshot tool in PowerPoint

- Go to the location where you want to screenshot.
- Click the location on the document where you want to add the screenshot.
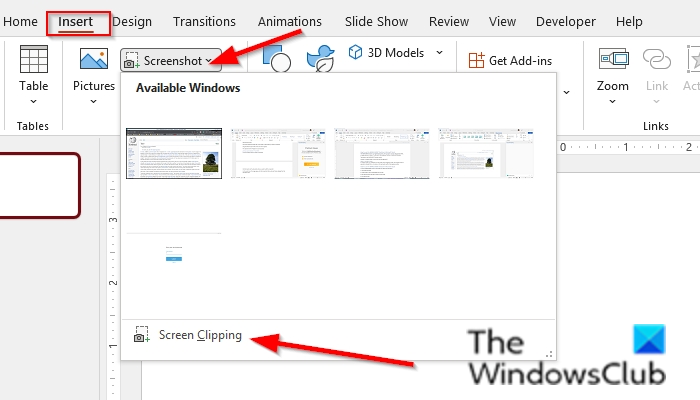
- On the Insert tab, in the Images group, click the Screenshot button and select Screen clipping from the drop-down menu.
- The Screen will become white with a cross pointer on the location you want to screenshot.
- Drag and select the part of the screen you want to capture.
The captured screen will appear on your slide.
3] How to use Screen Clipping Tool in OneNote

Follow the steps below to use the screenshots in OneNote.
- Go to the location where you want to screenshot.
- Click the location on the document where you want to add the screenshot.
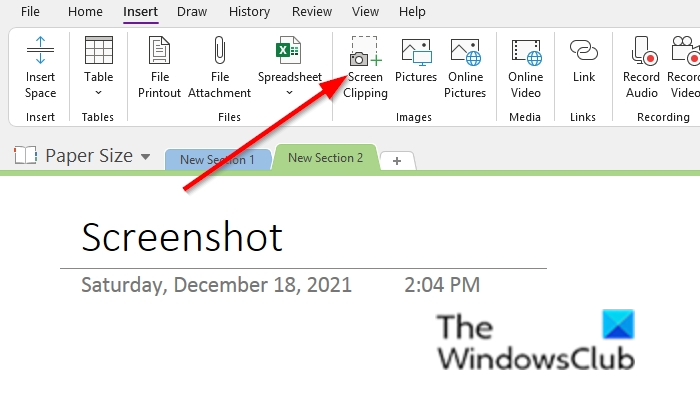
- On the Insert tab, click the Screen clipping button, in the Images group.
- The Screen will become white with a cross pointer on the location you want to screenshot.
- Drag and select the part of the screen you want to capture.
- The captured screen will appear in your notebook.
How do I take a screenshot in Office 365?
Just like the desktop version of Microsoft Office (say Microsoft Office 2016), there is a Screen Clipping tool in Word for Microsoft 365, Outlook for Microsoft 365, Excel for Microsoft 365, etc. Open any of these Microsoft 365 apps, jump to the Insert menu, and click on the Screenshot drop-down menu. Now you can add the screenshot of an entire opened window or use the Screen Clipping option to capture a part of the screen and add it to your document.
How do you take a screenshot of a Table in Excel?
You can screenshot the range of cells in Excel. To do this procedure:
- Copy the range of cells.
- Then go to the Home tab.
- Click the drop-down arrow of the copy button in the Clipboard group and select Copy as Picture option.
- A Copy Picture dialog box will open. There, select the Appearance type to As shown on screen or As shown when printed option.
- Select the Picture option as Format
- Then click the OK button.
- Click a different location on your spreadsheet, then select Paste in the clipboard group.
We hope this tutorial helps you understand how to use Screenshot or Screen clipping in Microsoft Office; if you have questions about the tutorial, let us know in the comments.
Leave a Reply