Secure boot is a security standard developed by members of the PC industry. It ensures that the device boots only using the software trusted by the Original Equipment Manufacturer (OEM). Secure Boot is one of the essential requirements of Windows 11. If you see the error System in Setup Mode: Secure Boot can be enabled when System is in User Mode while enabling the Secure Boot, the solutions provided in this article will help you.
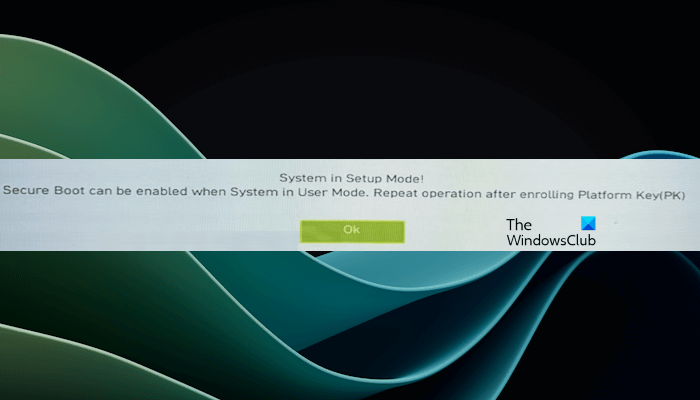
Secure Boot can be enabled when System in User Mode
You may see the “Secure Boot can be enabled when System in User Mode” error message while enabling the Secure Boot on your device. If you want to install Windows 11, you cannot do so until Secure Boot is enabled on your system. However, there are other ways to install Windows 11 without Secure Boot.
Some games also require the Secure Boot option enabled. Therefore, if you succeed in installing Windows 11 by bypassing the Secure Boot option, you may not be able to play such games. Hence, it is necessary to fix this error. The following suggestions will help you fix this error.
- Check your hard drive partition style
- Turn off CSM
- Change the System Mode to User
- Generate Platform Key (for ASRock Phantom Gaming motherboard users)
- Restore BIOS settings to default
Let’s see all the fixes in detail.
1] Check your hard drive partition style
The first step is to check the partition style of your hard drive. To do so, follow the steps provided below:
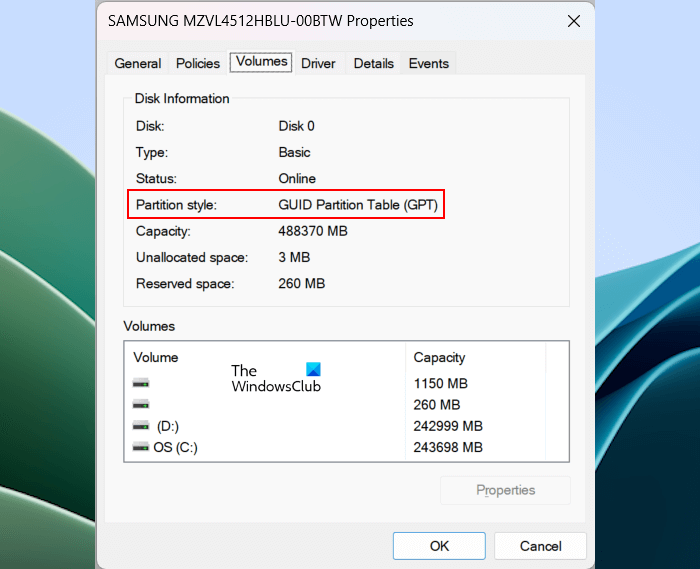
- Press the Win + X keys.
- Select Disk Management.
- Right-click on your hard disk and select Properties.
- Select the Volumes tab in the Properties window.
- You will see the partition style there.
If your hard disk partition style is MBR, convert it into GPT. Your data will be deleted while converting the hard disk partition style from MBR into GPT. But there is a way by which you can convert MBR into GPT without data loss.
Now, try to enable Secure Boot. If you cannot enable the Secure Boot, try another fix.
2] Turn off CSM
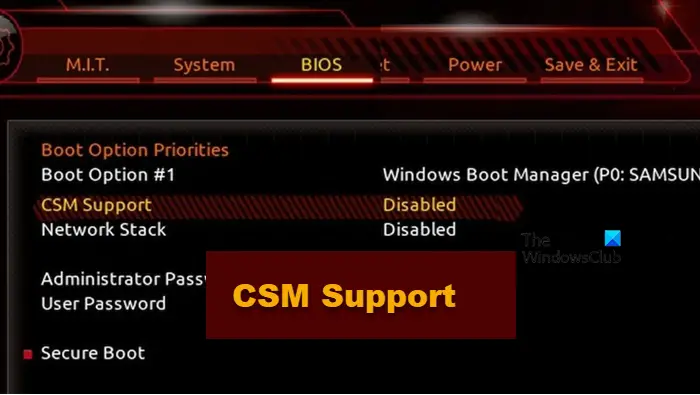
Modern computer systems come with the UEFI support. In such computer systems, there is no need for CSM support. Hence, if CSM is enabled on your system, you can disable it. Motherboards of different brands may have different ways to disable CSM in BIOS. You need to visit the official website of your computer motherboard manufacturer to know the exact way to disable CSM in BIOS.
3] Change the System Mode to User
The error message says that the Secure Boot can be enabled when the system is in User Mode. Therefore, if your system is in Setup mode, you cannot enable the Secure Boot. Change the Setup Mode to User Mode and you will be able to enable Secure Boot.
Motherboards of different brands may have different methods to switch between System Mode and User Mode. Refer to the user manual of your motherboard or refer to its official website to know the exact way to do this.
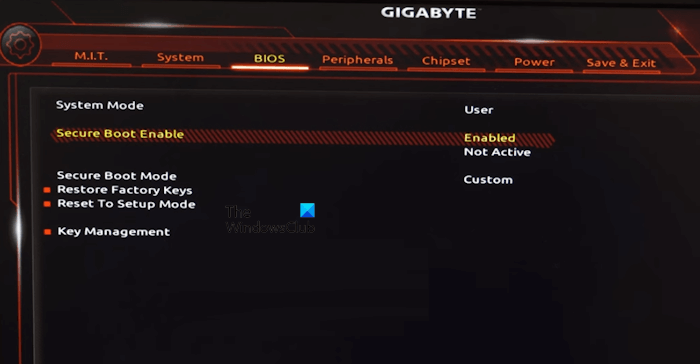
For example, in MSI and Gigabyte motherboards, you have to install the default factory keys. The steps to do this are as follows:
- Enter your BIOS.
- Change the Secure Boot mode from Standard to Custom.
- Click on the Enroll Factory Default keys option. In Gigabyte motherboards, this option is Restore Factory keys.
- Click Yes.
You may receive a popup message regarding resetting your system. Click No. Now, you should be able to enable Secure Boot. After enabling Secure Boot, change the Secure Boot Mode back to Standard. Save BIOS settings and exit.
4] Generate Platform Key (for ASRock Phantom Gaming motherboard users)
This solution is for the ASRock Phantom Gaming motherboard users. If your system has this motherboard and you are unable to install the default Secure Boot keys, you can generate the Platform Key.
To do this, enter the BIOS of your computer and then go to the Security tab. There you will see an option named Key Management. Select it and then select the Generate option or the option similar to the Generate option.
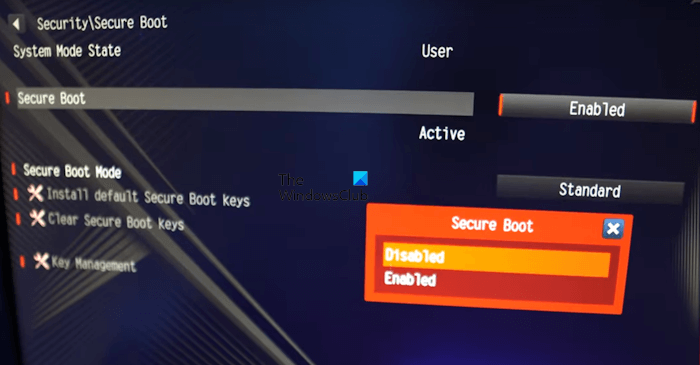
Now, return to the Secure Boot page in BIOS and switch the Secure Boot Mode from Standard to Custom. This will enable the option to install the default Secure Boot keys. Click on the Install Default Secure Boot Keys option. After doing this, enable Secure Boot.
Once you enable Secure Boot, change the Secure Boot Mode back to Standard. Save the changes and exit.
5] Restore BIOS settings to default

If none of the above fixes resolve your issue, you can restore all the BIOS settings to default. After performing this action, you should be able to enable Secure Boot. Before resetting your BIOS settings to default, we recommend you note down all the changes you made in your BIOS, so you can make all these changes again after enabling Secure Boot.
I hope this helps.
How do I enable Secure Boot in system configuration?
There is no option to enable Secure Boot in System Configuration or MSConfig. Hence, you must enter your BIOS settings to enable Secure Boot on your device. Visit your computer manufacturer’s official website to know the dedicated key to enter BIOS.
Why can’t I enable Secure Boot status?
There can be many reasons why you cannot enable Secure Boot or the Secure Boot option is greyed out on your system. You might have changed a setting that disabled the Secure Boot option. The easiest way to fix this issue is to reset BIOS to factory default settings.
Read next: Windows computer won’t boot after enabling Secure Boot.
Leave a Reply