If during installation, you receive an error message The selected boot device failed, Press <Enter> to Continue then know that this error can occur when you use a USB Stick or even a DVD Disk to boot from. This is because some settings inside of your BIOS are not compatible with the bootable device that you created. Fixing this does not vary from device to device at all. All we need to do is change some settings in the BIOS and make a proper bootable disk.

Fix The selected boot device failed error in Windows
Since you cannot boot into your Windows computer, you will have to use a bootable media to do so. If you already have one, you can use it. If you do not have one, you will have to create one using another computer. Follow these steps to resolve your issue.
1] Make a bootable USB Stick

To make bootable media, you should use the Media Creation Tool – but you can do it without using the Media Creation Tool as well.
If you get an ISO without using the Media Creation Tool, make sure that the bootable USB stick has been created using a trustworthy tool.
2] Repair your computer

Once you have the bootable media, use it to boot your computer and use then opt to Repair your computer using the installation media.
3] Run Automatic Startup Repair

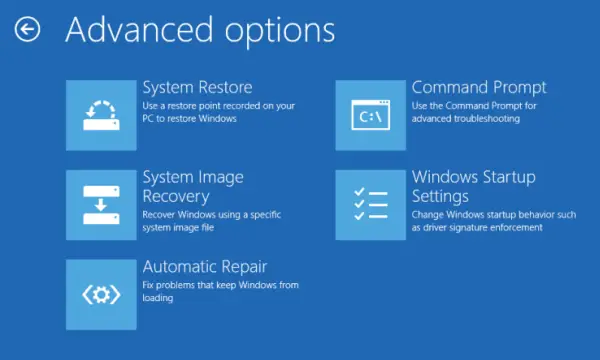
Once you select Repair your computer, It will boot your computer into Advanced Recovery Options.
Here you can select the Automatic Startup Repair option and wait for the computer to do its job.
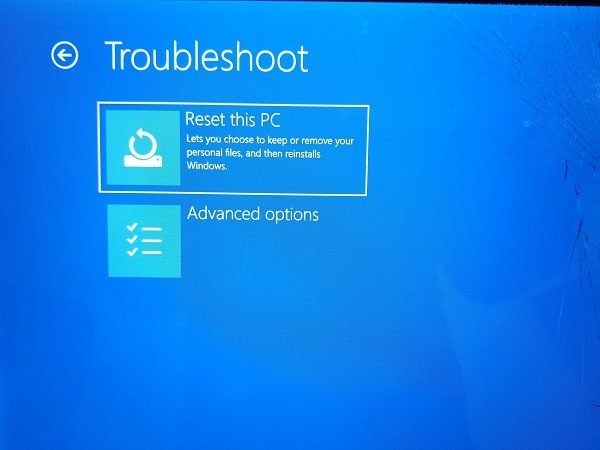
If Automatic Repair works, good; but if Automatic Startup Repair cannot repair your PC, you will have to use the Reset This PC option that is also available in the Advanced Startup Options screen.

If this step works, you will have resolved your issue – but if Automatic Startup Repair and Reset PC also fails, then the linked post will help you.
4] Disable Secure Boot in BIOS
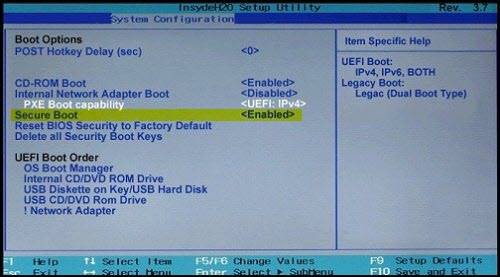
Once you are able to boot to the BIOS or normally to Windows desktop, we would recommend disabling Secure Boot in the BIOS settings.
You can boot directly to your BIOS/Firmware settings or go via Windows Settings s follows:
- Open Windows 11 Settings > System > Recovery > Advanced startup.
- Open Windows 10 Settings > Update & Security > Advanced Startup options.
When you click on Restart Now, it will reboot your PC, and offer you all these advanced options.
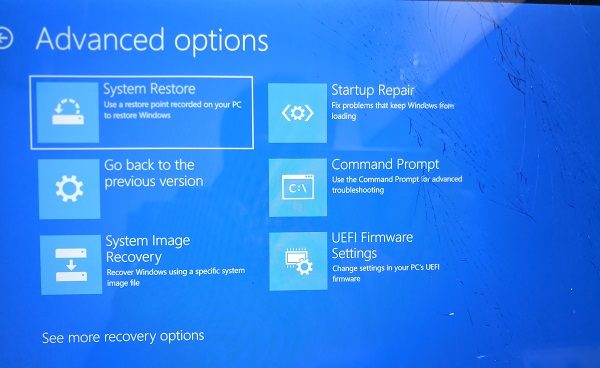
Select Troubleshoot > Advanced Options. This screen offers further options which include System restore, Startup repair, Go back to the previous version, Command Prompt, System Image Recovery, and UEFI Firmware Settings.

Select UEFI Firmware Settings, and it will take to the BIOS.
Every OEM has their own way of implementing the options. Secure Boot is usually available under Security > Boot > Authentication Tab. Set it to Disabled.

Also, set Legacy Support to On or Enabled.
Save changes and exit. The PC will now reboot.
Once you are done with both of these things, you are good to go with the normal functioning of the operating system on your computer.
All the best!
Leave a Reply