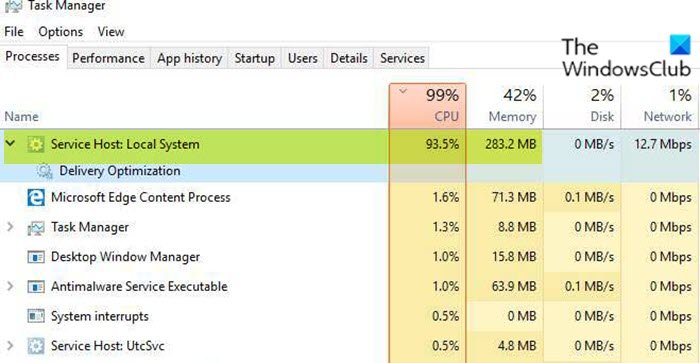
If you notice in Task Manager, that the Service Host Local System is hogging much of your disk, CPU and Memory usage that is potentially impacting your system performance, you can try the solutions provided in this post to resolve this high CPU or disk usage on your Windows 11/10 PC.

The Service Host Local System is a bundle of System Processes which operate automatically through the system. It includes several processes, such as the Windows Auto Update and many others which will occupy some disk space, memory, CPU, and even the Network.
Service Host: Local System high CPU or Disk usage
If you’re faced with this issue, you can try our recommended solutions and see if that helps to resolve the issue.
- Run SFC and DISM scans
- Disable Superfetch
- Modify Registry key value
- Disable Windows Update Delivery Optimization
- Troubleshoot in Clean Boot state
- Upgrade CPU.
Let’s take a look at the description of the process involved concerning each of the listed solutions.
1] Run SFC and DISM scans
The Service Host: Local System high CPU or Disk usage on your Windows 10 PC may be caused by corrupted system files. In this case, you can try to run the System File Checker to check and repair the corrupted system files. You can follow that up with a DISM (Deployment Image Servicing and Management) scan – a powerful utility in fixing problematic Windows system image files.
2] Disable Superfetch
This solution requires you to disable Superfetch and see if the issue is resolved. If not, try the next solution.
Related: Fix Antimalware Service Executable High CPU, Memory, Disk usage.
3] Modify Registry key value

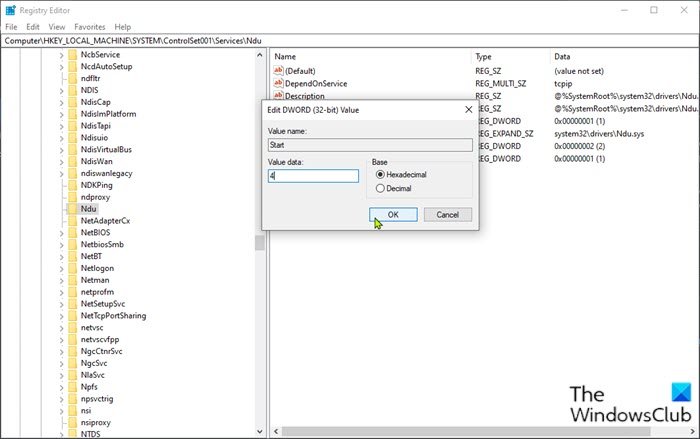
The registry key to be modified here is the ndu.sys. The ndu.sys (Network Data Usage Monitor) file is a Windows driver.
Since this is a registry operation, it is recommended that you back up the registry or create a system restore point as necessary precautionary measures. Once done, you can proceed as follows:
- Press Windows key + R to invoke the Run dialog.
- In the Run dialog box, type regedit and hit Enter to open Registry Editor.
- Navigate or jump to the registry key path below:
HKEY_LOCAL_MACHINE\SYSTEM\ControlSet001\Services\Ndu
- At the location, in the right pane, double-click the Start key to edit its properties.
- Input 4 in the Value data field.
Note: Changing the registry Start value to 4 will disable some part of the ndu.
- Hit Enter or click OK to save the change.
- Exit Registry Editor.
- Restart your PC.
On boot check if the issue is resolved. If not continue with the next solution.
4] Disable Windows Update Delivery Optimization
You may want to disable Windows Update Delivery Optimization and see if the issue at hand is resolved.
5] Troubleshoot in Clean Boot state
Unnecessary system and cache files, processes, services present or running on your computer can cause this issue.
Clean Boot is an environment on Windows 10 where only basic and essential services run and there is no issue being triggered by third-party applications or additional built-in features.
This solution requires you to perform a Clean Boot and see if that helps. If the issue persists, try the next solution.
6] Upgrade CPU
If none of the above solutions has worked for you, you can choose to upgrade your CPU. The issue may be caused by the old CPU or outdated/corrupted CPU drivers. In this case, you can first try updating the CPU drivers and see if that helped – if not, you can upgrade your CPU.
You can either update the processor drivers manually via the Device Manager, or you can get the driver updates on the Optional Updates (if available) section under Windows Update. You can also download the latest version of the driver from the CPU manufacturer’s website.
Any of these solutions should work for you!