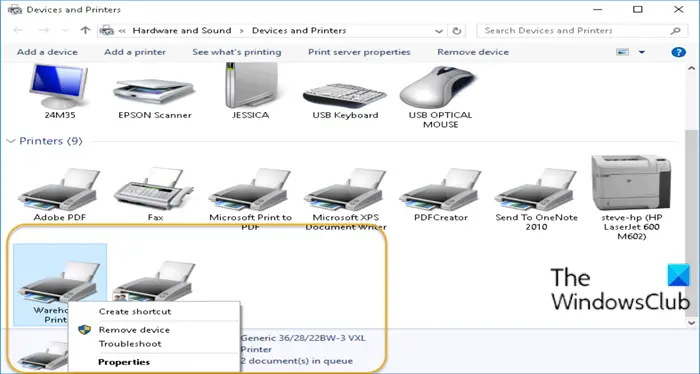
Typically, in Windows, you can right-click on a printer and the context menu will provide you an option to set that printer as default. Some PC users are reporting that this Set as default printer option is missing in Windows 11/10. This post provides the solution to this issue.

Set as default printer option missing
Notice that the option to Set printer as default is missing from the context-menu in the lead-in image above.
If you’re faced with this issue, you can try either of our recommended solutions below to resolve the issue.
- Set Default Printer via Settings app
- Use the ChangeDefaultPrinter app
Let’s take a look at the description of the process involved concerning each of the listed solutions.
1] Set Default Printer via Settings app
Here, you can try to set the default printer via the Settings app and see if that option is available for you.
Keep in mind that If you have Let Windows manage my default printer option selected, you’ll need to deselect it before you can choose a default printer on your own.
2] Use the ChangeDefaultPrinter app
With Windows 10, Microsoft wants to default to managing your default printer, based on which printer you printed to last while on that network. If you don’t want Windows choosing this for you, you can download from Github, and use the ChangeDefaultPrinter app to disable this behavior automatically if you choose a default printer. The app does not need to be installed, and can run in a limited user’s context or an administrator context.
Alternatively, you can manually disable the behavior via the registry.

Do the following:
Since this is a registry operation, it is recommended that you back up the registry or create a system restore point as necessary precautionary measures. Once done, you can proceed as follows:
- Press Windows key + R to invoke the Run dialog.
- In the Run dialog box, type regedit and hit Enter to open Registry Editor.
- Navigate or jump to the registry key path below:
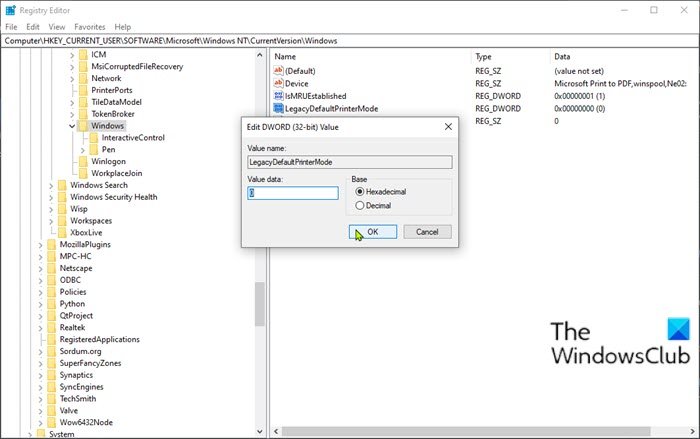
HKEY_CURRENT_USER\SOFTWARE\Microsoft\Windows NT\CurrentVersion\Windows
- At the location, on the right pane, double-click the LegacyDefaultPrinterMode entry to edit its properties.
If the key is not present, right-click on the blank space on the right pane and then select New > DWORD (32-bit) Value. Rename the value name as LegacyDefaultPrinterMode and hit Enter.
- Double-click on the new value to open it.
- Set the Value data to 1 to manually choose the default printer (as per previous versions of Windows), or to 0 (or disable it) to enable Windows being able to change the default.
- Exit Registry Editor.
Changes take effect immediately, without the user logging out and back in or restarting the computer. After this, you should be able to set the default printer.
I hope this helps!
Related post: Default Printer keeps changing.
Leave a Reply