Microsoft has introduced Dev Drive, a new storage volume using the ReFS technology meant to improve the performance of the drive of your system. We have already seen how to enable Dev Drive Protection, and now, In this post, we will learn how to set a Dev Drive as Trusted or Untrusted in Windows 11.
When one creates a Dev Drive, systems automatically start trusting it. However, this is not always the best behavior as there are some things that make a trusted drive different from the untrusted one.
When a Dev Drive volume is Trusted, it will be subjected to Real-time protection which will run in the Asynchronous Performance Mode. In this, the file will open now, but it will be scanned later. This creates a balance between threat protection and performance and improves the performance instead of making the drive more secure as you explicitly mark the drive as “Trusted”.
However, this is not the case with Untrusted Dev Drive. If a Dev Drive is untrusted, it will be synchronously scanned. This means that Real-time protection will run synchronously. So, the moment a file is open, it will be scanned. Due to this, the performance will take a hit, but the protection will be enhanced.
Set Dev Drive as Trusted or Untrusted in Windows 11
Now that you understand why it is important to set a Dev Drive Trusted or Untrusted manually, let us now see how to set Dev Drive as Trusted or Untrusted on your computer. In this guide, we will talk about the following things.
- Check if the Drive is set to Trusted or Untrusted
- Configure Dev Drive as Trusted
- Configure Dev Drive as Untrusted
We will see how to do the same.
1] Check if the Drive is set to Trusted or Untrusted

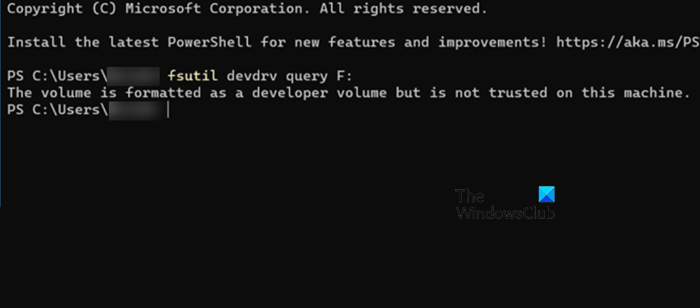
Before setting a drive to Trusted or Untrusted, we need to check if changing the configuration is necessary. To do the same, we would need Command Prompt or Windows PowerShell. You can launch the application from the Start Menu. Make sure to open the app as an administrator. You will get a UAC prompt when you try to open Command Prompt or PowerShell as an administrator. Click Yes to confirm your action. Once the app is launched, execute the command mentioned below.
fsutil devdrv query <drive-letter>:
Note: Make sure to replace <drive-letter> with the actual letter of the dev drive that you want to check.
If the command outputs the statement “This is a trusted developer volume, Developer volumes are protected by antivirus filter”, the dev drive is trusted, but if it says “The volume is formatted as a developer volume but is not trusted on this machine”, it is not trusted.
Read: Dev Home is not updating; Stuck at 90%
2] Configure Dev Drive as Trusted

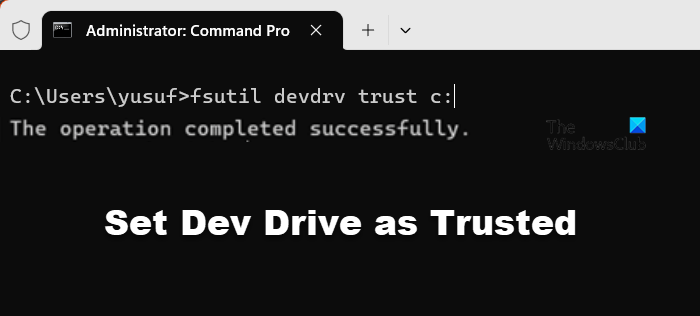
Now, let us set Dev Drive as trusted. We have mentioned earlier what a trusted drive is and how you can open the console, which in this case is Command Prompt or PowerShell as admin. So, open the command line interpreter with administrative privileges and execute the following command.
fsutil devdrv trust <drive-letter>:
Note: Replace <drive-letter> with the actual letter of the drive.
If the command is executed successfully, you will get the message “The operation completed successfully”.
3] Configure Dev Drive as Untrusted
To set a Dev Drive as Untrusted, execute the command in the elevated or admin mode of Command Prompt or PowerShell.
fsutil devdrv untrust <drive-letter>:
Note: Replace <drive-letter> with the actual letter of the drive.
This will do the job for you.
Also Read: How to hide a Drive in Windows?
How do I enable Dev Drive in Windows 11?
You can enable the Dev Drive from Windows Settings > Storage > Advanced Storage Settings > Disks & volumes > Create Dev Drive.
Related: How to Set up a Dev Drive on Windows 11 for Developers?
How much RAM do I need for Windows 11?
To install Windows 11, you must have at least 4 GB of RAM. However, RAM is not the only parameter to check; that is why, check Windows 11 System Requirements. You can also use tools to check if your PC supports Windows 11.