If you want to set the priority of notifications in the Action Center or Notification Center of Windows 11/10, here is the step-by-step guide you need. You can change the priority of any app’s notification so that you can get the notifications first or change the position of notifications.
Set priority of Notifications in Action Center in Windows 11
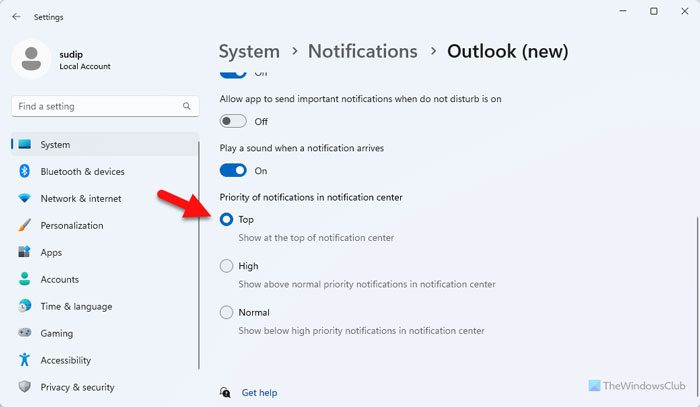
To set the priority of notifications in Action Center in Windows 11, follow these steps:
- Press Win+I to open Windows Settings.
- Go to System > Notifications.
- Click on the app you want to set priority for.
- Choose a priority as Top, High, or Normal.
To learn more about these steps, continue reading.
First, you need to open the Windows Settings panel and go to System > Notifications. Here you can find all the apps that show notifications in the Action Center or Notification Center.

Click on the desired app and head to the Priority of notifications in notification center section. From here, choose the Top or High option as per your requirements.
However, if you are using Windows 10, you can follow the below steps.
Set priority of Notifications in Windows 10 Action Center
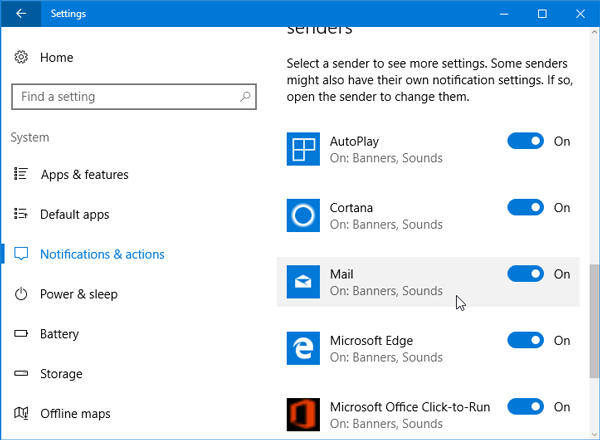
To prioritize notifications, open the Settings panel on your Windows 10 machine. To do so, you can press the Win+I keys together. Next, click on System. Here, you will see Notifications & actions on the left-hand side. Select it and then scroll down a bit to get all the apps those are currently showing notifications in Action Center.

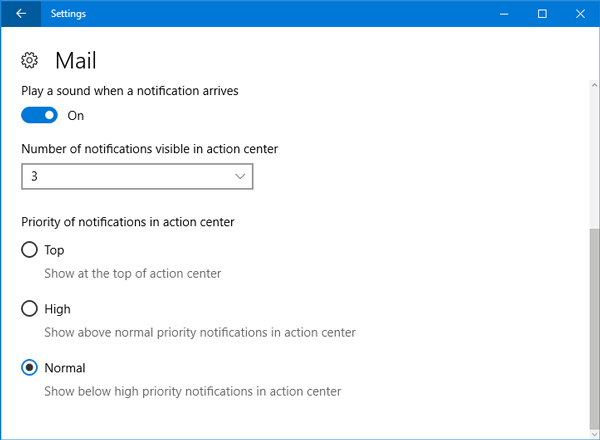
Select an app that you want to change the priority of. There are three options available:
- Top
- High
- Normal.
The “Normal” is the general priority and if all the apps are set to “Normal”, the Action Center will show notifications according to the receive time. “High” preferred apps will show notifications above “Normal.” That means if your Mail app is set to “High” and others are set to “Normal,” you will get Mail notifications above all the others – no matter when you received the new email. “Top” labeled apps will show notifications above all the other two labels. However, if you have set “High” priority for two apps or so, you will get the notifications according to the notification received times.

Select the desired priority and confirm the action if you are asked.
That is all you need to do.
Read: How to Turn off Widget notifications on Windows 11
How do I change the position of notifications in Windows 11?
To change the position of notifications in Windows 11, you need to set the priority for the notifications as Top. For that, open the Windows Settings panel and go to System > Notifications. Click on the desired app and head to the Priority of notifications in notification center. Then, choose the Top option from the list.
How do I change the notification area in Windows 11?
To change the notification area in Windows 11, you need to move the entire Taskbar. It is possible to How to Turn off Widget notifications on Windows 11. Open Registry Editor and go to this path: HKEY_CURRENT_USER\SOFTWARE\Microsoft\Windows\CurrentVersion\Explorer\MMStuckRects3. Double-click on Settings and find the 00000008 row and FE column. Change the Value data from 03 to 01. Then, save the change, close all the windows, and restart the Windows Explorer process in using Task Manager.
Read: How to hide Notification Content on Lock Screen on Windows 11.