Screen resolution is a setting that determines how much detail and information is displayed on your computer’s screen. It is measured horizontally and vertically in pixels. However, how much information needs to be displayed is based on the monitor and the user’s personal taste. Hence, in this post, we will discuss how to set a different screen resolution for each user account in Windows 11/10.

Windows chooses the best display settings, including screen resolution, Monitor Refresh Rate, and color, based on your monitor. These settings differ depending on whether you have an LCD or a CRT monitor.
Recommended resolution for monitors
While it is usually a good idea to set your computer’s screen resolution to its native resolution – the resolution a monitor was designed to display based on its size, there may be a reason why you’d want to change it. You can select any of the recommended resolutions or simply let your eyes decide what suits you best.
Resolution based on LCD monitor size
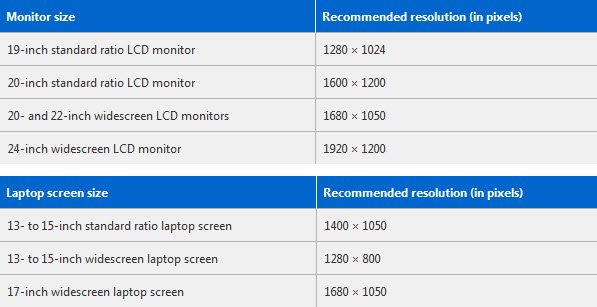
Resolution based on CRT monitor size
Unlike LCD monitors, CRT monitors generally don’t come in widescreen sizes. Almost all have a standard 4:3 screen ratio, with resolutions in the same 4:3 ratio of width to height. Here are the recommended resolution based on CRT monitor size

An LCD monitor running at its native resolution usually displays text better than a CRT monitor. LCD monitors can technically support lower resolutions than their native resolution, but text won’t look as sharp, and the image might be small, centered on the screen, edged with black, or look stretched.
Change screen resolution in Windows 11/10
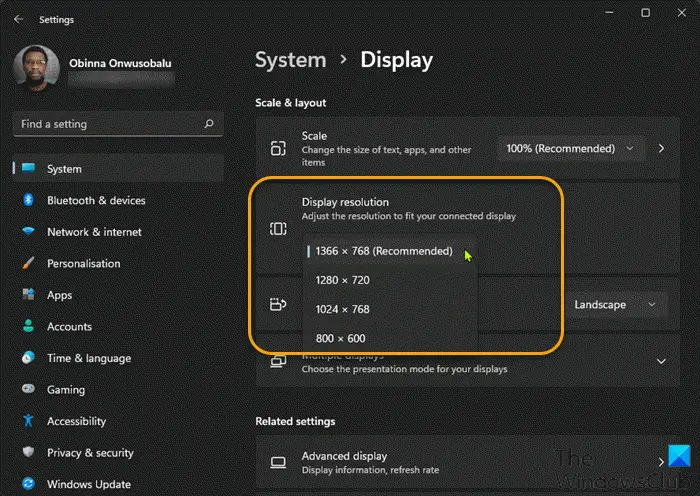
To check and change Screen Resolution via Settings app in Windows 11, do the following:
- Press Windows key + I to open the Settings app.
- Select System.
- On the right side of the System category, click on the Display tab.
- Scroll down on the right pane and you will see the current display resolution under the Display resolution section. For instance, on my PC, screen resolution is set by Windows 11 is 1366×768 (Recommended) pixels.
- To change the Screen resolution, click on the drop-down and select what you want.
- Exit Settings app.
If you are a user of Windows 10, you can also open Settings > System > Display. Click on Advanced Display Settings to open the following windows.
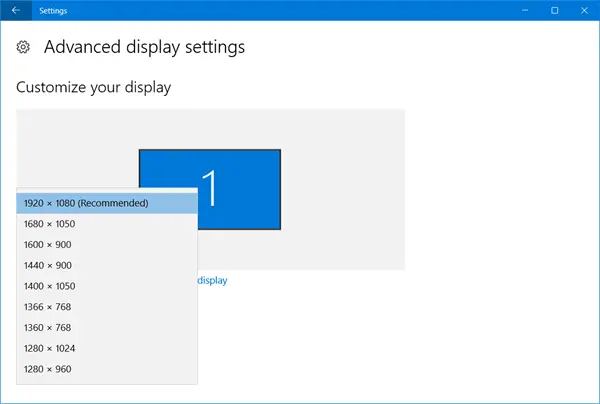
Here you can set the screen resolution.
If you want to change your screen resolution in Windows 10/8/7, right-click on your desktop and select Screen Resolution.
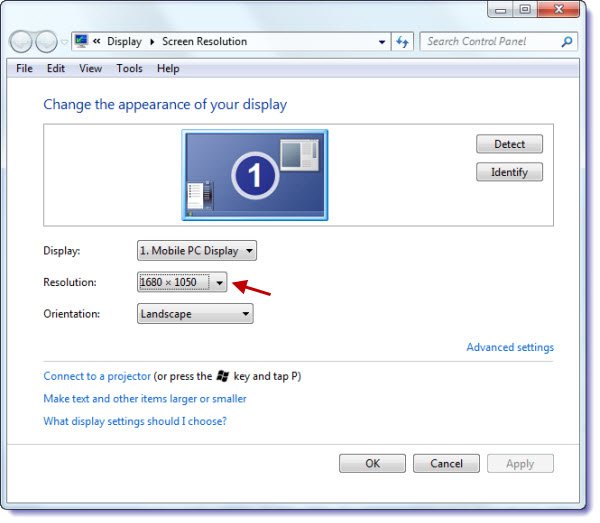
In the Control Panel Display setting window which opens up, you can set the Resolution you want, from the drop-down menu. You can go here to learn more on how to adjust your monitor for better screen resolution.
Set different screen resolution for every user
Windows OS does not let you set screen resolution per user. The same setting applies to all users once you set a screen resolution using the Control Panel. But you can, if you wish, set it so that your monitor displays an individual resolution for each user account. That is, every time a user logs on, he will get the screen resolutions that he has set for his account.
To do so, download and use Caroll. This freeware will automatically adjust the screen resolutions for each PC user.
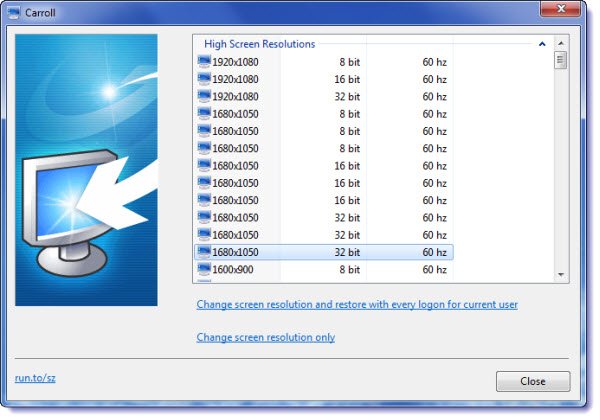
The first time you run it, the application will show all the available screen resolutions. Select the one you want and click on Change screen resolution and restore with every logon. Now, the next time you log on, Carroll changes the screen resolution automatically without displaying the user interface.
Can different users have different Display settings?
Yes, you can set different display settings with the help of a third-party app called Carrol. You can download the application from their official website and set display settings based on user preferences and the monitor.
Also Read: Cannot change User Account Control (UAC) settings on Windows.