Raspberry Pi is a single board, low powered single board computer available for a very low price. It is one of the best boards to build solutions that come under the Internet of things or IoT. It comes out of the box with an operating system calls as NOOBS which comes out as New Out Of the Box Software. In this guide, we will be taking a look at how to set this default environment up for a new Raspberry Pi board.
Read: Differences between Raspberry Pi A+ and Raspberry Pi B+.
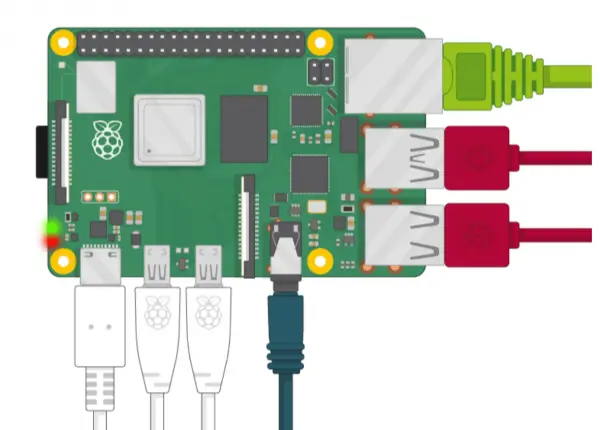
Set up Raspberry Pi module with default settings
We will talk about the following aspects of setting up the Raspberry Pi module with default settings:
- The Power Supply
- The Storage.
- Input devices.
- The output display.
These are the minimum components that will help you in setting up the Raspberry Pi module. In addition to these, you can also connect a case, an ethernet connection, and more.
The following will be the steps to get Raspberry Pi ready:
- Get the SD Card ready.
- Powering on the Raspberry Pi.
- Setting up the environment.
1] Get the SD Card ready
Get the latest version of NOOBS or RASPBIAN from their official website here.
Extract the contents of the downloaded ZIP to the formatted SD Card using your Windows computer.
2] Powering on the Raspberry Pi
To make sure that all the components of the board are safe, you would have to plug in the components in the given order.
Insert the SD card where you extracted the files for your operating system.
Connect the USB Mouse and then the keyboard.
Finally, plug in the display cable not matter if you are using HDMI or VGA.
Just plug in any of the optional devices if you want to.
And just plug in the power supply and boot it.
You will see the following loading screen on the main display.
 There you go.
You will land on this Desktop after a few seconds.

Next, we will be setting up the environment.
Read: How to install Windows 11 on Raspberry Pi4?
3] Setting up the environment
Run the Welcome to Raspberry Pi application.
It will take you through the setup guide.
Select Next to initiate the setup.
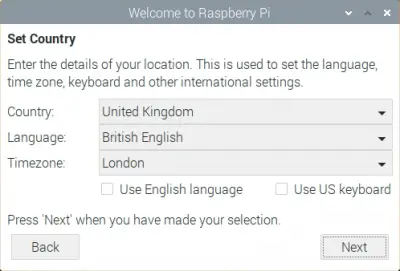
Set your Country, Language, and Timezone and then select Next to proceed ahead.
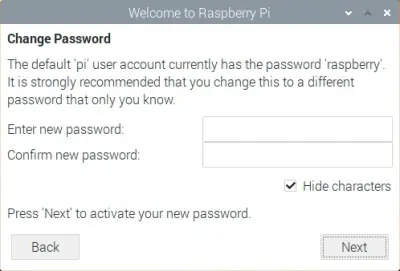
Put up a strong password and select Next again.
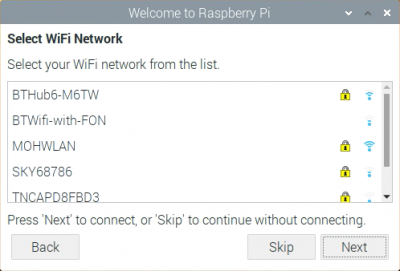
Set up your WiFI on the next screen and upon selecting Next, it will check for software updates,
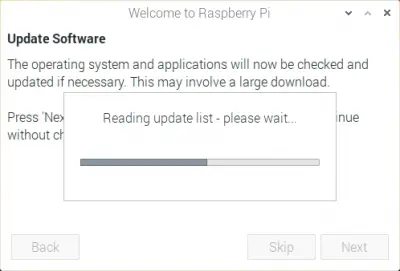
If any updates are found, it will download and install it.
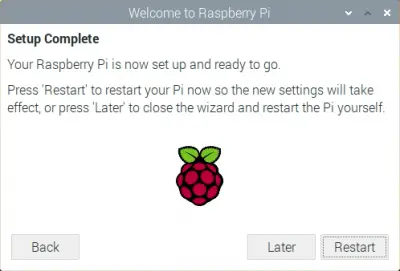
You will get a Setup Complete message. Now, you will have to Restart your Pi immediately or later to complete the setup.
In case you need some further help, you can always refer to their Help section of the Raspberry Pi project.
I hope this guide helps!
Read: How to take a backup of Raspberry Pi
How do I reset my Raspberry Pi to default settings?
Normally, the only way to restore or reset your Raspberry Pi OS is by unplugging the SD Card, formatting the card, re-write the OS image, and then plugging back the SD Card. If you want, you can also use a gist from github.com that lets you factory reset your Raspbian OS. That gist provides the scripts for creating an image file of Raspberry Pi OS including an option to factory reset it. You won’t have to unplug the SD Card and format it to factory reset Raspberry Pi OS.
How do I change the configuration on my Raspberry Pi?
To change the configuration of Raspberry Pi OS, first, click on the Raspberry Pi icon or logo present on the top left side. Access the Preferences menu and click on the Raspberry Pi Configuration option. Now you can configure the options. You can change the system password, enable/disable the splash screen, set resolution, and access the Interfaces tab to enable/disable Camera, Remote GPIO, SSH, and more.
Read next: Windows IoT Core vs Raspbian – Which is better?
Leave a Reply