During email composition, CC (Carbon Copy) and BCC (Blind Carbon Copy) are the two commonly used fields which are used by most of us to send the copies of an email to additional people who are concerned with the information in addition to the main recipients. Irrespective of which email provider you use whether Gmail or Outlook, you will see the CC and BCC fields along with To fields when you compose a new email.
According to email etiquette, the To field is used to enter the email addresses of the main recipients. CC is used to enter the email addresses of additional people interested in the information or when you simply want to keep them in the loop. While CC is used when you want the main recipients to know that other people have also been sent the same message, BCC is used when you don’t want the main recipients to know who has received the same email copy.
You may often want to CC and BCC yourself or your colleagues in an email so that you are in the loop of important conversations. To simplify your task, Outlook and Gmail enable you to automatically CC and BCC any email address on every email you send. While these can be messy, in some situations, you may need a copy of all the ongoing series of email conversations.
You can set a simple rule in Gmail and Outlook that will automatically CC and BCC certain email addresses to all the emails you compose. In this article, we explain in detail how to auto-CC and BCC a specific email address in Outlook and Gmail.
Automatically CC & BCC all emails in Gmail
Gmail doesn’t have an inbuilt feature to auto-CC and BCC emails. However, many extensions allow you to automate the task and save time. AutoBCC.com offers an extension called Auto BCC & Auto CC for Chrome users. This extension allows you to easily set a new rule to automatically BCC or CC multiple Google mail accounts or your email address when you compose, reply, or forward emails.
This extension is free for personal users. Additionally, the Auto BCC and Auto CC extension can be used in combination with a CRM system. Follow the below steps to automatically cc and BCC any email you send using the Auto BCC for Gmail extension.
- Get this extension here.
- Install the extension and provide access to your Gmail account.
- Click the Envelop icon that gets added to your Chrome browser to open the Options page.
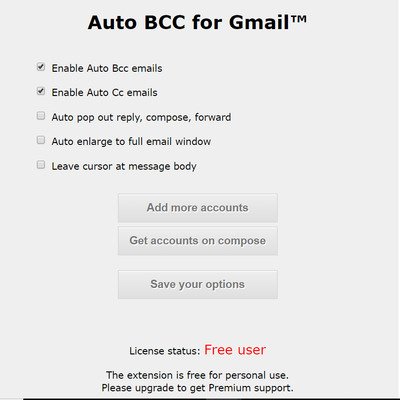
- Select the option Enable Auto Bcc emails.
- Select the option Enable Auto Cc emails.
- Click Add more accounts.
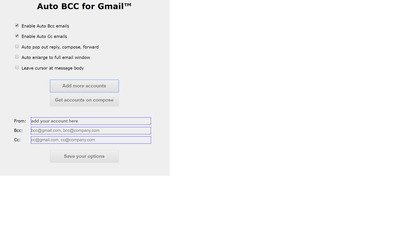
- In the From field, add your account address.
- Type the emails addresses that you want to Bcc and CC in their respective fields. You can add multiple addresses separated by commas.
- After you finish, click Save your options button to apply a new rule.
- Launch Gmail and click the Compose button to create a new email.
- Change From email address. This will automatically change the BCC and Ccc email addresses accordingly.
- If in the future you want to officially cancel the extension’s access to the Gmail account, simply uninstall the extension.
If you don’t want to have third party access to your Gmail account, you can automatically BCC or CC emails using Gmail Filters. Follow the below steps to use Gmail Filters
- Launch Gmail and navigate Settings
- Click the option Filters and Blocked Addresses and select Create a new filter.
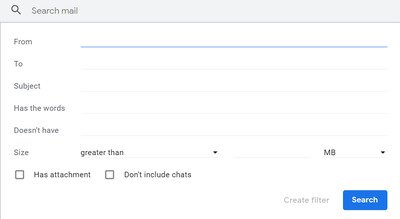
- Type your address in the From field.
- Click Create Filter with this search
- In the next page, select the option Forward it to.
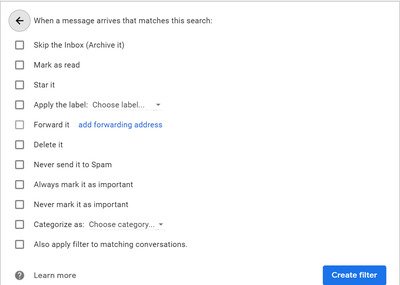
- Click the option add forwarding address and enter your email.
Related: How to Hide or Show BCC field in Outlook.
Automatically CC & BCC all emails in Outlook
Follow the below steps to automatically CC or BCC yourself or a certain email address in Outlook.
- Launch Outlook and click on Rules at Home tab.
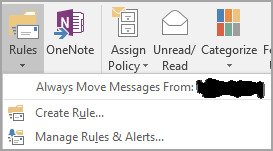
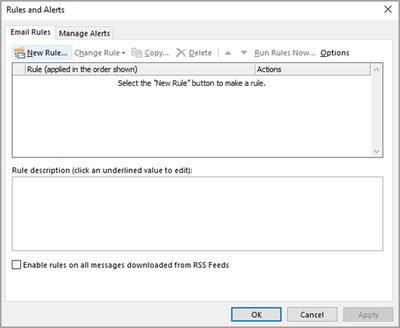
- Select Manage Rules and Alerts from the drop-down menu and click New Rule.
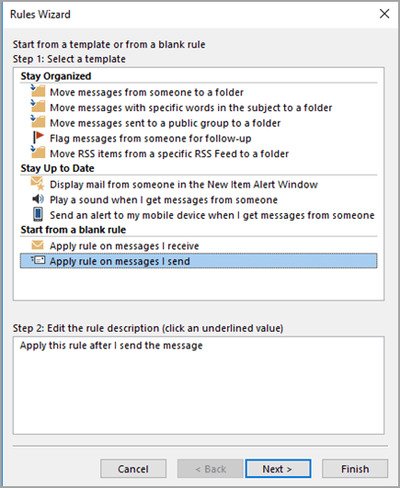
- In the Rules Wizard window, under the Start from a blank rule, click on the option Apply rule on messages I send and click Next.
- Now you can select the condition if you are selective about automation or else simply click the Next button to apply the rule to all your emails.
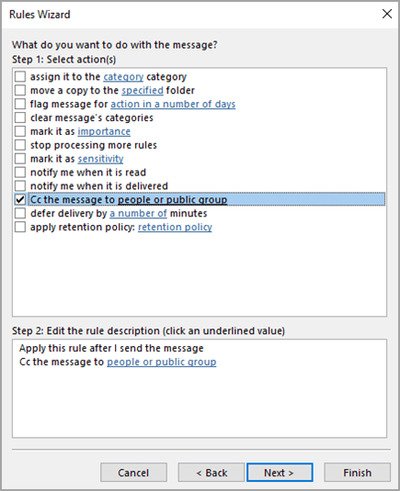
- Under the Select action in Step 1, select the option Cc the message to people or public group if you want to CC an email. If you want to BCC an email, select the option, Move a copy to the specified folder in Step1.
- Under Step 2, click on the link people or public group.
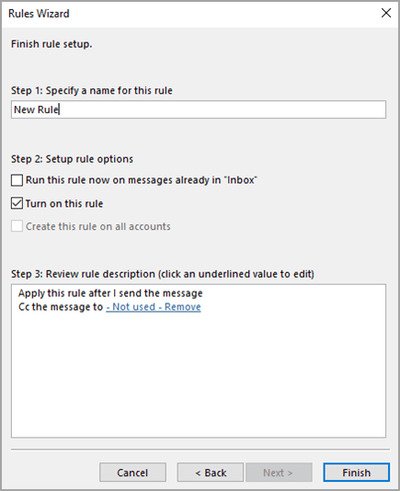
- Enter your email address or the other email address that you want to CC in the To field. If necessary, You can also select the exception if you want to exclude this rule for certain emails and click the Next button.
- Type the name for this rule under Step 1 and select the option Turn on this rule under Step 2.
- Click the Finish button.
Once done, your new rule will be added automatically every time you send a new message.
Leave a Reply