Wallpapers, at least for me, form an integral part of the work setup. To different people, wallpapers mean different things. While some have the default slides running in the backdrop for the entirety of their experience of using the computer, others juggle with them on a consistent basis. But even the best of wallpapers, be it the picture of your loved ones or the most aesthetic of scenic beauties, can get monotonous after a period of time, which is where a wallpaper slideshow can come in handy. In this article, I’ll be demonstrating how a user can set a Wallpaper Slideshow on his/her Windows 11/10 computer. The process is simple and quite straightforward & you can be done with it in a jiffy.
How to setup Wallpaper Slideshow in Windows 11/10
The process to create a Desktop Wallpaper Slideshow in Windows 11 or Windows 10 involves the following steps, which we will go into detail later on:
- Open Settings
- Click open Personalization settings
- Locate Background
- Choose Slideshow from the drop menu
- Browse to your desired folder
- Set the Time interval
- Choose Fit.
You need to lay out some groundwork before setting up the slideshow. This involves making a folder consisting of all the wallpapers you want to have displayed on your desktop as a part of the slideshow. Simply open File Explorer, visit the library where you want to house this folder (that could be Desktop, Downloads, Pictures, anything), click on ‘New Folder’ and paste all your desired wallpapers there.
Windows 11
First, right-click the Start button on the Taskbar and choose Settings from the list of options displayed therein. Alternatively, you can use Win+I keyboard shortcut to go to the settings window directly.
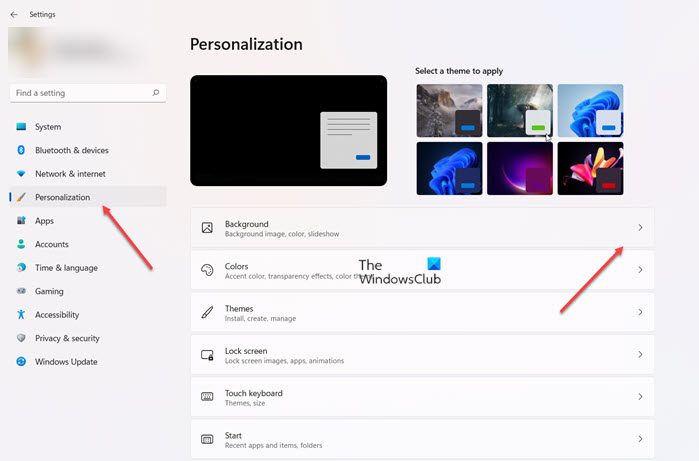
Next, select Personalization from the side panel on the left and expand the Background tile on the right.
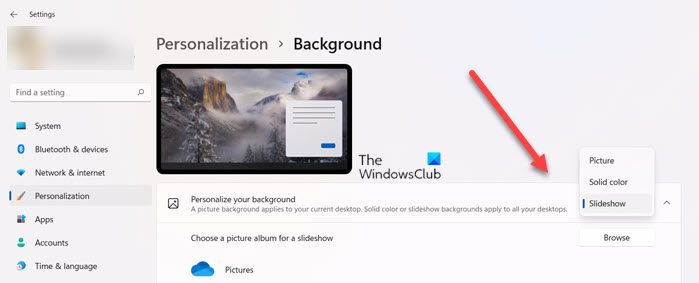
Now, when directed to a new screen, hit the drop-down menu next to Personalize your background heading and choose the Slideshow option.
Then, browse to the folder to choose an album for the slideshow.
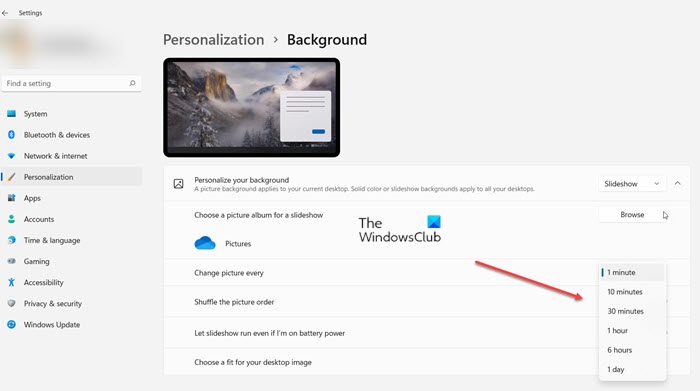
To adjust the timings for the pictures or images in the slideshow, hit the drop-down button adjacent to the Change picture every heading and select the desired time from the options given.
Windows 10
Now what you have to do is visit your Settings. This can be done by pressing Win+I key, clicking on your system’s notification center from the bottom right corner, or simply searching for them on the Search Pane.
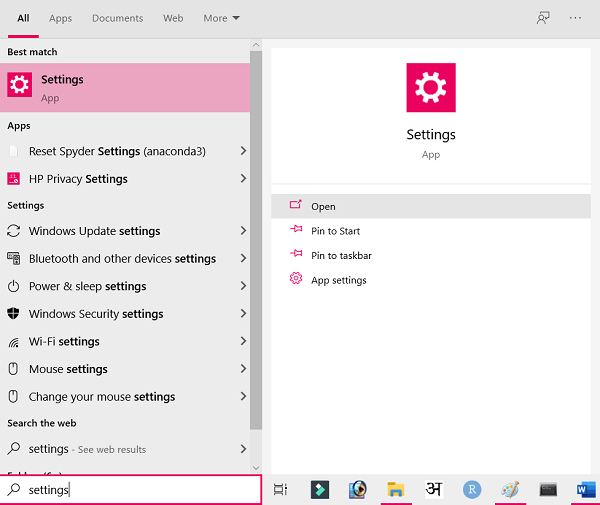
Here, head on over to ‘Personalization’.
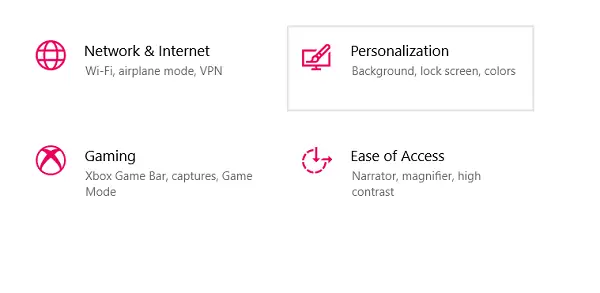
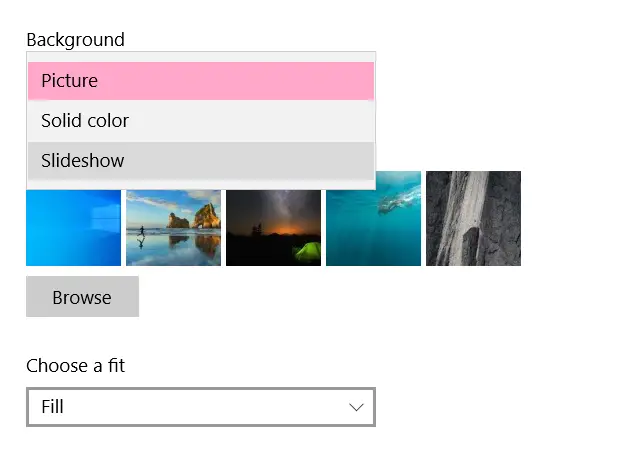
The first setting here goes by the name of Background.
You will find a drop-down setting by the same name, which is where you have to choose ‘Slideshow,’ over whatever you had set up previously.
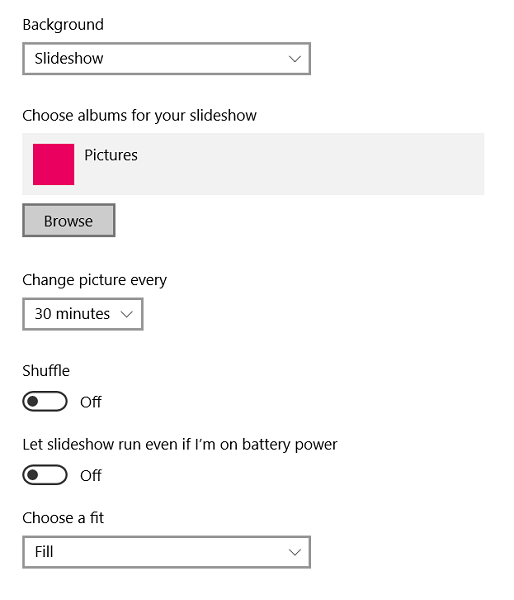
Choosing Slideshow then presents you with a bunch of settings that you have to configure. These include browsing and selecting the folder of your wallpapers, setting the time period in which you want your wallpapers to change, etc. The time period can be as low as a minute and has the ceiling of a day.
You also get an option to shuffle your wallpapers, so that they don’t oscillate in a certain, pre-set order.
Finally, you have to select the fit for your wallpapers. Since the same setting is going to apply to all the wallpapers in the slideshow, it is best preferred for all of them to be of the same size.
One of the primary issues users face after having set a wallpaper slideshow is the fact that it only works when your system is being charged. The rationale behind this is that your wallpapers take a toll on your system’s battery, eating up a huge chunk of it and often rendering low system speed.
I hope you find this helpful.
Read: Free software to set video as desktop background.
Run wallpaper slideshow even when your PC isn’t plugged in
If you are adamant about using a slideshow even when your computer isn’t plugged into the power source, and is running on battery power, you have an option to do so.
Search for the words ‘Edit Power Plan’ on the Windows Search bar, which is a setting in the Windows Control Panel.

Here, you’ll find an option to go to the advanced power settings. Click on it.
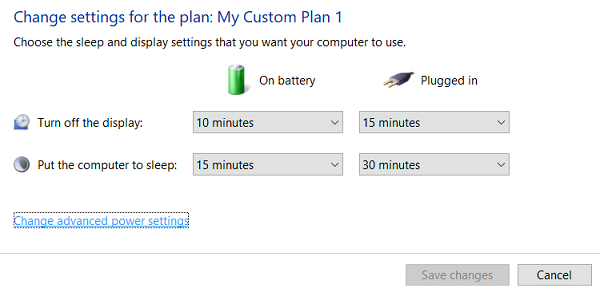
Click on the advance settings will open a dialog box, named ‘Power Options,’ as shown below.
Herein, select ‘Desktop Background Setting’ and further click on Slideshow to expand the tree.
Clicking on Slideshow now opens settings in two modes; when the system’s running on its battery and when it’s plugged into the power source. Click on the drop-down and select Available in the On Battery setting.
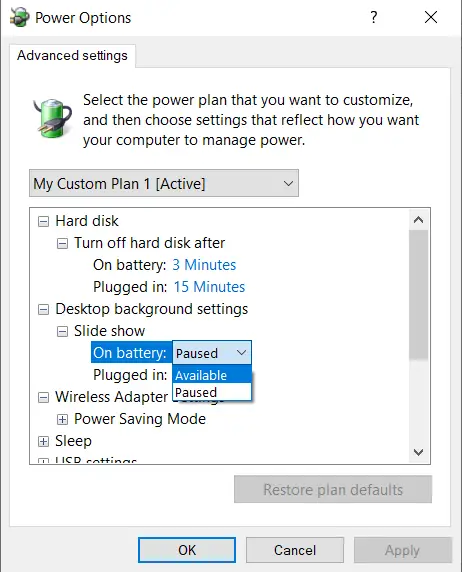
Apply these settings and you can have your wallpaper slideshow running even when your computer’s not plugged in.
These are the steps you have to follow to set up a wallpaper slideshow and have it run on your computer at all times.
How do you make a slideshow on Windows?
It’s easy to create Slideshow of your own pictures and images in Windows via Windows Personalization settings. All you have to do is go to Personalize your background heading under Windows 11 Personalization section and choose the Slideshow option.
Where do I find my photos on my computer?
Images saved by applications such as Paint and Internet Explorer can be found under the Pictures folder of Windows. Simply open File Explorer and select the Pictures folder from the side panel on the left. Go to the Downloads folder to find images saved by browsers like Microsoft Edge, Google Chrome, etc.
TIP: Bing Wallpaper app will set the daily Bing image on your desktop automatically.
Leave a Reply