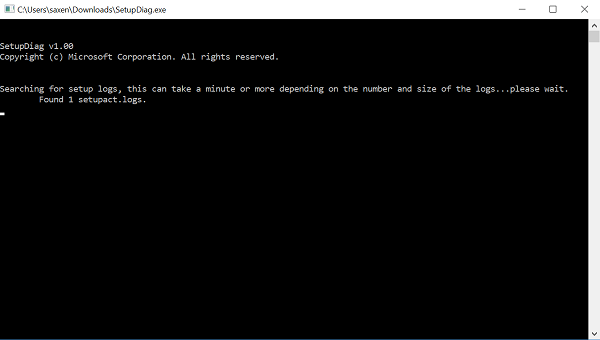
Windows Updates usually get installed on your PC without hassles. But sometimes it requires a bit of work, especially regarding compatibility and patches. If you encounter such failed update errors, you must manually search the error code and then look for troubleshooting steps. All this consumes time. So, Microsoft has come up with a simple solution – SetupDiag.exe.
SetupDiag.exe is a standalone diagnostic tool for discovering why a Windows 11/10 upgrade failed to install. As you know, the update process in Windows 11/10 has been thoroughly streamlined, but that doesn’t mean it’s always problem-free, hence the tool.

How to use SetupDiag.exe to diagnose Windows Update errors
SetupDiag.exe requires Microsoft .NET Framework 4 to be installed on your PC. The tool examines Windows Setup log files and parses them to find the root cause of a failure to update or upgrade the computer to Windows 11/10. It can be run on the computer that failed to update, or you can export logs from the computer to another location and run SetupDiag in offline mode.
Once you have the tool up and running, it can be used for performing checks and analyses also. The system halts whenever Windows comes across a situation that likely intends to compromise safe system operation. This condition is called a bug check. It is also commonly referred to as a:
- System crash
- Kernel error
- Stop error or BSOD
The typical cause for this issue is a hardware device, hardware driver, or related software.
If the bug check occurs during an upgrade, Windows Setup extracts a minidump (setupmem.dmp) file.
To debug a setup-related bug check, one must:
Specify the /Mode: Offline and /LogsPath parameters and try gathering the setup memory dump file (setupmem.dmp) from the failing system.
Please note that you cannot debug memory dumps online.
You will find Setupmem.dmp under either
%SystemDrive%$Windows.~bt\Sources\Rollback
Or
%WinDir%\Panther\NewOS\Rollback
depending on when the bug check occurs.
After that, you can install the Windows Debugging Tools on the computer that runs SetupDiag. If you choose to run the tool without parameters, it attempts to locate log files that Windows 11/10 creates during the upgrade process in the default folders on the device.
Once the scan is over, SetupDiag will generate Log.zip, SetupDiag.exe.config, and SetupDiagResults.log in the folder where the SetupDiag.exe is located.
The program also creates a results.log file in its directory after the scanning process is completed. During parsing, any upgrade issues encountered are rapidly detected in the log files.
Apart from the above, SetupDiag creates a zip archive of all processed logfiles and saves the Logs.zip file in the same directory.
Lastly, there’s an option to even run SetupDiag.exe in offline mode to parse folders copied from another device.
SetupDiag tool is now included with Windows Setup
In Windows 10 and Windows 11, SetupDiag tool is included with Windows Setup.
During the upgrade process, Windows Setup will extract all its sources files to the %SystemDrive%$Windows.~bt\Sources directory.
Now, setupdiag.exe is also installed in this folder and in case the upgrade fails, SetupDiag tool will automatically run to find out why it failed.
In this scenario, the following parameters are used:
/ZipLogs:False
/Format:xml
/Output:%windir%\logs\SetupDiag\SetupDiagResults.xml
/RegPath:HKEY_LOCAL_MACHINE\SYSTEM\Setup\SetupDiag\Results
The resulting SetupDiag analysis can be found at:
%WinDir%\Logs\SetupDiag\SetupDiagResults.xml
and in the Registry under
HKLM\SYSTEM\Setup\SetupDiag\Results
- If the upgrade process proceeds normally, the Sources directory including setupdiag.exe is moved under
%SystemDrive%\Windows.Oldfor cleanup. - If the Windows.old directory is deleted later, setupdiag.exe will also be removed.
For full details on how to use SetupDiag.exe you can read this Microsoft Doc.
How to troubleshoot a failed Windows Upgrade?
A Windows upgrade fails due to several causes. Insufficient disk space is the most common cause of Windows upgrade failure. In addition to this, third-party software and faulty hardware connected to your system also cause an upgrade to fail. To troubleshoot Windows Upgrade failure, disconnect all external hardware and check the disk space. When a Windows Upgrade fails, it displays an error code. You can use this error code to troubleshoot better.
How to repair Windows using CMD?
Windows OS has different commands to perform different repair actions. For example, the SFC and DISM scans are used to repair the corrupted system image files. On the other hand, the CHKDSK scan is used to repair bad sectors and errors on a hard disk. If your entire system gets corrupted and you are unable to sign in, you have to use Windows Recovery Environment.