Microsoft Word has an interesting feature to show and hide text you want. You may be in a situation where you do not want to completely delete the text, but should not have it in the document. Then, you can use this feature to hide text in Word.
What is hidden text in Word
Microsoft Word lets you hide text in Word documents. Let’s assume that you want to keep some paragraphs but do not want to show them all the time in your document. It is possible to do so.
Let us take an example of printing the document. Suppose you want to take the print of two versions of the document with different. One version needs to be printed as it is and the other must be printed without some parts of the text. Then, instead of creating two Word documents, create one and hide the text. Print this document by choosing the option to print the hidden text.
This way, you can have a single document that serves to print two versions of the documents. Instead of deleting the text, hiding the text is the best option. So, if you are worried about how to hide text in Word, then this article will be of great help to you. I will take you through a step-by-step procedure to hide text in Word easily.
How to Show and Hide Text in Word
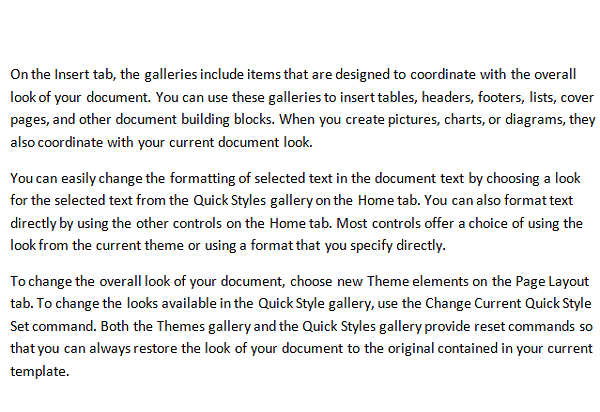
To get in to the procedure of hiding the text in Word, first create the document with the sample random text. Here is the sample document I use for the demonstration.

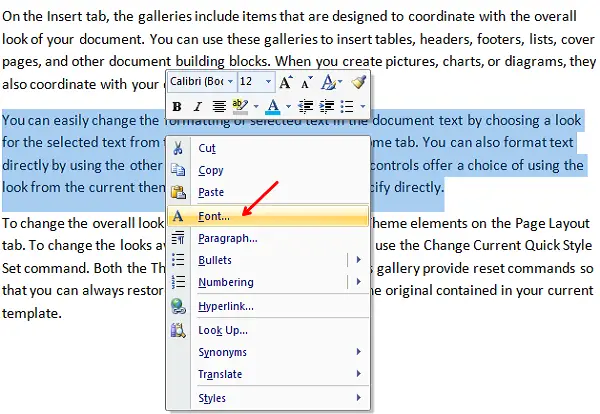
Select the text you want to hide. Right-click on the selected text and choose Font from the menu.
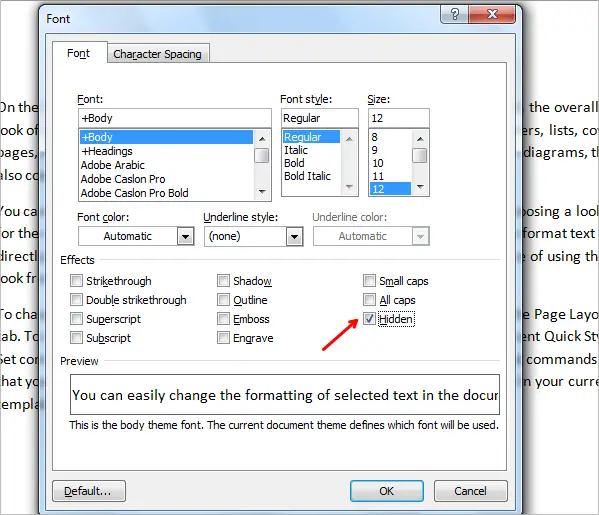
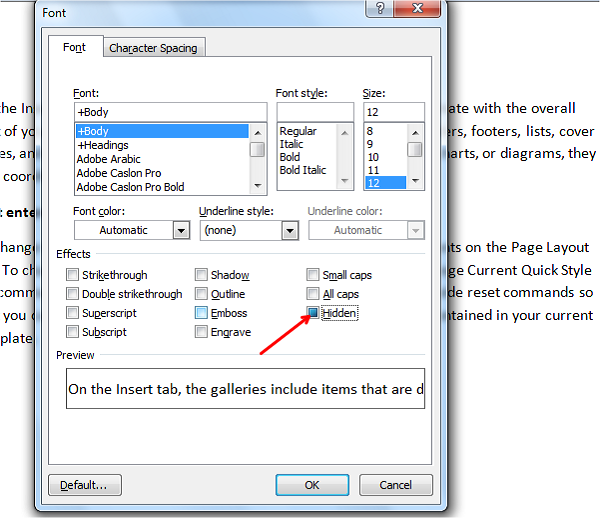
Font dialog box gets opened. Under Effects section, check the box Hidden and click OK.
Now, you can see that the selected paragraph has been hidden, and I do not have any idea where my hidden paragraph has gone. Even if someone looks at this present document, they cannot know whether the text has been hidden or not.
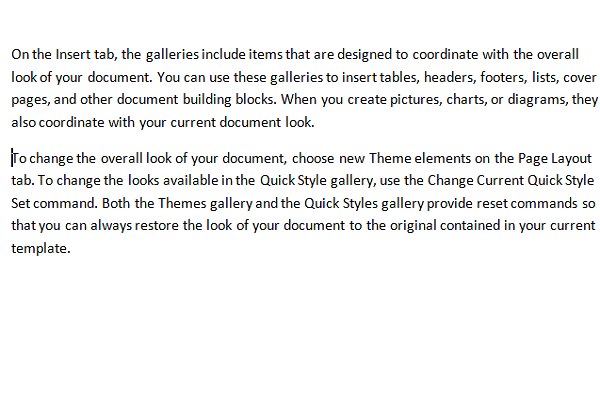
Now, here’s something interesting. If we start typing the text in the empty space where my hidden text was previously present, then what would happen when I show the hidden text? I tried it and typed some text in the place of the hidden text, as below.
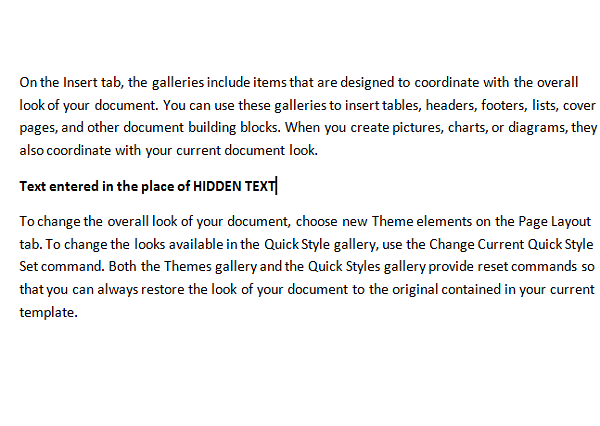
So, what happens when I show my hidden text again? Let’s see in the section below.
How to show Hidden Text in Word
So, now we have hidden the text and even entered some text in the place of hidden text. Now, if you want to view the hidden text, we need to follow the same process as above. This time select the whole content of the document by pressing CTRL+A. This selects the whole document, right click on the document and select Font.
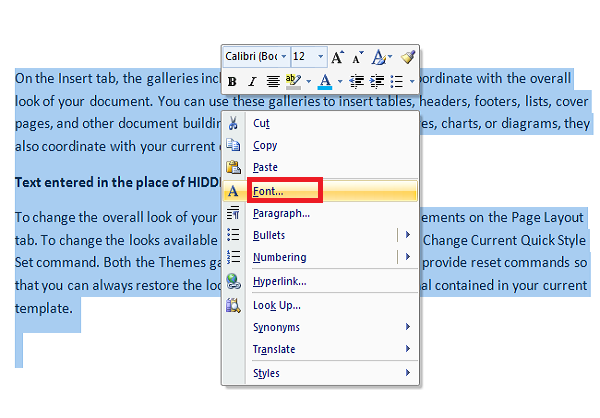
Now, you could see that the Hidden checkbox is filled. Click on it once and it shows the tick mark which means that the whole text is hidden. Click on the check box again to remove the tick mark and it shows the whole text including the hidden text.
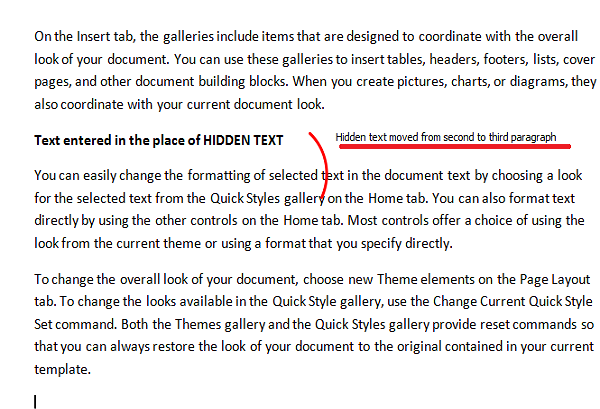
If you see it clearly, we have hidden the second paragraph and entered some text in the space. When we viewed the hidden text, it moved. This means that the text we entered does not overwrite the hidden text.
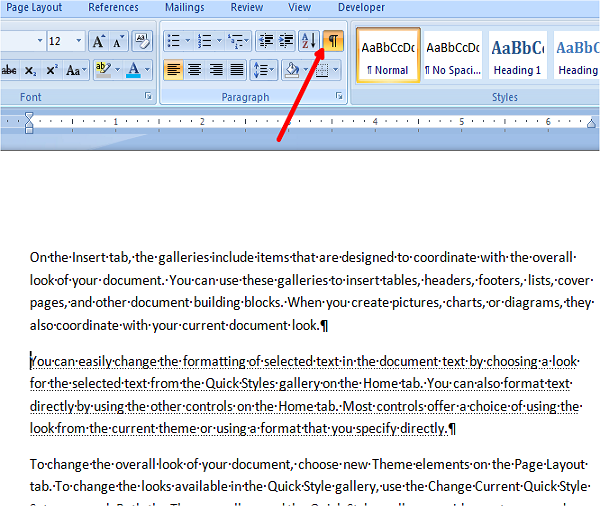
So, to know whether there is any hidden text in the document before editing the one, you can click on Show/Hide button in Paragraph Section under Home tab. It shows you the hidden text with the dotted lines and the marks. So, you can click where you want to enter the text and avoid confusion.
This is how to hide text in Word and view it when you want.
If you have anything to add, please share it with us through comments.