Some users get the Your signature could not be added to the document error while signing documents in Excel after updating Microsoft Office to the latest version. In this article, we will discuss solutions to fix this error.
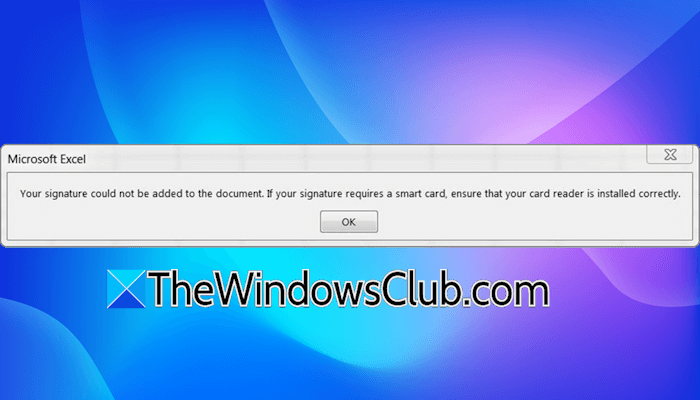
Your signature could not be added to the document Excel error
Use the following suggestions to fix the Your signature could not be added to the document error in Microsoft Excel.
- Update Office
- Disable add-ins
- Roll back Office update
- Are you able to sign in to other documents?
- Install the Smart Card Reader driver in Compatibility Mode
- Restart the Smart Card service
- Repair Office
- Uninstall and reinstall Office.
Unable to add Signature in Excel
1] Update Office
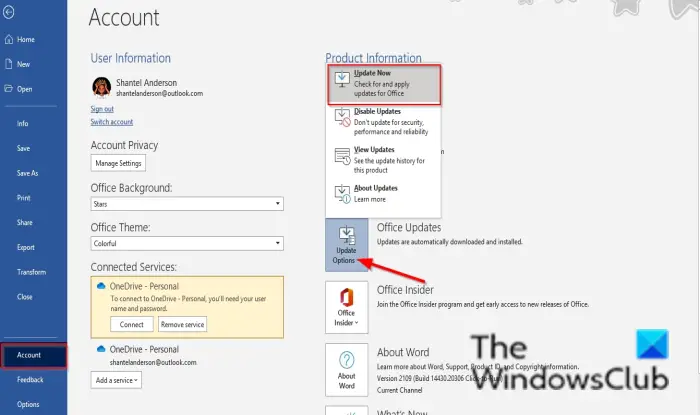
The first step is to check for Office updates. The error might occur due to a glitch which can be fixed by installing the latest updates. Check for Office updates manually and install them, if available.
2] Disable add-ins
Some installed add-ins might be causing this error. You can confirm this by disabling all add-ins manually. The steps to do this are as follows:
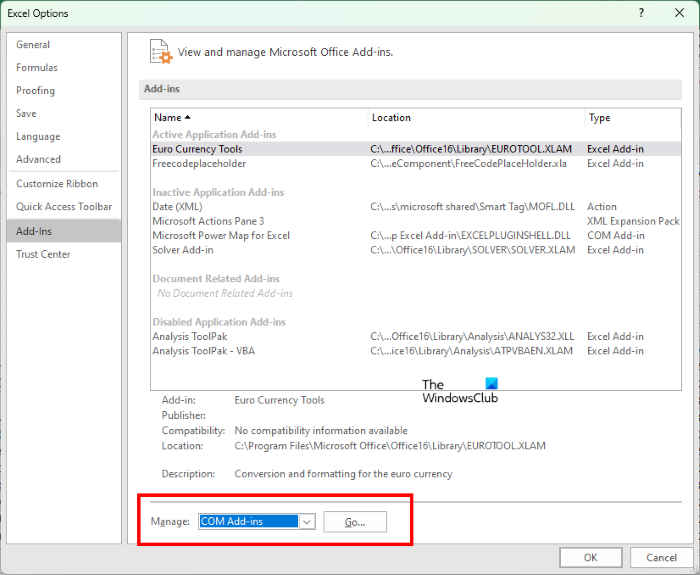
- In Microsoft Excel, go to File > Options.
- Select Add-Ins from the left side and then select COM add-ins in the drop-down on the right side.
- Click Go.
- Uncheck all the selected add-ins to disable them and click OK.
Now, check if you can add signatures to the document. If the error does not occur this time, the next step is to find the problematic add-in. To do this, enable all the disabled add-ins one by one and add the signature each time you enable an add-in.
3] Roll back Office update
If the error started after updating Office to the latest version, you can roll back Office to the previous version. You can roll back only Click-to-Run Office applications. First, note down the version of Office installed on your system. You can view it in any Office application under the Account > About section.
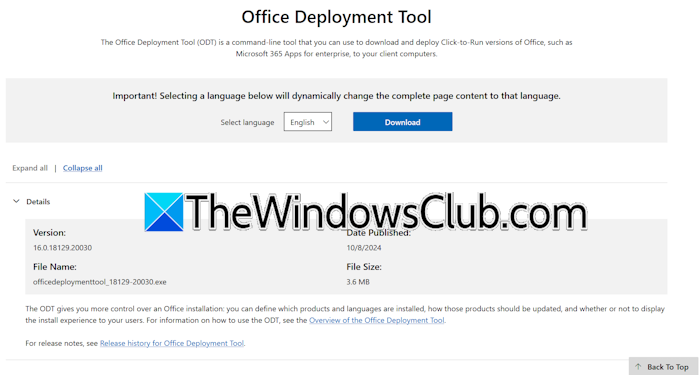
Now, download and install the Microsoft Office Deployment Tool. When you run the exe file, the tool will ask you to select a location on your hard drive for the installation. Remember the location where you install this tool.
Now, go to the Office Update History page and copy the version of Office earlier to the Office version currently installed on your system. Now, open Notepad, copy, and paste the following command into it.
<Configuration>
<Updates Enabled="TRUE" TargetVersion="16.0.aaaaa.bbbbb" />
</Configuration>
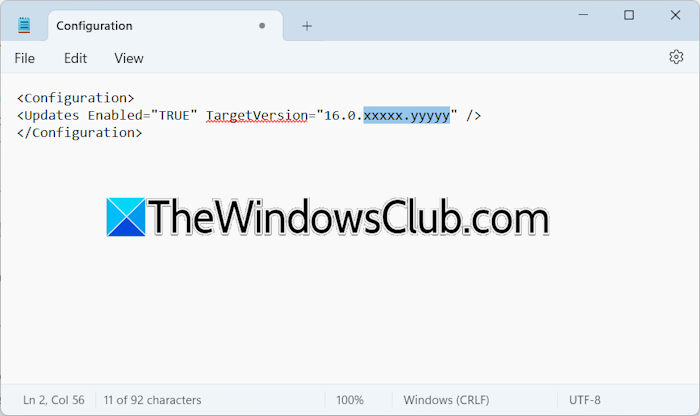
In the above command, replace aaaaa.bbbbb with the version number of Office you want to install. For example, if you want to install the version 18025.20096, then the command will be:
<Configuration>
<Updates Enabled="TRUE" TargetVersion="16.0.18025.20096" />
</Configuration>
Save this file as config.xml in the same location to which you installed the Office Deployment Tool.
Now, open Command Prompt as an Administrator and change the directory to the location where you saved the XML file. After that, run the following command.
setup.exe /configure config.xml
After the successful execution of the above command, open any Office application and go to Account > Update Options > Update Now. Microsoft Office will install the version configured in the configuration file. Now, you can pause Office automatic updates to stop it from being updated automatically. In the future, when Microsoft releases a newer version, you can update Office directly to that version.
Read: Signature Line greyed out in Word or Excel
4] Are you able to sign in to other documents?
Check if you can sign into other documents. If yes, there may be some formatting issues in your document. In such a case, copy the content from the problematic Excel document and paste it into the new Excel document without formatting.
5] Install the Smart Card Reader driver in Compatibility Mode
If your signature requires a Smart Card, there may be some issues with the Smart Card Reader driver. You can check this in the Device Manager. In such a case, uninstall the Smart Card Reader driver from the Device Manager and restart your computer. Now, install the Smart Card Reader driver in compatibility mode.
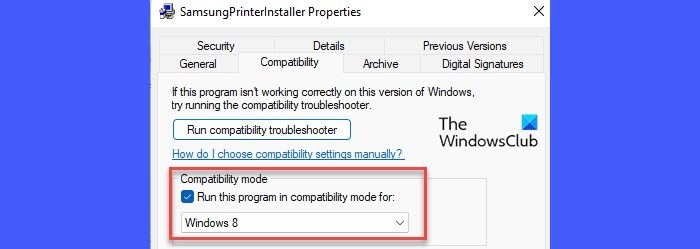
To install the driver in compatibility mode, follow the instructions provided below:
- Right-click on the driver installer file and select Properties.
- Select the Compatibility tab. Under the Compatibility mode, select the “Run this program in compatibility mode for” checkbox.
- Select Windows 8 from the drop-down.
- Click Apply and then click OK.
Now, run the installer file to install the driver. If required, reinstall the certificate.
6] Restart the Smart Card service
If the signature requires a Smart Card, restarting the Smart Card service can help. The following instructions will guide you on this:
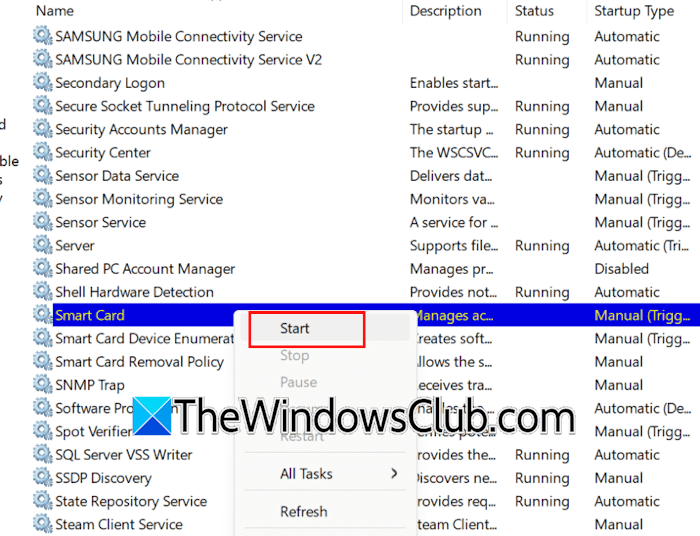
- Open Windows Services Manager.
- Search for the Smart Card service.
- Right-click on it and select Start or Restart.
6] Repair Office
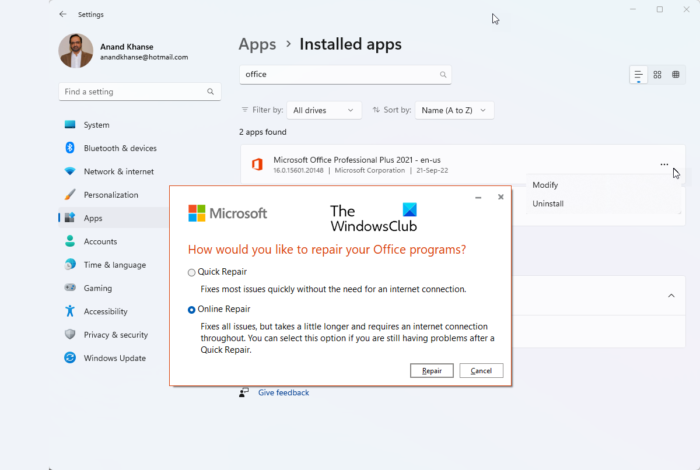
If the error persists, repairing Office can help.
7] Uninstall and reinstall Office
The last resort is to uninstall and reinstall Office. Use the Microsoft Support and Recovery Assistant tool to completely remove Office from your system.
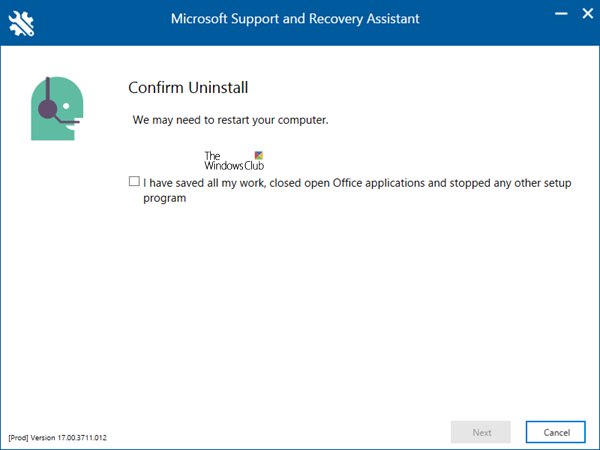
Before uninstalling Office, make sure that you have its product activation key, as you will need to activate its license when you reinstall it. If you have purchased Office from the official website, it will have been already been added to your Microsoft account, from where you can download and install it.
Read: We couldn’t free up space on the clipboard Excel error
How can I add a signature in Excel?
You can add a signature to an Excel spreadsheet using electronic signature software or using the Insert feature in Excel. Open an Excel spreadsheet and select Insert > Add a Signature Line. You can also insert a signature to your Excel spreadsheet as an image.
How do I add a signature to an Excel spreadsheet without a background?
You can add a signature to an Excel spreadsheet by inserting it as an image. However, if the signature is not transparent, it will not be installed properly. In such a case, make the signature transparent by removing its background. You can use any AI tool or Windows Paint app to remove an image background.