Skype is one of the most common platforms for video calling and online conferencing. It allows you to send texts, images, and other attachments. However, you might encounter a problem where Skype is not receiving or sending files in Windows 11/10.
Skype not receiving or sending files
If you are facing an issue where Skype is not receiving or sending files or images, then the main causes could be with the size of the file, server issues, problematic temporary files associated with Skype, or the Skype application itself. We recommend you try these suggestions to resolve the issue:
- Check the size of the file
- Check the status of the Skype server
- Reset the Skype application
- Delete the AppData folder for Skype.
1] Check the size of the file
The maximum file attachment size allowed on Skype is 300MB. If you try to send any file larger than that size, Skype will return the error – Not sent – File is larger than 300 MB.
If you wish to send a file larger than 300MB in size, upload it to Google Drive and allow the recipient access to the link to file. Now, you can share the file with the recipient.
2] Check the status of the Skype server
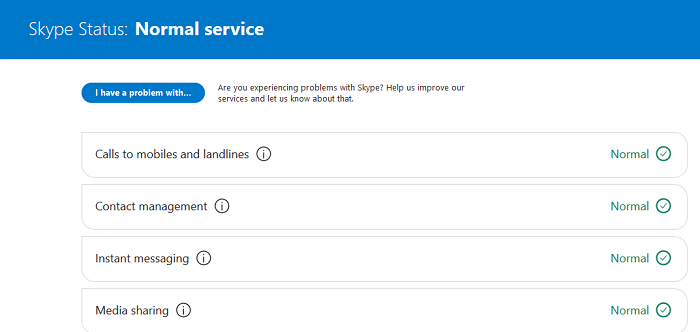
If the Skype server is down, you might not be able to send messages or attachments. The status of the Skype server could be checked here.
Read: Skype is not sending messages.
3] Reset the Skype application
If the application’s settings are messed up with, you might not be able to send or receive messages on Skype. To rectify this issue, you can reset the Skype application to default as follows:
Click on the Start button and go to Settings > Apps > Apps & features.
Click on Skype from the list to expand the menu.
Select Advanced options.
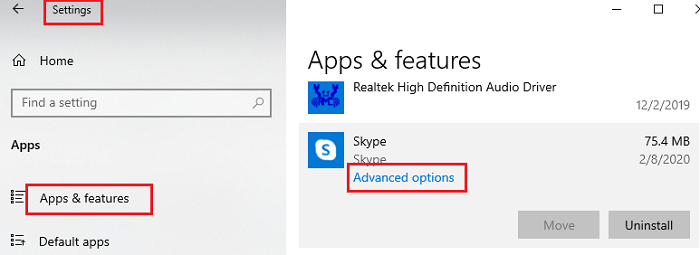
Now, scroll to the Reset button and click on it. A warning will prompt, then click on Reset for the warning too.
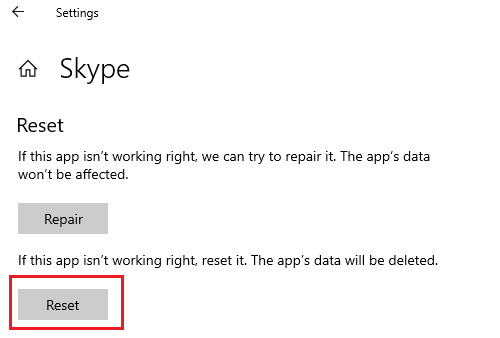
Check if this resolves your issue, or move on to the next solution.
4] Delete the folder for Skype in AppData
If nothing else works, try deleting the folder for Skype in AppData as follows:
Open the Task Manager and kill the Skype process.
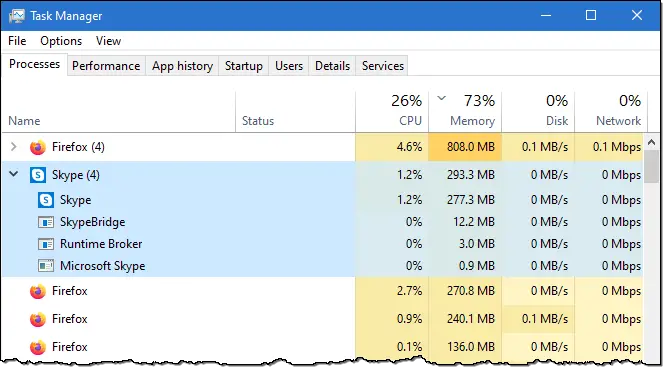
Now, press Win+R to open the Run window.
Type the address %appdata% in the Run window and hit Enter to open the AppData folder.
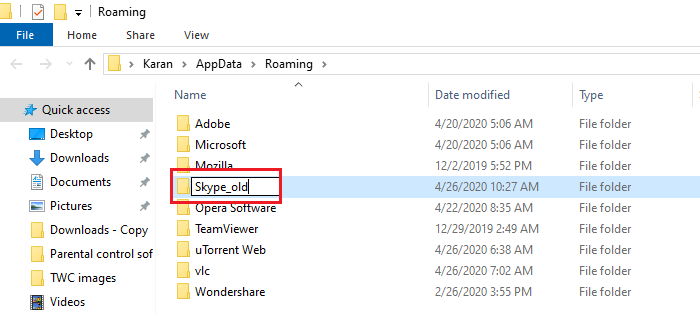
Search for the Skype folder in the window and rename it to something else like Skype_old.
Launch Skype now and try sending attachments.
This AppData fix has resolved the problem for many users.
If none of the above-mentioned solutions work, you could consider re-installing the Skype application.
Related read: Skype is not working or making voice and video calls.
I hope it helps with your problem.
Leave a Reply