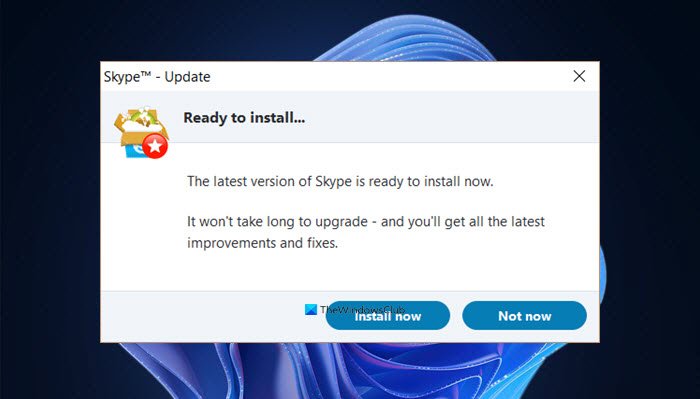
Many users have been reporting that Skype starts updating or installing every time they open it on Windows 11/10. Let’s see what are the possible reasons for this issue and how can we fix it.

Before the Windows 11 release, there were many rumors about Microsoft killing Skype, but the app is still there on the Windows 11 PC and in fact with a new design. However, we don’t think of a reason why Microsoft didn’t even mention Skype during the Windows 11 launch. Microsoft Teams has no doubt gained a good fan following in the covid lockdowns but Skype still has its userbase. There are many people who still prefer using Skype over the other video conferencing apps available.
Well, coming back to the topic of today’s post, let’s see how to fix if your Skype automatically starts updating or installing every time you start it in Windows 11 or Windows 10.
Why does Skype keep reinstalling in Windows?
Some of the possible reasons may include-
-
- Incomplete installation
- Corrupted installation or program files
- Outdated version of Skype
- Antivirus
- Any recent changes in your PC
If your Skype automatically starts updating or installing every time you start it in Windows 11 or Windows 10, follow these suggestions to resolve the issue:
- Repair or Reset the app
- Remove and reinstall the app
- Completely uninstall and Download Skype from their official page
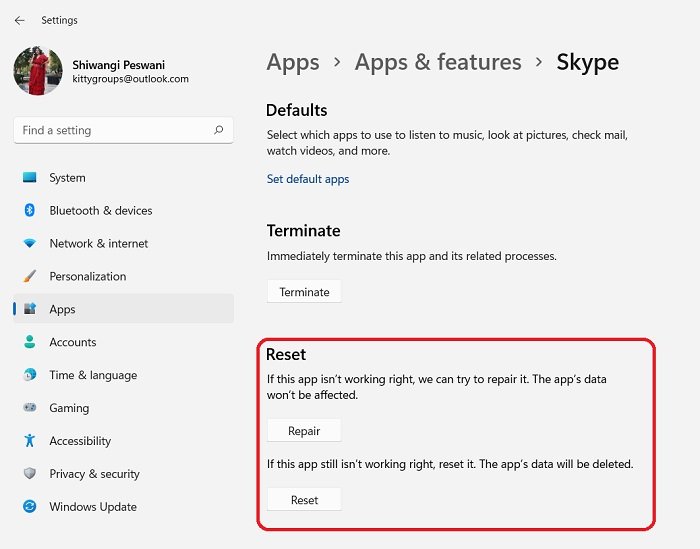
1] Repair or Reset the app

This is the first fix that you can try to avoid this error in Skype. To reset the Skype app-
- Go to Settings
- Open Apps & Features
- Locate Skype
- Click Advanced Options.
- Scroll down to Repair, if you don’t want to lose your data
- If that does not help, Choose Reset.
2] Remove and reinstall the app
The second option is to uninstall the app from your PC and re-install it.
- If you are using the Skype desktop program, you can simply type Control Panel in the Run Dialog Box and then go to Programs and click on Uninstall a program.
- If you are using the Skype UWP app then you may remove it via Settings > Apps and features > Apps > Locate app > Advanced options > Uninstall.
To reinstall the app on your Windows 11 PC, you can go to the Microsoft.com website or Microsoft Store, download and install it. It should work fine now.
3] Download Skype from their official page
If it is still not working for you, which is quite a rare possibility, you should now download the latest version of the app from their official page only. Uninstall the existing installation and fresh install this one.
- Uninstall your Skype program
- Open the Run box, type %appdata% and hit Enter. Locate the Skype folder and delete all its contents.
- Next, in the Run box, type %temp% and hit Enter, and then delete all the contents of this folder.
- Restart your computer
- Then run the Skype Setup file that you just downloaded.
This should help!
Remember: If one option, say the Skype program does not work for you, you have the option of using the Microsoft Store Skype app.
Well, these were some of the fixes that you can try if you are facing frequent crashing and automatic updating issues with your Skype app. Do let us know via comments if any of these fixes worked for you.
Related: Skype keeps crashing on Windows.
Why does Skype reinstall every time I open it?
If it has failed to install earlier on your computer, it will show the prompt of reinstallation every time when you open it. On the other hand, it comes with an auto-repair feature, which appears it detects any corrupt file. Also, if you haven’t updated Skype for a very long time, it may show the installation wizard to let you install the update.
How do I remove Skype from startup in Windows 11?
To remove Skype from the startup in Windows 11, you need to open the Task Manager first. Press Ctrl+Shift+Esc to open the Task Manager and switch to the Startup apps tab. Find the Skype app, select it, and click on the Disable button. It will stop Skype from opening at startup in Windows 11 as well as Windows 10.
Read next: Skype not opening, working or making voice and video calls.
Leave a Reply